PLC ENGINEERING

Blog

Home

Blog

  • CompactLogix 1769 System Reference: CPUs, I/O, Power Supplies, Batteries, and Spares
    CompactLogix 1769 System Reference: CPUs, I/O, Power Supplies, Batteries, and Spares Sep 07, 2026
      The CompactLogix 1769 platform is Rockwell Automation's modular compact controller family. A 1769 system has a controller, 1769 I/O modules, and a 1769 system power supply mounted on one backplane. Two controller generations use this platform: the CompactLogix 5370 family (current) and the older 1769-L3x/L4x generation. Both generations use the same 1769 I/O modules, power supplies, and end caps. This reference covers controllers, I/O, power, battery, cabling, and the spare parts worth stocking in 2026.   Platform overview   The 1769 platform is a field-proven design. Key facts: · The controller mounts at the left end of the chassis. · I/O modules mount to the right of the controller on the same backplane. · A 1769-ECR right end cap terminates every chassis. · A 1769-ECL left end cap terminates the left side of I/O-only expansion chassis. · The system power supply feeds the backplane. · Programming uses RSLogix 5000 or Studio 5000. · The platform is mature, and Rockwell still sells it in 2026. 1769 hardware is common in machine control, packaging, and skid applications worldwide. Buyers in the Middle East, the Americas, and Europe run this platform. Spares are widely available.   Controllers: CompactLogix 5370 family   The 5370 family is the current 1769 controller line. Catalog numbers follow a fixed naming convention. Naming convention · E = embedded EtherNet/IP port · R = RS-232 serial port · M = embedded motion control · NSE = no serial port The tier is encoded in the number. L16 and L18 are compact controllers with embedded I/O. L24 and L27 are embedded-I/O controllers with more points. L30, L33, L36, L37, and L38 are rack-based controllers with no embedded I/O. The suffix after the hyphen encodes the embedded I/O mix. BB1B means 8 digital inputs and 6 digital outputs. QB1B means 16 digital inputs and 10 digital outputs. QBFC1B adds 4 analog inputs and 2 analog outputs to the 16-in/10-out base. CompactLogix 5370 controller table Catalog number | Embedded I/O | Motion | Serial | Typical memory | Notes 1769-L16ER-BB1B | 8 DI / 6 DO | No | Yes | 1 MB | Standalone unit, embedded I/O 1769-L18ER-BB1B | 8 DI / 6 DO | No | Yes | 2 MB | Standalone unit, embedded I/O 1769-L24ER-QB1B | 16 DI / 10 DO | No | Yes | 1.5 MB | Standalone unit, embedded I/O 1769-L27ERM-QBFC1B | 16 DI / 10 DO, 4 AI / 2 AO | Yes | Yes | 1.5 MB | Standalone unit, embedded I/O 1769-L30ER | None | No | Yes | 2 MB | Rack-based, 1769 I/O 1769-L30ERM | None | Yes | Yes | 2 MB | Rack-based, motion 1769-L30ER-NSE | None | No | No | 2 MB | Rack-based, no serial 1769-L33ER | None | No | Yes | 2 MB | Rack-based, 1769 I/O 1769-L33ERM | None | Yes | Yes | 2 MB | Rack-based, motion 1769-L36ERM | None | Yes | Yes | 3 MB | Rack-based, motion 1769-L37ERM | None | Yes | Yes | 3 MB | Rack-based, motion 1769-L38ERM | None | Yes | Yes | 3 MB (verify) | Rack-based, motion Memory values above are typical published figures. Verify the exact memory for your catalog number and revision in the PCDC or the controller manual. Notes on the 5370 family: · The L16ER-BB1B and L18ER-BB1B have 8 digital inputs and 6 digital outputs built in. The L24ER-QB1B and L27ERM-QBFC1B have 16 digital inputs and 10 digital outputs. The QBFC1B adds 4 analog inputs and 2 analog outputs. · Embedded-I/O models (L16, L18, L24, L27) are standalone units. They mount on a panel or DIN rail, take 24 VDC at the controller terminals, and have no 1769 backplane slots. · Rack-based models (L30, L33, L36, L37, L38) use 1769 I/O modules in a chassis with a 1769 system power supply. · M models add embedded motion control for Kinetix servo drives. The supported drive interfaces are listed in the controller manual. · Most rack-based models have -NSE variants without the RS-232 port. Confirm availability in the PCDC. · Firmware: the 5370 family runs RSLogix 5000 / Studio 5000 in the v20-v36 range depending on the model. The L1x/L2x models support a narrower range than the L3x models. Check the exact range per catalog number in the PCDC. · 5370 controllers have no display. Status is shown with LEDs on the front.   5370 NSE variants   The NSE suffix removes the RS-232 port. Rockwell lists the full set of NSE variants in the PCDC. Match the catalog number exactly when ordering a spare. Catalog number | Base model | Difference 1769-L30ERM-NSE | 1769-L30ERM | No RS-232 port 1769-L33ER-NSE | 1769-L33ER | No RS-232 port 1769-L33ERM-NSE | 1769-L33ERM | No RS-232 port 1769-L36ERM-NSE | 1769-L36ERM | No RS-232 port 1769-L37ERM-NSE | 1769-L37ERM | No RS-232 port An NSE controller fits any application that does not use the serial port. Applications that do use the serial port, for example panel displays or serial instruments, need the standard model. Confirm the variant and revision in the PCDC before ordering.   Legacy generation: 1769-L3x and 1769-L4x   The older generation includes 1769-L30E, 1769-L32E, 1769-L35E, 1769-L43, and 1769-L45. These controllers are rack-based and use 1769 I/O modules. The E suffix means embedded EtherNet/IP. Catalog number | Generation | EtherNet/IP | Notes 1769-L30E | L3x | Yes | Rack-based, no embedded I/O 1769-L32E | L3x | Yes | Rack-based 1769-L35E | L3x | Yes | High end of the L3x line 1769-L43 | L4x | Yes | High end of the legacy generation 1769-L45 | L4x | Yes | High end of the legacy generation Facts about the legacy generation: · All five models are rack-based with no embedded I/O. · Firmware tops out around v20. Rockwell's PCDC lists the exact last firmware revision per catalog number. · Non-Ethernet versions of this generation exist (for example 1769-L32 and 1769-L35). Verify availability and specifications in the PCDC. · These controllers are aging. Rockwell's lifecycle status varies by catalog number. Stock spares for machines that still run them.   I/O modules   All 1769 controllers use the same 1769 I/O module family. Modules mount on the backplane to the right of the controller and appear in the controller's I/O tree.   Digital I/O modules   Catalog number | Type | Points | Signal 1769-IQ16 | Input | 16 | 24 VDC sinking 1769-IQ32 | Input | 32 | 24 VDC sinking 1769-IQ6XOW4 | Combo | 6 in / 4 relay out | 24 VDC in, relay out 1769-IA16 | Input | 16 | 120 VAC 1769-IM12 | Input | 12 | 240 VAC 1769-OB16 | Output | 16 | 24 VDC sourcing 1769-OB32 | Output | 32 | 24 VDC sourcing 1769-OV32T | Output | 32 | 24 VDC sinking 1769-OA8 | Output | 8 | AC output (verify in catalog) 1769-OW8 | Output | 8 | Relay 1769-OW16 | Output | 16 | Relay Role summary: · 1769-IQ16 is the standard 24 VDC input module. It is the most common input module on the platform. · 1769-IQ32 doubles the density for panels with limited space. · 1769-IA16 and 1769-IM12 read AC signals directly, with no interposing relay needed. · 1769-OB16 and 1769-OB32 source DC outputs. · 1769-OV32T sinks DC outputs. · 1769-OW8 and 1769-OW16 switch loads with relay contacts. They handle mixed AC and DC loads. · 1769-IQ6XOW4 combines 6 inputs and 4 relay outputs in one module.   Analog I/O modules   Catalog number | Type | Channels 1769-IF4 | Input | 4, 16-bit 1769-IF4XOF2 | Combo | 4 inputs / 2 outputs 1769-IF4FXOF2F | Combo, fast | 4 inputs / 2 outputs 1769-IF8 | Input | 8, 16-bit 1769-OF2 | Output | 2 1769-OF4 | Output | 4 1769-OF8 | Output | 8, 16-bit 1769-IT6 | Input | 6 RTD Role summary: · Analog inputs read 4-20 mA, 0-10 V, and other standard process signals. Configuration is done in the module properties in the controller program. · 1769-IF8 is the workhorse 8-channel input module. · 1769-IF4XOF2 handles small machines with one module. The fast version, 1769-IF4FXOF2F, suits higher-speed analog applications. · 1769-IT6 reads RTD temperature sensors directly. · Verify the exact signal ranges and accuracy specs for each module in the module user manual.   Special modules   Catalog number | Function 1769-HSC | High-speed counter for fast pulses and encoders 1769-ASCII | ASCII serial communication for bar code readers, scales, printers 1769-SDN | DeviceNet scanner for DeviceNet devices 1769-SM2 | Stepper motor control (verify in catalog) 1769-SM3 | SERCOS interface for motion drives (verify in catalog) Special modules cover the edge cases: counting, serial instruments, and fieldbus integration. Confirm the exact capabilities and firmware support in the PCDC before ordering.   Power supplies   The 1769 system power supply mounts at the left end of the chassis, with the controller to its right. The supply feeds the backplane. Catalog number | Input voltage | System power output 1769-PA2 | 120/240 VAC | 2 A 1769-PB2 | 24 VDC | 2 A 1769-PA4 | 120/240 VAC | 4 A 1769-PB4 | 24 VDC | 4 A Power budget rules: · The 1769 supply provides 5 VDC system power on the backplane for the I/O modules. · CompactLogix 5370 rack-based controllers also take 24 VDC at the controller power terminals. The older L3x/L4x controllers draw backplane power from the system supply. · The chassis power budget must be calculated. Sum the backplane current draw of every module in the chassis. · Size the supply so the total draw stays under the rating: 2 A for PA2/PB2, 4 A for PA4/PB4. · If the budget is exceeded, use a larger supply or split the system into a second chassis with its own supply. · Verify every module's current draw and the exact power scheme for your controller in 1769-UM002.   End caps, battery, and cabling   End caps: · 1769-ECR right end cap: required on every 1769 chassis. It terminates the backplane bus. · 1769-ECL left end cap: used on I/O-only expansion chassis. Battery: · The 1769-BA battery keeps the real-time clock and retentive memory alive when power is off. · On the older L3x/L4x generation, a dead battery can mean program loss. The battery backs user memory. · On 5370 controllers, the program is held in nonvolatile memory. The battery still protects the clock and retentive data. · Replace the battery every few years. The replacement interval is documented in the controller manual. · A dying 1769-BA battery shows up as a controller fault or a clock reset. Do not wait for the fault. Replace on schedule. Cabling: · 5370 controllers use standard RJ45 Ethernet patch cords on the EtherNet/IP port. · The RS-232 port is a standard 9-pin D-sub. Use a shielded null-modem cable for programming and serial devices. · 1769-CRL1 an
  • Studio 5000 and RSLogix 5000 Firmware and Version Management: A Rigorous Guide
    Studio 5000 and RSLogix 5000 Firmware and Version Management: A Rigorous Guide Sep 02, 2026
      Firmware is the operating system that runs on the controller. Project revision is the format version of the .ACD file. These two numbers are frequently confused, and the confusion is expensive. A maintenance engineer who mistakes one for the other can convert a healthy project into a file that no installed software can open, or send a running production line through an unplanned firmware download for which no backup exists. Correct terminology follows Rockwell Automation usage: Logix Designer, ControlFLASH, RSLinx Classic, FactoryTalk Linx, and the Product Compatibility and Download Center (PCDC).   1. Definitions   1.1 Controller firmware   Firmware is the executable operating system stored in nonvolatile memory on the controller. For a ControlLogix or CompactLogix controller, the firmware implements the Logix execution engine: it runs the task model, executes the routines, communicates over the backplane and the network, and provides the services that Logix Designer calls during an online session. A controller without firmware is inert. New controllers ship from the factory with firmware already loaded, and the same physical hardware can run different firmware revisions over its service life. Rockwell identifies firmware by a revision number. The revision is the number shown in RSLinx Classic or FactoryTalk Linx when the engineer browses to the controller, and it is the number that must be weighed against the software version on the PC. When this guide says "controller revision," it means that firmware revision number.   1.2 Project revision   A Logix Designer project is a single file with the .ACD extension. The file has its own format version, and that format version is the project revision. When a dialog says "project revision 32," it is describing the file format, not the controller. The project revision is written into the file by the software that created or last saved it. The project revision and the controller revision usually match in a healthy system, because Logix Designer creates a project at the revision of the controller it targets. The match is a convention, not an identity. A project at revision 32 can target a controller at firmware 32, and the two numbers happen to be equal. The confusion begins when an engineer treats the project revision as if it were the controller firmware, or the controller firmware as if it were a file property.   1.3 Software version   The software version is the version of the installed application: RSLogix 5000 for versions 1 through 20, and Studio 5000 Logix Designer for version 21 and later. Rockwell renamed RSLogix 5000 to Studio 5000 Logix Designer starting around version 21, released in 2012. The change was a rebranding and a packaging change, not a new product. The application that opens .ACD files is the same lineage, and the version numbering continued without a break. Version 20 is therefore RSLogix 5000, and version 21 is Studio 5000 Logix Designer. The name matters only near that transition point. An engineer should read "Studio 5000 version 32" and "RSLogix 5000 version 20" as the same kind of quantity. Each software version has a native project revision. Studio 5000 Logix Designer version 32 creates and edits projects at revision 32. The software can open projects at older revisions under conditions described below, and it can create projects for controllers at older firmware revisions under conditions as well. The native pairing is the relationship that matters: software version N pairs with project revision N and controller revision N.   1.4 Module firmware   The controller is not the only device with firmware. Every intelligent module in a Logix system carries its own: the 1756-EN2T Ethernet communication module, the 1756-IB16 and other discrete I/O modules, the 1756-IF8 and other analog modules, the 1756-CNB and 1756-DNB bridges, and the 5069 and 1769 I/O families. Each module has its own firmware revision, and each is updated separately with ControlFLASH. Module firmware matters for two reasons. The project stores the expected firmware revision for every module in the I/O configuration, and Logix Designer compares expectations against reality at online time. Communication modules also sit on the online path to the controller, so a module with incompatible firmware can block the connection before the engineer ever reaches the controller. Module firmware and controller firmware are updated with the same tool, but they are different operations, and an upgrade plan must treat them separately.   2. The compatibility model   The compatibility model has three inputs: the software version, the project revision, and the controller revision. The rules below describe how the three may combine. Once the rules are stated, every dialog and every failure mode becomes readable.   2.1 Project files: no forward compatibility, limited backward compatibility   A project saved by a newer version of the software cannot be opened by an older version. This rule has no exceptions in the Logix product line. If a project was created and saved in Studio 5000 Logix Designer version 33, no installation of version 32 can open it. The older software does not understand the newer file format, and Rockwell does not ship a downgrade converter for project files. Backward compatibility exists and is limited. An older project opens in newer software, and the newer software converts it. The conversion is one-way. After the newer version saves the file, the project revision has advanced, and the older software can no longer open it. A project at revision 20 that is opened in version 33 and saved becomes a revision 33 project. The original revision 20 file is gone unless a copy was kept. This is the first expensive failure mode. An engineer opens an old project to look at a routine, the software prompts to convert, the engineer accepts, saves, and the plant loses the ability to open that project with the old software that still matches the running controllers. The safe practice follows directly from the rule: keep the original file untouched, and convert into a new file name.   2.2 Software version and controller revision: the online requirement   Going online is the operation where software and controller meet directly. Logix Designer establishes a communication path through RSLinx Classic or FactoryTalk Linx, finds the controller, and compares versions. The comparison is strict. To go online with a controller, the software version must be compatible with the controller's firmware revision. The practical expression of the requirement: software at a version equal to or newer than the controller revision can go online. Software older than the controller revision cannot. A controller at revision 32 requires software at version 32 or newer. Version 31 cannot go online with that controller, and no driver setting or compatibility mode changes that fact.   2.3 Upload and download   Upload is the transfer of the project from the controller to the PC. Upload works when the software version is equal to or newer than the controller firmware revision. The software reads the program from the controller, reconstructs a project, and writes the file at the revision of the controller it read. Uploading from a controller at revision 24 with version 32 software therefore produces a project at revision 24, and that file is openable by software at version 24 or newer, including the older software the plant already owns. Uploading with software older than the controller revision is not possible: the older software cannot interpret the data structures of the newer controller. A controller at revision 32 with only version 30 software available cannot be uploaded. The fix is to obtain version 32 software or newer, not to attempt workarounds. Download is the transfer of the project from the PC to the controller. Download requires the project revision to match the controller revision, unless the engineer explicitly changes the controller revision as part of the download. When the revisions differ, Logix Designer offers to change the controller revision before it downloads the project. Changing the controller revision means flashing new firmware into the controller. There is a legitimate way to make the two sides match without a conversion: the New Project dialog in Logix Designer offers a revision list for the selected controller, and that list includes revisions older than the software version. A plant with version 32 software can create a project at revision 24 for a v24 controller, and the file is written at revision 24. This is how an OEM produces a deliverable that an older software version can open, and it is the correct tool when the project revision and the controller revision must be aligned by design. The download path is where the second expensive failure mode lives. The change-controller-revision prompt appears during a routine download, an engineer accepts it without reading it, and the controller receives new firmware. A running machine whose controller was never backed up loses its program if the flash fails partway. Even a successful firmware change can leave I/O connections and module firmware expectations in an inconsistent state, because the new controller revision may expect newer module firmware than the chassis actually runs.   2.4 What the revision mismatch dialogs actually mean   Three dialogs dominate the field reports. The first is the project open error. The software reports that the project was created with a newer version of the software and refuses to open the file. No workaround exists inside the older software. The fix is to obtain the newer software version, or to ask the source of the file for a copy at the plant's revision, which the newer software can produce for projects it can open. The second is the Go Online mismatch. The software finds the controller, sees a revision difference, and offers to change the controller revision. Accepting the offer flashes the controller. The dialog is a request for permission to change firmware, not a notice. The safe response is Cancel, followed by a decision about which side should move: install matching software, or plan a controlled firmware upgrade. The third is the download mismatch with the change-controller-revision option. It is the same operation as the second, reached through a different path. The meaning is identical: the project revision and the controller revision differ, and the software proposes to make them equal by writing new firmware to the controller. The Who-is-online list in Logix Designer shows the engineers currently connected to each controller and the controllers each connection targets. It belongs in this discussion because the Go Online sequence is where an engineer first sees the revision of the target controller, and where an unplanned acceptance of the change-controller-revision offer does its damage. The dialog appears once per online attempt, it is phrased as a routine question, and the cost of accepting it without preparation is an altered or bricked machine. The Go Online flow is also where the engineer sees whether the controller can be reached at all: if the communication path fails before the version comparison, the problem is the driver or the network, and if the comparison fails, the problem is the revision.   2.5 Why the three numbers line up   The alignment of software version, project revision, and controller revision is not accidental. When an engineer creates a new project, Logix Designer asks for the controller catalog number and for the controller revision. The project file is written at the selected revision, and that revision is stored as the target. A healthy machine runs a controller at the revision the project targets, and the project lives at the revision of the software that manages it. Drift in any one of the three numbers produces one of the dialogs above. Online edits add a second kind of drift. An engineer who goes online and edits logic changes the program stored in the controller without changing the .ACD file on the PC. The controller and the file now differ, even though every version number matches. This is why a full upload belongs in any upgrade procedure: the upload captures the actual state of the controller, including edits that were never saved to the file.   2.6 Common situations, read through the model   Four situations recur in support requests, and each one is the compatibility model in action. Situation one: an OEM sends a project file at revision 33, and the plant runs Studio 5000 version 30. The file will not open. The plant either installs version 33, or asks the OEM for a project at revision 30, which the OEM's newer software can create. Neither option changes the controllers, so the plant's existing online capability is unaffected. Situation two: a replacement controller arrives from the warehouse and the plant cannot go online with it. The replacement was flashed to a newer firmware revision than the plant's software supports. The options are to flash the replacement down to a revision the plant's software supports, if that revision exists for the catalog number, or to upgrade the plant's software. Flashing down is a firmware operation with the same risks as any other flash, and it needs the same backup discipline. Situation three: an engineer downloads a project and the software asks to change the controller revision. The engineer accepts, and after the download the I/O tree shows module faults. The controller revision moved, the module firmware did not, and the project's module expectations no longer match the chassis. The fix is a planned module firmware upgrade, which is why the procedure in section 6 treats the whole chassis, not only the controller. Situation four: an engineer cannot upload from a controller that a contractor upgraded during commissioning. The contractor flashed the controller to revision 32 and the plant owns version 30 software. Upload is impossible until the plant obtains version 32 or newer. This situation is common after third-party work, and it is why the controller revision belongs on any handover checklist.   3. Hardware firmware limits   Each controller family has a range of firmware revisions it can run. The figures below are the well-established limits. Rockwell adjusts support policy over time, and the authoritative source for any specific catalog number is the Product Compatibility and Download Center (PCDC). Check the PCDC before planning an upgrade. A firmware revision that does not exist for a given catalog number cannot be selected in ControlFLASH in any case. Controller family | Catalog numbers | Maximum firmware (typical) | Notes ControlLogix 5560 | 1756-L61, 1756-L62, 1756-L63 | approximately v20 | Rockwell ended feature development for the L6x family at that point. The exact supported range depends on the catalog number; check the PCDC. ControlLogix 5570 | 1756-L71 through 1756-L75 | approximately v24 | The L7x family tops out near v24. Check the PCDC for the exact range. ControlLogix 5580 | 1756-L81 through 1756-L85 | v24 and newer | The L8x family requires v24 or newer and will not accept older firmware. ControlLogix 5580, E series | 1756-L81E through 1756-L85E | v28 and newer (general) | The 5580 family generally requires v28 or newer. Check the PCDC for the current maximum. CompactLogix 5370 | 5069-L306ER and related 5069 catalog numbers | v30 and newer (general) | The 5069 family generally requires v30 or newer. Check the PCDC for the current maximum. CompactLogix 5370 | 1769-L16ER through 1769-L37ERM | approximately v20 to v36 | The supported range depends on the model and on Rockwell support policy. Check the PCDC for the exact figure for your catalog number. Three practical consequences follow from the table. First, an L61 at revision 20 cannot be upgraded to revision 24; the hardware does not support it, and no firmware file at revision 24 exists for that catalog number. Second, an L81 cannot run revision 20 firmware; the controller requires revision 24 or newer and will not accept older firmware. Third, the maximum firmware for the 5580 and 5069 families is a moving target: Rockwell publishes new revisions over time, and the current maximum is exactly the kind of figure the PCDC exists to state. When a plant plans a migration from an L6x to an L8x, the firmware jump from approximately v20 to v24 or newer is part of the project scope, along with the software jump from RSLogix 5000 to a newer Studio 5000 version. The same reasoning applies to a migration from a 1769 CompactLogix to a 5069 CompactLogix: the new controller family sets a new firmware floor and a new software floor, and the old project must be converted into a new project at the new revision before it can be downloaded. Hardware that has reached the end of its firmware range is often the same hardware that has become hard to source, which is why Allen-Bradley spare parts for legacy ControlLogix and CompactLogix platforms remain a normal procurement item for plants that cannot migrate yet.   4. Multiple software versions on one PC   Multiple versions of RSLogix 5000 and Studio 5000 Logix Designer can be installed on the same PC. Rockwell designed the installers to coexist, and many engineers do run version 20 and version 32 on one machine. The coexistence is workable, and it is messy. Licensing is the first complication. RSLogix 5000 and Studio 5000 use FactoryTalk Activation, and each software version needs its own activation. An activation that covers version 32 does not automatically cover version 20. A plant that keeps both installed must keep both activations valid, and an expired activation for one version surfaces as an error that looks like a software fault. Windows compatibility is the second complication. The oldest RSLogix 5000 versions predate modern Windows and do not run on Windows 10 or Windows 11. Version 20, for example, was released in the Windows XP and Windows 7 era, and running it on a modern operating system typically requires a virtual machine. The compatibility matrix in the PCDC states the supported operating systems for each software version. The honest summary: the older the software, the older the Windows it needs. Coexistence itself is the third complication. Different versions share services such as RSLinx Classic and FactoryTalk Linx, and version conflicts surface as drivers that disappear, activation errors, and projects that open in the wrong application when file associations point at the last installed version. A version that worked alone can start failing after a second version is installed. The common engineering solution is a dedicated laptop or a virtual machine per version. A plant with controllers at v20 and at v32 keeps one machine with RSLogix 5000 v20 and one with Studio 5000 v32, and does not mix them. The pattern costs hardware and desk space, and it buys certainty. A plant that keeps a v20 machine alive is usually the same plant that keeps PLC spare parts on hand for hardware Rockwell no longer sells. The virtual machine approach has an extra advantage: the VM image itself is a backup, and a corrupted installation is restored by copying the image rather than by reinstalling the software and re-entering activations.   5. Module firmware versus controller firmware   A Logix chassis contains the controller and its modules, and each module runs its own firmware. The project stores the expected firmware revision for every module in the I/O configuration. When Logix Designer goes online, it compares the expected module revisions against the actual revisions in the chassis and reports differences. Module firmware is updated with ControlFLASH, the same tool used for the controller. The operation is per module: select the module in the flash tool, select the target revision, and flash. The 1756-EN2T Ethernet module is the module most often flashed, because its firmware controls the network path and because Rockwell publishes new EN2T revisions to correct communication defects. The practical rule: module firmware upgrades belong in the same maintenance window as controller firmware upgrades, and they are verified with the same discipline. A project that expects EN2T revision 5 on a module that runs revision 3 produces a mismatch at online time, and the mismatch either blocks the connection or degrades it, depending on the module and the size of the difference. Keep module firmware consistent with the project's expectations, and change both sides deliberately, never one side by accident. A controller firmware upgrade that raises the controller beyond the firmware of its communication modules is a common source of module fault and connection failed reports after an otherwise clean upgrade.   6. The safe firmware upgrade procedure   The procedure below is ordered. Every step exists because a skipped step has caused a real failure. Follow the steps in sequence, and do not merge steps. 1. Verify the current state. Open RSLinx Classic or FactoryTalk Linx, browse to the controller, and record the current firmware revision. Record the revision of every module in the chassis as well, from the I/O configuration in the project or from module properties. The record is the baseline for the entire operation, and it is the reference for the post-upgrade verification. 2. Back up the project. Close the project, copy the .ACD file to two separate locations, and record the project revision. Do not convert the project as part of the backup. The backup must be a byte-for-byte copy of the file that matches the running system. 3. Perform a full upload. Go online with the current software, upload the project from the controller, and save the uploaded copy under a separate name. The upload is the second backup, and it is the one that matters if the .ACD file and the controller have drifted apart. Controllers can contain logic that the file does not, because engineers make online edits. The upload captures the actual state. 4. Check the compatibility matrix in the PCDC. Verify three things: the target firmware revision exists for the controller catalog number, the software version planned for the post-upgrade connection supports that firmware revision, and that software version runs on the operating system of the PC that will go online. A failure in any of the three cancels the upgrade until it is resolved. This step also identifies the module firmware revisions that the target controller revision expects, so the module list from step 1 can be checked against it. 5. Confirm the maintenance window. A firmware download interrupts the controller. The controller stops executing the program for the duration of the flash, and I/O connections drop. Confirm that the process can tolerate the interruption, that the operators have been informed, and that the machine is in a safe state. Do not upgrade a running machine outside a maintenance window, and do not upgrade a machine in the middle of a batch. 6. Run ControlFLASH. Launch ControlFLASH, select the controller, select the target revision, and start the flash. Do not interrupt the flash once it starts. A power loss or a communication break during the flash can leave the controller with a corrupt firmware image. The controller may recover through a boot mode, and the recovery is not guaranteed. Wait for the completion message before touching anything. 7. Verify the result. Power-cycle or reset the controller as the flash tool directs. Go online with the planned software version and confirm that the revision shown in Logix Designer matches the target. Check the I/O connections: every module in the I/O tree should show its expected state, and module firmware mismatches surface at this point. Confirm that the program runs: place the controller in Run mode and observe execution, task timestamps, and I/O values. Keep the pre-upgrade backups until the machine has completed a full production cycle on the new firmware. Module firmware upgrades follow the same procedure, with step 6 repeated for each module. The verification in step 7 then checks the module revisions in the I/O tree instead of the controller revision.   7. Firmware upgrade checklist   Condensed checklist for the maintenance planner: · [ ] Baseline recorded: controller revision and module revisions documented · [ ] Project backed up at its current revision, two copies, not converted · [ ] Full upload performed and saved under a separate name · [ ] PCDC checked: target firmware exists for the controller catalog number · [ ] PCDC checked: planned software version supports the target firmware · [ ] PCDC checked: software version supports the PC operating system · [ ] Module firmware expectations checked against the target controller revision · [ ] Maintenance window confirmed with operations · [ ] Machine in a safe state, no active batch · [ ] ControlFLASH run to completion without interruption · [ ] Controller reset or power cycle performed as directed · [ ] Online verified: controller revision matches the target · [ ] I/O connections verified module by module · [ ] Program confirmed running in Run mode · [ ] Pre-upgrade backups retained until one full production cycle completes   8. FAQ   Q1. Can version 30 open a project saved in Studio 5000 version 32? No. A project saved by a newer version cannot be opened by an older version. Version 30 cannot read the revision 32 file format. Obtain version 32 or newer, or ask the source of the file for a copy at revision 30. Q2. What does the controller revision mismatch message mean when I go online? It means the software version and the controller firmware revision are not compatible, and the software offers to change the controller revision, which writes new firmware to the controller. Cancel the offer unless the change is planned, backed up, and scheduled. Q3. Can I upload from a controller whose firmware is newer than my software? No. Upload requires software at a version equal to or newer than the controller revision. Install matching or newer software before the upload. Q4. Is a firmware upgrade reversible? A controller can be flashed back to an older revision if that revision exists for the catalog number. The reversal is itself a firmware operation with the same risks. A converted project is not reversible: once the newer software saves a converted file, no older software can open it. Q5. Can I run version 20 and version 33 on the same PC? In principle, yes. The practical limits are licensing, Windows compatibility, and shared-service conflicts. Version 20 does not run on modern Windows without a virtual machine. Most plants use a dedicated laptop or VM per version. Q6. What is the difference between controller firmware and module firmware? Controller firmware is the operating system of the controller. Module firmware is the operating system of each individual module, such as a 1756-EN2T. Both are updated with ControlFLASH, and both must match what the project expects. Q7. Where do I find the exact maximum firmware for my controller? In the Product Compatibility and Download Center (PCDC) at Rockwell Automation. The PCDC states the available firmware revisions for each catalog number and the compatible software versions. Consult it before every upgrade.   9. The rule that governs every case   The compatibility model reduces to one sentence: the software version, the project revision, and the controller revision must form a consistent set, and every change to one member of the set is a planned operation. A project file that will not open, an online session that will not start, and a download that wants to change controller firmware are all the same underlying condition: the set is inconsistent. The engineer's job is to identify which member is out of line, decide which member should move, and move it with a backup and a maintenance window in place. For plants that run legacy hardware, the set has a fourth member: the hardware itself. A controller whose firmware range has ended is a controller whose spares are scarce, and the planning horizon for a migration starts at the moment the firmware limit is reached. Allen-Bradley spare parts and ControlLogix spare parts keep legacy lines running while the migration is planned, and the version discipline in this guide keeps the software side of the set stable for as long as the hardware runs. The discipline costs little. The alternative costs a production line. URL Slug: studio-5000-firmware-version-management-guide ------------------------------------------------------------------------------------------- 🏢 About TZ Tech   TZ Tech is a leading supplier of industrial automation, electrical, instrumentation, and telecommunications components. We specialize in sourcing ready-to-ship distributor stock, allowing us to offer highly competitive pricing and short lead times. Thanks to our extensive inventory, we can even source rare and discontinued parts that are hard to find elsewhere.   🛡️ Our Quality Commitment   We understand that quality is your top priority. Every component undergoes a strict screening and inspection process so you can buy with absolute confidence. For legacy or discontinued parts, we believe in complete transparency and will always provide an honest, accurate report on the product's condition. Plus, all brand-new parts come backed by a full 1-year warranty.   ✉️ Get in Touch     Have a project or a part you need? Send us your inquiry today! Our team is dedicated to providing a fast response within 6 hours (excluding weekends).

  • ABB ACS550 Obsolescence & Replacement Guide
    ABB ACS550 Obsolescence & Replacement Guide Aug 28, 2026
      Complete Migration Strategy to ACS580: Sizing, I/O Wiring, Modbus Retrofit, and Critical Pitfalls Published: Industrial Drive Engineering Blog  |  Category: VFD Retrofit & Retrofits  |  Target: ABB ACS550 → ACS580 / ACS880   The ABB ACS550 was once one of the most ubiquitous general-purpose Variable Frequency Drives (VFDs) deployed across global industry—powering fans, centrifugal pumps, belt conveyors, agitators, air compressors, and standard machinery across virtually every sector. As equipment life cycles progress, plant managers and electrical maintenance engineers face a critical dilemma: With the legacy ACS550 reaching its end-of-life, can replacement units still be procured? What is the official replacement series, and can you simply swap in the same kilowatt rating? According to ABB's official product roadmap, the direct generational successor to the ACS550 is the ACS580 general-purpose drive. However, concluding that 'ACS550 replaces with ACS580' is only true at a high-level product family level. It does NOT mean that you can perform a blind 1-to-1 swap based purely on motor power (kW / HP). ■ KEY ENGINEERING TAKEAWAYA reliable VFD migration requires simultaneous verification of: rated continuous and overload current, load profile (variable vs. constant torque), control terminal mapping, communication protocols, physical cabinet dimensions, braking resistor sizing, and installed options.     1. Has the ABB ACS550 Been Officially Discontinued?   According to ABB's official 'ACS550, ACH550, and ACQ550 Product Life Cycle Statement', the ACS550, ACH550, and ACQ550 families officially entered the Obsolete life cycle phase on January 1, 2025. In this statement, ABB notes that for the European, Asian, Middle Eastern, African, and Americas markets, standard production and regular sales have ceased. For specific local markets, remaining availability requires direct inquiry with local ABB entities, and ABB strongly recommends actively migrating installed fleets to next-generation drive families. Entering the Obsolete phase does not mean every existing ACS550 disappears overnight. In the industrial market, units may still be sourced through: · Distributor legacy inventory; · OEM spare parts stock; · Refurbished, repaired, or pulled equipment; · Surplus inventory from non-exhausted regional channels. However, relying on dwindling legacy stock for mission-critical operations exposes plants to soaring component prices, unpredictable delivery lead times, counterfeit risks, and the eventual impossibility of replenishment. Therefore, plants operating ACS550 units must formulate structured migration plans immediately rather than waiting for an emergency breakdown.   2. Successor Families: Which Drive Should You Choose?   ABB has published dedicated replacement and migration guides to help users evaluate capacities, mounting methods, dimensions, electrical parameters, control terminals, and parameter groups between the 550 and 580 series. Legacy Series Primary Application Domain Next-Gen Replacement Family ACS550 General Machinery, Fans, Pumps, Conveyors, Mixers ACS580 (General Purpose) ACH550 HVAC, Building Supply/Return Fans, Chilled Water Pumps ACH580 (HVAC Dedicated) ACQ550 Water & Wastewater, Pumping Stations, Sewage Treatment ACQ580 (Water/Wastewater) ACS550 w/ Encoder Closed-loop Speed Feedback / High Dynamic Performance ACS880 (Industrial High-Performance)   ■ MIGRATION RULE OF THUMBStandard ACS550 units migrate to ACS580; HVAC ACH550 units migrate to ACH580; Water/Wastewater ACQ550 units migrate to ACQ580. High-performance closed-loop applications requiring encoder feedback must migrate to the ACS880.   3. Why You Cannot Swap 1-to-1 Based Solely on Kilowatt Rating   A frequent mistake during field retrofits is assuming that a 15 kW ACS550 can be automatically replaced with any 15 kW ACS580. Motor power is only a nominal reference. The true technical determinants of VFD selection are: · Mains supply voltage & tolerance; · Motor rated nameplate current (In); · Continuous and maximum overload current capacity of the VFD; · Load profile (Variable Torque vs. Constant Torque / Heavy Duty); · Ambient temperature & installation altitude derating; · Motor control method (Scalar vs. Vector); · Communication network requirements; · Dynamic braking requirements (braking chopper & resistor); · Enclosure IP rating and mechanical footprint. A. Centrifugal Fans and Pumps (Light Duty / Normal Duty) Fans and centrifugal pumps feature quadratic variable torque load profiles (T ∝ n²), characterized by low starting torque and moderate short-term overload demands. Once the motor current, continuous duty cycle, and ambient conditions are verified, the ACS580 can typically be selected based on its Light Duty (ILd) or Normal Duty rating. B. Conveyors, Mixers, and Heavy-Duty Loads Conveyors, heavy mixers, extruders, positive displacement pumps, and hoist mechanisms demand high breakaway torque and endure severe impact loading. For these applications, sizing must account for: · Actual running current under peak mechanical load; · Maximum starting/inrush current during acceleration; · Start/stop duty cycle frequency; · Locked-rotor / jam risk; · Low-frequency continuous torque capability. For such equipment, the ACS580 must be selected based on its Heavy-Duty (IHd) rating, which may require sizing up by one full power frame level.   4. Mandatory Data Collection Prior to ACS550 Removal   Before unmounting the legacy ACS550, compile a complete archival record of the existing installation. 1. Clear Photographic Record of Drive Nameplate Capture the full hardware code: complete model string (e.g., ACS550-01-038A-4), supply voltage range, rated output current, serial number, IP rating, option codes (+E200, +K454, etc.), and control unit label. A label reading only 'ACS550 15kW' is insufficient for precise engineering replacement. 2. Motor Nameplate Verification Record: Rated Power (kW/HP), Rated Voltage (V), Rated Current (A), Frequency (Hz), Synchronous/Rated RPM, Power Factor (cos φ), Winding Connection (Star Y vs. Delta Δ), and Motor Type (Standard Induction, PM, or Explosion-proof). 3. Parameter Backup & Control Logic Audit If the drive powers on, upload parameters via the Assistant Control Panel or DriveWindow Light / Drive composer. If the drive has failed completely, reconstruct the control strategy from electrical schematics, PLC code, and terminal field wiring. Crucial parameter sets include: · Motor nameplate parameters (Group 99); · Start/Stop/Direction source & logic (Group 10); · Min/Max frequencies, Accel/Decel ramp times (Groups 20 & 22); · Analog Inputs (AI1 / AI2 signal type: 0–10V vs. 4–20mA); · Digital Inputs (DI1–DI6) & Relay Outputs (RO1–RO3 functions); · PID controller settings, multi-step speeds, and communication configurations.   5. Control I/O Wiring: Do NOT Wire Pin-to-Pin by Terminal Number       ■ CRITICAL FIELD WARNINGAlthough both ACS550 and ACS580 share ABB lineage, their control board layouts, terminal physical positions, and factory macro defaults differ significantly. Connecting a wire to ACS580 Terminal #2 just because it came from ACS550 Terminal #2 can cause hardware damage or control malfunction!   ACS550 Function Signal Type ACS580 Equivalent Retrofit Action Item Start / Stop Digital Input Digital Input Verify Active High / DI1 logic setting Forward / Reverse Digital Input Digital Input Check Macro direction selection Speed Reference 0–10 V or 4–20 mA Analog Input (AI1/AI2) Configure DIP switch / software AI mode Pressure Feedback 4–20 mA Analog Input Verify scale, unit, and PID feedback loop Running Status Relay Output Relay Output (RO1/RO2/RO3) Re-map relay firmware output function Fault Output Relay Output Relay Output Verify NO / NC circuit continuity logic Fault Reset Digital Input Digital Input Configure reset trigger mode (edge/level)   Crucial Verification Signals: Speed reference (0–10V / 4–20mA), process feedback loops, start/stop interlocks, multi-step speeds, drive run/fault/at-setpoint outputs, bypass interlocks, and emergency fire/safety circuits. Perform a point-to-point I/O check prior to spinning the motor.   6. The Encoder Exception: When You MUST Upgrade to ACS880   A pivotal rule emphasized in ABB migration literature: The ACS580 series does NOT support encoder feedback modules. If the legacy ACS550 utilized a pulse encoder interface card (such as OTAC-01) for closed-loop vector speed control or precise positioning, the replacement drive MUST be selected from the ABB ACS880 family. ■ CONSEQUENCES OF INCORRECTLY CHOOSING ACS580 FOR ENCODER SYSTEMS• Inability to physically terminate or interface the pulse encoder;• Total loss of closed-loop speed accuracy and zero-speed holding torque;• Dramatically reduced low-frequency torque capability;• Mandatory rework of the electrical and automation architecture.     7. Modbus Communication Migration Strategies   Both ACS550 and ACS580 support native Modbus RTU communications via standard RS-485 interfaces. However, register mapping is not identical. ABB Technical Note 062 defines two viable migration paths: Method 1: Enabling Modbus Backward Compatibility Mode The ACS580 incorporates an embedded legacy compatibility mode that emulates 550-series Modbus register addressing. · Pros: Minimizes or eliminates PLC/SCADA program modifications; accelerates commissioning and shortens shutdown windows. · Limitations: Not all legacy parameters are 100% mirrored, and newly introduced ACS580 advanced features/diagnostics cannot be accessed through the compatibility map. Method 2: Updating PLC / HMI Register Addresses to Native ACS580 Maps Re-mapping the master PLC, DCS, or HMI software directly to native ACS580 parameter registers. While requiring program adjustments, this provides robust, future-proof communications and full access to modern drive telemetry. ■ MODBUS PRE-COMMISSIONING CHECKLISTDocument and verify: Node Address, Baud Rate, Data Bits, Parity, Stop Bits, Control Word address, Status Word address, Speed Reference / Actual Speed registers, Motor Current / Torque / Fault codes, and 16-bit vs. 32-bit word scaling factors.     8. Physical Footprint, Cabinet Clearance, and Thermal Considerations   The physical chassis dimensions, frame sizing (R1–R9), mounting bolt patterns, and cooling clearance requirements differ between ACS550 and ACS580. Before ordering, verify inside the enclosure: · Chassis width, height, and depth; · Mounting hole coordinates and backplate drill points; · Upper and lower thermal clearance for airflow exhaust; · Cabinet door clearance (ensure new drive depth allows door closure); · Main power and motor cable bend radius and remaining conductor length; · Braking resistor mounting location and ventilation.   9. Peripheral Accessories: Braking, EMC, and Fieldbus Options   Legacy ACS550 accessories generally cannot be directly ported over to ACS580 without verification: · Fieldbus Modules: Legacy plug-in adapters (RPBA-01 Profibus, RDNA-01 DeviceNet) must be replaced by modern F-series adapters (FPBA-01, FDNA-01, FENA-21 for Ethernet/IP & PROFINET). · Braking Resistors: Re-verify internal chopper availability (integrated in smaller frames) and minimum allowable braking resistance (Ω) and thermal power (kW). · EMC & Reactors: ACS580 features integrated harmonic mitigation (swinging choke equivalent) and standard EMC filtering. · Safe Torque Off (STO): ACS580 includes dual-channel SIL3 / PL e STO terminals natively, requiring proper hardwired jumpering or integration into emergency safety circuits.   10. Recommended 9-Step Field Migration Workflow   · Step 1: Build Existing Machine Archive — Photograph nameplates, wiring, cabinet layout, and existing options. · Step 2: Backup Parameters & PLC Programs — Export parameter files, capture schematics, and record Modbus register maps. · Step 3: Analyze Load Characteristics — Classify mechanical load (variable vs. constant torque) and record operational amp draw. · Step 4: Select Proper ACS580 Sizing — Size according to voltage, full-load amps, overload cycle, and ambient rating. · Step 5: Audit Special Requirements — Confirm encoder presence, PID loops, fieldbus protocols, dynamic braking, and STO circuits. · Step 6: Construct Cross-Reference Tables — Create detailed mapping sheets for Power Terminals, Control I/O, Parameters, and Comm Registers. · Step 7: Perform Pre-Installation Offline Commissioning — Bench-test the new drive, pre-load parameters, and verify communications before plant downtime. · Step 8: Execute Cold & Hot Commissioning — Test motor rotation direction, start/stop logic, speed scaling, PID loop response, and emergency stop interlocks. · Step 9: Archive Final Documentation — Save final parameter backups, revised electrical drawings, and full ordering codes for plant records.   11. Seven Common Replacement Mistakes to Avoid   · Mistake 1: Sizing by Motor kW Alone: Overlooking rated current, ambient derating, and heavy-duty overload requirements. · Mistake 2: Terminal-for-Terminal Blind Rewiring: Assuming identical terminal number assignments between generations. · Mistake 3: Failing to Backup Parameters: Attempting to reconstruct complex PID or multi-step logic from scratch after drive failure. · Mistake 4: Overlooking the Encoder: Installing a standard ACS580 on a closed-loop encoder application instead of an ACS880. · Mistake 5: Assuming Identical Modbus Registers: Neglecting register shift, word order, or scaling factor differences. · Mistake 6: Ignoring Cabinet Physical Dimensions: Discovering mounting hole mismatches or insufficient door clearance on install day. · Mistake 7: Overlooking Option Modules: Omitting required fieldbus gateways, braking units, or I/O extension modules from the order.   12. Official ABB Reference Documents   1. ABB ACS550, ACH550, and ACQ550 Product Life Cycle StatementDetails obsolescence timeline, regional availability guidelines, and phased migration pathways. 2. ACS550 to ACS580 Replacement and Comparison Guide (Doc # 3AXD50000660681)Comprehensive technical cross-reference: frame sizes, clearances, wiring terminals, and parameter groups. 3. 550 to 580 Series Modbus Register Conversion (Technical Note 062)Implementation guide for Modbus RTU backward compatibility mode and native register translation. 4. ABB ACS580 General Purpose Drives Hardware Catalog (Doc # 3AUA0000145061)Full technical specifications, complete ordering nomenclature, dimensional drawings, and option codes.   ■ IMPORTANT SAFETY & ENGINEERING NOTICEThis guide serves as preliminary engineering guidance and does not replace final technical validation. Variable frequency drive replacement involves dangerous voltages. All electrical design, unmounting, wiring, and commissioning must be executed strictly by qualified electrical engineering personnel in compliance with local safety standards.     🏢 About TZ Tech   TZ Tech is a leading supplier of industrial automation, electrical, instrumentation, and telecommunications components. We specialize in sourcing ready-to-ship distributor stock, allowing us to offer highly competitive pricing and short lead times. Thanks to our extensive inventory, we can even source rare and discontinued parts that are hard to find elsewhere.   🛡️ Our Quality Commitment   We understand that quality is your top priority. Every component undergoes a strict screening and inspection process so you can buy with absolute confidence. For legacy or discontinued parts, we believe in complete transparency and will always provide an honest, accurate report on the product's condition. Plus, all brand-new parts come backed by a full 1-year warranty.   ✉️ Get in Touch     Have a project or a part you need? Send us your inquiry today! Our team is dedicated to providing a fast response within 6 hours (excluding weekends).  
  • Allen-Bradley ControlLogix 1756-L6x: When to Repair, When to Replace
    Allen-Bradley ControlLogix 1756-L6x: When to Repair, When to Replace Aug 26, 2026
      A ControlLogix 1756-L6x processor faults out mid-shift. The line stops. Someone pulls the CPU, stares at it for ten minutes, and makes a call that costs the plant hundreds or thousands of dollars. Most of those calls are wrong, because most L6x "failures" are not the CPU at all. When the CPU shows problems, do this, in this order. Nothing else until you finish all three checks. First, read the LEDs. The front-panel status LED tells you more than any diagnostic tool you own. Every state maps to a fault class: flashing green, solid green, flashing red, solid red, off. Write down exactly what you see before you touch anything. Then check the battery. The 1756-BA2 lithium cell keeps the SRAM program alive when main power is off. A weak battery throws a low-battery alarm in the controller properties and on the front panel. If the cell dies while the chassis is powered down, the program is gone. A huge share of "dead CPU" calls are flat batteries. Then check the CompactFlash card. A corrupted, loose, or dying 1784-CF64 card makes an L6x act exactly like a dead CPU. It faults on power-up, refuses to load firmware, or loops in a boot cycle. Plants condemn good processors over a failed memory card every week. Only after those three checks do you talk repair versus replace. This guide runs the full decision in order: diagnose, inventory, repair, replace, compare, decide.   The decision framework up front   Run every 1756-L6x fault through this filter before you spend money. Repair the CPU when: · The fault is a battery alarm, a corrupted CompactFlash card, or a firmware mismatch. · The processor powers up, sees the backplane, and holds its program across power cycles. · The CPU is under ten years old with no history of repeated faults. · You hold a verified program backup and a known-good spare CPU on the shelf. Replace the CPU when: · The CPU faults repeatedly across different chassis, power supplies, and racks. · You see physical damage: burnt components, bulged capacitors, bent pins, or residue from water or chemicals. · A failed backplane or chassis power supply took the CPU out, and the unit is past the ten-year mark. · The line is critical, the program backup is unverified, and spares for your exact catalog number are getting scarce. One rule overrides everything: a critical line does not wait for a repair cycle. If this CPU runs a process where downtime costs thousands per hour, you replace or exchange, and you do it fast. Repair belongs to spares, non-critical cells, and budget-constrained shops. That is the whole logic in one paragraph.   The 1756-L6x model line at a glance   Know exactly which CPU you are holding before you decide anything. The catalog number is printed on the front and on the side label. Read it, record it, and match it against this line. Model | Memory | Notes 1756-L61 | 1.2 MB | Entry model, small applications 1756-L62 | 2 MB | Mid-range, common on older lines 1756-L63 | 4 MB | The workhorse, most common in the field 1756-L64 | 8 MB | High-memory version 1756-L65 | 8 MB | Top of the L6x line, faster processor 1756-L6SP | 4 MB | Safety partner for L6xS safety controllers All L6x models run firmware up to version 20 and program in RSLogix 5000. That firmware ceiling drives a lot of the replacement decisions later in this guide. Write the firmware revision down next to the catalog number; you will need both.   Step 1: Diagnose the fault before you touch the parts shelf   1.1 Read the LED states   The front panel of every 1756-L6x carries a status LED and a module OK LED, plus the BAT LED that reports battery health. Read them with the chassis powered and the key switch in REM or RUN. LED state | What it means | Next move Solid green | CPU is running normally | Not your problem today Flashing green | Program mode, or faulted but recoverable | Go online, read the fault log Flashing red | Recoverable fault | Clear the fault, watch for repeats Solid red | Non-recoverable fault or hardware failure | Power cycle once, then run the battery and CF checks Off | No power, dead module, or failed backplane connection | Check the power supply and module seating first Record the state before you power-cycle. Power cycling erases the evidence. If the LED returns to the same state after a clean power cycle with a good battery and a reseated CF card, you have a genuine hardware problem. If it changes, you were chasing a transient.   1.2 Check the battery first   Do not skip this step. The 1756-BA2 is a standard lithium cell with a typical service life of two to five years, and it is the single most common cause of "the CPU lost its program" calls in the field. Check it like this: 1. Go online with the controller in RSLogix 5000 or Studio 5000 and open Controller Properties. Read the battery field. A low cell shows there and on the front-panel BAT LED. 2. If the battery is low or dead, replace it with a fresh 1756-BA2 while the chassis is powered. Hot-swapping with power on keeps the SRAM backed up the whole time. 3. After the swap, verify the program is intact and the BAT LED clears. If the program is already gone, move to the CompactFlash step immediately. Watch out, this is where people lose programs: they pull the battery out of a powered-down chassis "to be safe," and the SRAM drains in minutes. If the machine is down and the cell is flat, the program in SRAM is already at risk. Get the CompactFlash card out and read it before you do anything else.   1.3 Reseat and test the CompactFlash card   The CompactFlash card in the L6x holds the firmware and the program image. It is the cheapest component in the whole system and the most ignored. Do this: 4. Power the chassis down, or if the CPU is hung, remove the card with power off. 5. Pull the card, inspect the contacts, clean them with a dry cloth, and reseat the card firmly. 6. Power back up and watch the boot sequence. A CPU that boots clean after a reseat had a card contact problem, not a hardware failure. 7. If the CPU still faults, test it with a known-good CF card loaded with the same firmware revision. If the spare card revives the CPU, the card was the failure. Replace it. Pitfall: never rewrite a CF card on a PC with random formatting tools and then blame the CPU. Flash firmware with ControlFlash and nothing else. A card written with the wrong image makes a healthy CPU look dead. Always keep a backup CF card for each CPU. Label it with the CPU serial number, the firmware revision, and the program revision. At 2 a.m., a labeled spare card is worth more than the whole parts budget.   1.4 Check power and backplane   An L6x that will not power up is often not the CPU's fault. Work outward from the module: 8. Verify the chassis power supply, a 1756-PA75, 1756-PB75, or 1756-PA72, is producing the right voltage. Measure at the chassis. Do not trust the supply LED alone. 9. Inspect the backplane connector pins on the CPU. Bent pins are a classic failure when someone slams a module into a slot. Check every pin with a light. 10. Move the CPU to a different slot, or better, to a different chassis with a known-good power supply. If it runs there, the problem was the slot, the backplane, or the supply. 11. Inspect the chassis backplane for scorch marks, cracked traces, or bent pins in the slot connector. This is where people waste a day: they replace the CPU, the new one fails the same way, and only then do they discover the backplane is dead. Test in a known-good chassis before you order anything.   Step 2: Check what you own before you decide   Before you pick repair or replacement, take stock. This takes twenty minutes and it decides everything. Program backups. Find the latest .ACD file for this CPU and open it in RSLogix 5000. Confirm it matches the running program revision. No backup? Then the CF card in the CPU is your only copy. Do not ship the CPU anywhere and do not power-cycle the chassis until you have extracted or verified that program. This is the moment most plants discover their "backups" are three years old. Spare CPUs. What is on your shelf? A known-good L6x of the same or higher model? An L7x? Nothing? Your answer sets the urgency. No spare on a critical line means the decision is already made: you need hardware in hand within days, which points to exchange or replacement, not a weeks-long repair. Firmware and software versions. Which RSLogix 5000 version does your team run? L6x CPUs top out at firmware version 20. If your engineering PCs moved to Studio 5000 v21 or newer, your L6x project still opens there, but with conversion, and an L6x running old firmware may not connect cleanly to newer software. Firmware mismatches get misdiagnosed as hardware failure all the time. Check the revision in the fault record before you blame silicon. Lifecycle status. Do you know the Rockwell lifecycle status for your exact catalog number? Several 1756-L6x CPUs sit in Life Cycle or End of Life status per Rockwell's product lifecycle page. Check rockwellautomation.com for your catalog number and region. When Rockwell stops servicing a model, the repair-versus-replace math changes overnight.   Step 3: Repair paths for the 1756-L6x   If the diagnosis points to a genuine CPU fault and the framework says repair, here are the roads, in the order most plants actually use them.   3.1 Rockwell repair and exchange   Rockwell Automation runs an official repair and exchange program for out-of-warranty ControlLogix hardware. You send the unit in, they diagnose it, and you get your board back repaired or a refurbished exchange unit. The advantages are real: genuine parts, original firmware, a warranty on the returned unit, and traceability that auditors like. The trade-offs are the ones everyone knows: turnaround measured in weeks in many regions, and cost that can approach a third or more of a new processor's list price. For a CPU already ten years old, that math often fails. Get a written quote with the fault description before you ship, and confirm the current turnaround time.   3.2 Third-party repair houses   Independent repair shops handle 1756-L6x boards at a fraction of Rockwell's price, often with faster turnaround. The good ones publish their process: free diagnosis, a fixed quote, component-level repair, and a warranty. Do your homework before you ship a board to an unknown shop. Ask for their test procedure, and they should test on a real ControlLogix chassis with a known-good backplane. Ask about warranty terms and references from plants running the same hardware. A board that comes back "repaired" but faults on install costs you double in freight and labor. Record the serial number so you can verify you got your own board back.   3.3 Module exchange and surplus   Between new, repaired, and dead sits the exchange market. Surplus and aftermarket dealers stock working 1756-L6x modules pulled from decommissioned lines, tested and warranted. For a plant with a fleet of L6x machines, buying a tested surplus CPU as a spare is often the fastest, cheapest hedge available. Allen-Bradley spare parts listings carry these modules with varying warranties. Pitfall: an exchange CPU with a different firmware revision than your program will not load your program without a firmware flash. Confirm the firmware revision before purchase, or budget for a ControlFlash step on install.   Step 4: Replacement paths for the 1756-L6x   When the decision lands on replacement, you have four honest options. Rank them by what your plant actually runs.   4.1 Same-family replacement: 1756-L7x   The 1756-L7x family, L71 through L75 plus the L7SP safety partner, is the direct successor to the L6x. Same chassis, same backplane, same I/O, same power supplies. You pull the L6x, you push in the L7x, and the migration becomes mostly a firmware and software question. What you gain: more memory, faster scan, and support for Studio 5000 v21 and newer. Your RSLogix 5000 L6x project opens in Studio 5000 with conversion. Budget time for the conversion review, especially around motion, message instructions, and custom add-on instructions. The L7x keeps your existing chassis, racks, and I/O, so the hardware cost stays contained. That is why most L6x plants migrate to L7x first. The counterweight: the L7x is also aging, so check its lifecycle status before you bet a critical line on it.   4.2 Current-generation replacement: 1756-L8x   The 1756-L8x family, L81 through L85 plus the L8SP, is Rockwell's current ControlLogix generation. More memory, faster processors, cybersecurity features, and the longest remaining support horizon. For a critical line you plan to run another ten years, the L8x is the honest answer. The cost is higher, and the migration touches more than the CPU: Studio 5000 project conversion, possible firmware updates across the rack, and review of legacy communications. Plan the conversion as a project, not a swap. Plants already on Studio 5000 find the L8x conversion straightforward. Plants still on RSLogix 5000 v20 or older face a bigger jump, so budget engineering time.   4.3 Downsize: CompactLogix 5380 and 5069   If the machine does not need ControlLogix capacity, do not buy ControlLogix. The CompactLogix 5380 family, the 5069-L306ER and its siblings, plus the older CompactLogix 1769-Lx line, handles a huge share of standalone machines, skids, and small cells. The 5069 line runs Studio 5000, uses the same tag-based programming, and costs far less than an L8x. Do the capacity check honestly: how many I/O points, how much motion, how much data logging, what comms does the line actually need? If the answers fit a 5380, the replacement pays for itself in the first year of spares and energy. The catch: you are rewiring or re-commissioning the rack, which means real downtime and real engineering. That is fine for a small machine. For a 500-I/O line, stay in ControlLogix.   4.4 Small applications: Micro800   For tiny, single-purpose machines, the Micro800 family is the budget end of the answer. It is not a ControlLogix replacement in any functional sense. It is a different platform for different jobs: small standalone machines, simple sequences, applications where one controller and a handful of I/O cover everything. If you are rebuilding a small machine anyway and the old L6x was oversized for it, Micro800 is worth a look. If the machine is part of a coordinated line, skip it and stay in the Logix family.   4.5 The spare-parts strategy   Most plants get the spares part wrong. They wait until a CPU dies, then chase hardware at premium prices. The correct move, on a fleet with aging L6x CPUs, is to buy the spare while spares still exist. One tested surplus L6x on the shelf, with a labeled CF card and a fresh battery, converts a week-long emergency into a two-hour swap. Stock it now. PLC spare parts sourcing gets harder every quarter as these models age out of active support.   Step 5: Cost and effort comparison   The table below is the honest comparison. Prices vary by region, vendor, and warranty, so treat the effort and risk columns as the real decision drivers. Path | Hardware cost | Downtime | Engineering effort | Risk | Best for Third-party repair | Low | Weeks of waiting | Low | Medium: returned board may fault again | Spares, non-critical cells Rockwell exchange | Medium | Weeks | Low | Low: genuine parts and warranty | Audited or regulated plants Surplus L6x swap | Low to medium | Days | Low | Medium: verify firmware and history | Fleets that must stay on L6x Upgrade to L7x | Medium | Days, planned | Medium: project conversion | Low | Plants with existing racks on RSLogix 5000 Upgrade to L8x | High | Days, planned | High: full project conversion | Low | Critical lines with a ten-year horizon CompactLogix 5380 | Low to medium | High: re-commissioning | High | Medium: new architecture | Standalone machines, small cells Read the cost column with care. A "cheap" repair that fails on install costs you double in freight and labor. An "expensive" L8x that runs for fifteen years is cheap. Count the total cost of the decision: hardware, freight, engineering hours, downtime, and the probability of doing the job twice. The effort numbers assume verified program backups. Without backups, every path gets more expensive and more dangerous, and the only sane move is to recover the program from the CF card or the battery-backed SRAM before you touch anything.   The decision checklist   Run this list in order, every time. 12. Read and record the LED state. Power cycle once. 13. Check the battery. Replace the 1756-BA2 with power on if low. Verify the program. 14. Reseat and test the CompactFlash card. Try a known-good card. 15. Test the CPU in a known-good chassis with a known-good power supply. 16. Confirm the firmware revision matches your software and your program. 17. Locate and verify the latest program backup. No backup? Stop here and recover the program first. 18. Check Rockwell's lifecycle page for your exact catalog number. 19. Count your spares and your line's criticality. 20. Repair if the fault is minor, the CPU is healthy, and time allows. 21. Replace or exchange if the fault is major, the unit is old, or the line is critical. 22. Buy the spare now, while it exists, and label it with firmware and program revisions. Print this. Tape it to the panel. It will save the next shift a bad decision.   FAQ   How long does a 1756-BA2 battery last in a ControlLogix L6x? Typically two to five years, depending on powered-down time and ambient temperature. Replace it on a schedule, not on a failure. Keep a spare cell in the panel. Can I replace the battery without losing the program? Yes, if you replace it with the chassis powered. If the chassis is down and the battery is flat, the SRAM program is already at risk, so move the program to the CompactFlash card or a PC before the cell dies. My 1756-L63 shows a solid red OK LED. Is the CPU dead? Not yet. Run the full diagnosis first: power cycle, battery check, CF reseat, and a test run in a known-good chassis. A solid red LED that persists across all of those points to hardware failure. Only then do you decide repair versus replace. Will a 1756-L7x run my existing L6x program? Your L6x project opens in Studio 5000 with conversion, and the converted project runs on the L7x in the same chassis. Budget time to review the conversion, especially for motion, messaging, and add-on instructions. What firmware does the 1756-L6x support? The L6x family tops out at firmware version 20. Newer Studio 5000 releases still open L6x projects, but an L6x running old firmware may refuse to talk to newer software. Check the revision match before you call it a hardware fault. Is the 1756-L6x still supported by Rockwell? Several L6x catalog numbers are in Life Cycle or End of Life status. Check the Rockwell product lifecycle page for your exact catalog number and your region. Support status drives both repair pricing and spare availability, so verify it before you commit. Where can I find 1756-L6x spares? Surplus and aftermarket channels carry tested L6x modules. Check Allen-Bradley spare parts and PLC spare parts listings, and confirm the firmware revision and warranty on any unit before purchase. My CPU lost its program after a power outage. Battery or CF? Check the battery first. If the cell is flat and the program was SRAM-only, the program is gone unless it lives on the CompactFlash card. This is exactly why every L6x should carry a labeled backup CF card. Is repair always cheaper than replacement? No. A cheap repair that fails on install costs more than a planned upgrade. Compare hardware, freight, engineering hours, and downtime, and count the probability of doing the job twice. For old CPUs on critical lines, replacement usually wins. URL Slug: controllogix-1756-l6x-repair-or-replace -------------------------------------------------------------------------------------------- 🏢 About TZ Tech   TZ Tech is a leading supplier of industrial automation, electrical, instrumentation, and telecommunications components. We specialize in sourcing ready-to-ship distributor stock, allowing us to offer highly competitive pricing and short lead times. Thanks to our extensive inventory, we can even source rare and discontinued parts that are hard to find elsewhere.   🛡️ Our Quality Commitment   We understand that quality is your top priority. Every component undergoes a strict screening and inspection process so you can buy with absolute confidence. For legacy or discontinued parts, we believe in complete transparency and will always provide an honest, accurate report on the product's condition. Plus, all brand-new parts come backed by a full 1-year warranty.   ✉️ Get in Touch     Have a project or a part you need? Send us your inquiry today! Our team is dedicated to providing a fast response within 6 hours (excluding weekends).
  • Siemens S7-300 Analog Input Troubleshooting: SM331 Faults Found in the Field
    Siemens S7-300 Analog Input Troubleshooting: SM331 Faults Found in the Field Aug 24, 2026
      Three in the morning. The packing line goes quiet. Not the graceful quiet of a planned stop. The kind that makes the night operator call me with a voice that says this is not the first problem tonight. "The tank level reads full," he says. "Full and climbing. We're about to put product on the floor." I pull up the VAT table on my laptop. The raw word for the level channel sits at 27648. Pegged hard at the top of the scale. The transmitter on that tank is a 4-20 mA unit, and 27648 is what the SM331 reports when the input is maxed out. Either the tank really is overflowing, or something in that loop is lying. It was the loop. It usually is. I've replaced more SM331s than I can count. I've also watched perfectly good modules get condemned because a 2-wire transmitter got wired into a slot set up for 4-wire, or a range card went back in backwards after a panel cleaning. Nine times out of ten it's not the module. It's the stuff hanging off the terminals. This article is the order I check things in, ranked by how often I actually see each fault in the field. Work the list top to bottom before you order a spare. You'd think the module is the problem. Most nights, it isn't.   What the SM331 Actually Is   The SM331 is the analog input card for the S7-300 family. It takes the 4-20 mA, 0-20 mA, or voltage signal from a field transmitter and turns it into a number the CPU can use. That number is a raw integer between 0 and 27648 for unipolar ranges, or between -27648 and +27648 for bipolar ranges. The CPU then scales that raw value into engineering units: percent, bar, or degrees Celsius. Whatever the process needs. The whole family shares a few traits. They mount on the same rail. They use the same backplane bus. They all answer to the same diagnostic system. The differences are in the channel count, the resolution, the input ranges, and how well the channels are isolated from each other. One thing I tell every apprentice: an SM331 is a dumb, honest device. It does not invent readings. If it reports 27648, something drove the input there. If it reports zero, the loop is open or dead. The card is a voltmeter with a serial number. Treat it that way and troubleshooting gets a lot simpler.   SM331 Models You'll Meet in the Field   Not all SM331s are the same. The order number tells you almost everything. These are the ones I actually see in plants, with what they're good for. Order number | Channels | Resolution | Input ranges | Typical use 6ES7331-7KF02-0AB0 | 8 AI | 12-bit | 0-20 mA, 4-20 mA, ±10 V | The workhorse. Process signals, transmitters, drive feedback 6ES7331-7KB02-0AB0 | 2 AI | 12-bit | 0-20 mA, 4-20 mA, ±10 V | Small panels, a couple of signals, retrofits 6ES7331-7NF10-0AB0 | 8 AI | 15-bit | 0-20 mA, 4-20 mA, ±10 V | High resolution, precision weighing, fast loops 6ES7331-7NF00-0AB0 | 8 AI | 15-bit | 0-20 mA, 4-20 mA, ±10 V | Older high-res card, same job as the 7NF10 6ES7331-1KF02-0AB0 | 8 AI | 13-bit | 0-10 V, ±10 V, 0-20 mA | Voltage-heavy panels. No isolation between channels 6ES7331-7PF11-0AB0 | 8 AI | 16-bit | RTD, thermocouple | Temperature. Pt100, type J and K A few notes from the field. The 7KF02 is the one you'll pull out of most racks. It's cheap, it's everywhere, and the range card lets one card handle voltage, current, and on some positions even Pt100 and thermocouples. That flexibility is why it survived so long. The 1KF02 has no isolation between channels. Every channel shares the same reference. A ground fault in one loop drags the whole card. I've seen one bad field cable take down all eight channels at once, and the maintenance crew replaced two perfectly good cards before somebody checked the cable. The 7NF10 uses a 40-pin front connector. The 7KF02 and the 1KF02 use 20-pin. When you buy a replacement, match the connector, or you'll be hunting for the right cable at 2am.   The Fault List, Ranked by How Often I See It   1. Wiring and Polarity   This is the big one. I'd say half of my analog calls end with a screwdriver fix, not a parts order. The most common mistake is reversed polarity on the channel terminals. M+ and M- swapped. An instrument tech re-terminates a pressure transmitter after a calibration, gets the pair crossed, and the reading dies. The operator swears the transmitter is dead. The transmitter is fine. The two little letters on the terminal block are the whole story. Current inputs need a return path. If the negative side of the loop is floating, you get garbage. Not zero, not pegged. Garbage. Values that wander around like a drunk man. I've also seen a terminal that looked tight but had a strand of wire hanging by a thread. The reading dropped every time the machine vibrated. You'd think it was a loose sensor. It was a loose screw. Checks: · Are the terminal screws actually tight? Pull on each wire, not gently. · Is M+ on the module going to the plus side of the signal? Is M- going to the minus? · Does every current channel have a complete return path? · Any corrosion, green fuzz, or discolored terminals in wet areas? Fix: re-terminate with ferrules, replace damaged terminal blocks, and label the pair. A label costs ten seconds and saves an hour.   2. Two-Wire vs Four-Wire Transmitters   This one sends good modules to the scrap bin. A 2-wire transmitter is powered by the loop itself. The module has to be configured for 2-wire operation so it feeds loop power out of the channel. A 4-wire transmitter runs on its own supply. Its output is just a signal, and the module only measures it. Wire a 2-wire transmitter into a slot configured for 4-wire and there is no loop power. The card reads zero. Everybody blames the card. I found a brand-new pressure transmitter like that once, installed by a contractor, dead on arrival according to the foreman. It took me two minutes with a multimeter to find the loop had no voltage on it. The card never had a chance. The reverse is worse. Wire a 4-wire transmitter into a slot configured for 2-wire and the module tries to drive loop current into an output that can't sink it. The reading pegs at 27648 and the transmitter output stage gets hot and unhappy. That's the "tank is full" call at 3am, sometimes with a genuinely full tank because the valve closed on a false reading. Checks: · How many wires go to the transmitter? Two means 2-wire. Four means it has its own power pair. · What does the HW Config entry say for that channel group? · What position is the range card in? Fix: set the range card and the HW Config to match the transmitter type, and land the loop supply where it belongs.   3. Raw Value Stuck at 27648 or 0   The classic. A raw value pinned at 27648 means the input is being driven to maximum. A raw value pinned at 0 means the loop is open, the sensor is dead, or the supply is missing. Both look identical on the HMI: a bad reading. Both have completely different causes. Pegged at 27648, in order of likelihood: the sensor is shorted or pegged, the loop current really is above 20 mA, the transmitter output is saturated, or the range is set wrong. I had a tank level that read full for a week. The operator wrote it off as a faulty card. The cable had been pinched under a cable tray during a roof job, shorting the pair together. The transmitter was pushing its maximum against a shorted loop. The card was reporting the truth. Stuck at 0: an open loop, a dead transmitter, a blown fuse on the 24V loop supply, or a wire break with monitoring turned off. And here's a subtle one: if the channel is configured for 0-20 mA but the transmitter is 4-20 mA, the card reads about 20% of scale when the tank is empty. Not zero. Twenty percent. Operators call that "leaking" and it's a config problem, not a hardware problem. Checks: · Put a mA meter in series with the loop. What does the current actually read? · Measure voltage across the transmitter terminals. Is it getting what it needs? · Check the 24V rail and the loop fuse. Fuses die at 3am more than any component. Fix: replace the fuse, repair the cable, or replace the sensor. Then inject 12 mA with a loop calibrator. If the card reads mid-scale, the card was never the problem.   4. Channel Group Isolation Faults   The 7KF02 isolates its channels in groups of two. Channels 0 and 1 share a group. So do 2 and 3, 4 and 5, 6 and 7. When one channel in a group takes a hit, its partner rides along. I've seen a surge take out the input protection on channel 0, and channel 1 read nonsense for a month while everybody blamed the transmitter on channel 1. The group wiring also shares the reference. A shorted field cable on one channel in the group can pull the group's reference and drag the neighbor's reading. Same group, same fate. Checks: · Move the suspect signal to a channel in a different group. If it reads fine there, the group is damaged, not the whole card. · Check both channels in the group. If they both misbehave, suspect the group. · Look at the field cable on both channels, not only the one that's alarming. Fix: repair the faulted field path. If the input stage of that group is genuinely blown, the card has to go. You can't bypass a dead group.   5. Wrong Range Module or Wrong Setting   The 7KF02 has a range card, a little board you slide into the front of the module. It sets the measurement range for each channel group. It can go in backwards. It can go into the wrong slot. I watched a panel cleaning crew pull one, wipe the contacts, and put it back rotated 180 degrees. Half the channels read nonsense after that. Nobody touched the program. Nobody touched the wiring. A $5 piece of plastic was the whole fault. The range card position and the HW Config entry have to agree. If the card says 4-20 mA but HW Config says 0-10 V, the readings will be wrong in a way that looks like a sensor problem. And the order number and hardware version in HW Config have to match the actual module, or the CPU flags the slot. Checks: · Pull the range card. Is it the right way around? Is it in the right position? · Does HW Config show the same range for that group? · Does the order number in HW Config match the module in the rack? Fix: reinsert the card correctly, correct the HW Config entry, and download. Reboot the rack if the CPU is grumpy about it.   6. Grounding and Common-Mode Voltage   The 7KF02 only separates its channel groups by about two volts. That is not real isolation. It's a token separation. If the transmitter and the PLC sit on different ground potentials, the difference lands right on the input. Readings drift. They jump. Sometimes they peg. I had a compressor skid built in the States, running 120V/60Hz, sitting next to a 230V/50Hz plant panel. The analog signal drifted all day long. The grounds disagreed by a couple of volts and the 7KF02 had no headroom for it. The fix was a single-point ground and a shield grounded at one end. The 15-bit 7NF modules handle this kind of thing better, but you can't always pick your hardware. Checks: · Measure the voltage between the transmitter negative and the module M- terminal. More than a volt or two is a common-mode problem. · Is the shield grounded at both ends? That's a ground loop with a hum. · Are the signal cables sharing a tray with motor leads or VFD cables? Fix: single-point grounding, one end of the shield grounded and the other taped, and in stubborn cases an isolator between the transmitter and the card. It costs less than a new module and it fixes the root cause.   7. Addressing and Slot Configuration   The module is in slot 4 and the config says slot 5. Or the order number in HW Config doesn't match the card that's actually installed. The CPU either faults the slot or the values never update. The HMI shows stale numbers and the operators think the process is frozen. I've also been handed a "new" module from stores that was an older hardware version than what HW Config expected. The CPU refused to accept it. The fix was matching the version in the config to the card in the rack, or finding the right card. Check the input word addresses too. An 8-channel card takes eight words, and if two cards overlap on addresses, you get readings that fight each other. Checks: · Open Module Information in HW Config. Does the card report the order number and version you expect? · Is the module in the slot the config says it's in? · Do the input word addresses overlap with another card? Fix: correct the config, download, and confirm the addresses. Then verify the live value in a VAT table.   8. The Module Is Actually Dead   Last on the list, and it should be. Real hardware failure happens. A surge takes out an input stage. A shorted transmitter pumps 24V into an input that was only rated for milliamps. Lightning lands on a fence line a hundred meters away and the whole rack flinches. Sometimes a card just dies of old age. The signs are honest: SF LED steady on, Module Information showing an internal fault, no channel responding even with a calibrator directly on the terminals, and the fault follows the card when you move it to another slot. If you've done steps 1 through 7 and the card still won't behave, it's the card. Checks: · Swap test with a known-good card. Fault follows the card? It's the card. · Smell the module. Burnt electronics have a distinctive smell. So does a blown input protection stage. · Look for visible damage on the input circuitry. Fix: replace it. Match the order number exactly and check the hardware version against your HW Config entry. A used 6ES7331-7KF02-0AB0 from a reputable supplier is fine. Just confirm the version and that the range card comes with it. Front connector type matters too. If you're shopping, we carry Siemens PLC spare parts and general PLC spare parts that cover the common SM331 versions, new and used. New modules carry CE and UL markings. Used ones from the EU or the States are fine as long as the order number and version match.   Diagnostics: What the Card Is Telling You   The SF LED   The SF LED is the module's whole vocabulary. Learn it and you skip half the guesswork. LED state | Meaning | What to do SF off | No fault reported by the card | Trust it, but still check the field wiring SF flashing | Channel fault: wire break, overrange, underrange | Read the diagnostics, find the channel SF steady on | Parameter assignment error or internal fault | Check HW Config, range card, and module version   Reading Module Information   In HW Config, double-click the module and open Module Information. The Diagnostics tab is where the card tells the truth. It names the channel, the fault type, and whether it's a wire break, an underrange, or an overrange. It also shows internal faults that the LEDs can't express. If you enable the diagnostic interrupt in the module parameters, the CPU gets notified on every fault. That's where the trap is. If the interrupt is enabled and OB82 is not loaded in the program, the CPU goes to STOP the first time a channel faults. I've answered that call at 3am. Someone enabled diagnostics for a good reason and forgot the OB. The whole line stopped because one spare channel had a loose wire.   Watching the Raw Value   Open a VAT table and enter the input word address. For an 8-channel card, that's eight words. Watch the value while you inject a known signal at the field terminals. If the raw value follows the signal, the card and the config are fine. If the raw value ignores the signal, work back toward the field, terminal by terminal.   Wire Break Monitoring   Wire break monitoring is parameterizable on the 4-20 mA and 1-5 V ranges. When it's on, an open loop reads 32767 and the SF LED flashes with a wire break diagnostic. When it's off, an open loop reads 0 and looks exactly like a dead sensor. Know which setting you have, or you'll chase a ghost for an hour.   Raw Value to Engineering Units   Here's the map I keep in my head. Raw values are integers, and the scale is fixed. Raw value | Percent of range | 4-20 mA signal | What it usually means 32767 | overrange | above 20 mA | Wire break with monitoring on, or overrange 27648 | 100% | 20 mA | Input maxed. Sensor pegged, short, or wrong range 20736 | 75% | 16 mA | Normal reading at 75% 13824 | 50% | 12 mA | Mid-scale. Normal 6912 | 25% | 8 mA | Normal reading at 25% 0 | 0% | 4 mA | Zero signal, open loop, or dead transmitter -32768 | underrange | below 4 mA | Underrange with monitoring on One thing that trips people up: on the 4-20 mA range, the module maps 4 mA to raw 0 and 20 mA to raw 27648. The dead zero of the 4-20 range is already removed inside the card. So when you scale, the low limit is the engineering value at 4 mA, not the value at 0 mA. Get that backwards and your tank reads full when it's empty.   Scaling with FC105   FC105 is the SCALE function in the standard library. IN is the raw integer from the input word. HI_LIM and LO_LIM are your engineering range. BIPOLAR tells the block whether the raw range is -27648 to +27648 or 0 to 27648. OUT is the real result. RET_VAL is the status word, and you should check it. If it's not zero, the conversion has a problem. Most scaling bugs I see are a wrong BIPOLAR flag or swapped limits. Both produce readings that are wrong in a very consistent way, which makes operators trust them more, not less. A reading that's always 10% high is a scaling bug until proven otherwise.   Wiring It Right   2-Wire Hookup   The module feeds the loop power. L+ lands on the module's L+ terminal. The loop current comes out of the channel's M+ terminal, through the transmitter, and back into M-. No external supply needed. If the module isn't configured for 2-wire, there's no loop power and the reading sits at zero, waiting for you to blame the card.   4-Wire Hookup   The transmitter runs on its own supply. The signal pair goes to M+ and M-. Do not feed loop power from the module into a 4-wire transmitter output. The card pegs and the transmitter output stage gets hot. I've replaced two transmitters before I found a contractor doing exactly that.   Shielding   Twisted shielded pair for 4-20 mA, always. Ground the shield at one end only. Pick the panel end or the field end and stay consistent. Both ends grounded is a ground loop with a nice hum. Keep signal cables out of the tray with the motor leads and the VFD cables. I've seen a VFD turn a clean 4-20 mA signal into noise you could hear on a radio. The card reads it as a signal. The process reads it as chaos.   Fixes, in Order   · Terminals: tight, clean, ferruled, with M+ and M- correct. · Loop: meter in series, confirm the current matches the process. · Supply: 24V at the loop, fuse good, polarity right. · Config: range card position, HW Config order number, hardware version, measurement range. · Isolation: move the signal to another channel group, inject with a calibrator. · Then the card. Do it in that order and you'll replace a lot fewer modules. I keep a loop calibrator in my truck. It has paid for itself a hundred times over. A $200 tool that proves the card is fine is cheaper than a $400 module that isn't the problem.   When to Replace the Module   Replace the module when the SF LED is steady on with an internal fault in diagnostics. Replace it when no channel responds, even with a calibrator directly on the terminals. Replace it when the fault follows the card to another slot. Replace it when you can smell burnt components. Surge damage on an input stage is not repairable on the floor. Don't waste a shift on it. When you buy the replacement, match the order number exactly. Check the hardware version against your HW Config entry. Confirm the front connector type. Confirm the range card is included. A module without its range card is a paperweight on the 7KF02. We stock Siemens PLC spare parts with the versions listed, so you can match before you order instead of after.   Maintenance Checklist   · Every shutdown: check terminals for tightness and corrosion. · Pull the range card, inspect the contacts, reinsert it correctly. · Verify shield grounds are single-ended. · Log raw values for healthy channels so you know what normal looks like. · Check the 24V rail and the loop fuses.
  • Allen-Bradley 1771 I/O Modules: What's Obsolete, What's Still Supported, What Replaces It
    Allen-Bradley 1771 I/O Modules: What's Obsolete, What's Still Supported, What Replaces It Aug 19, 2026
      The 1771 I/O family is the classic Allen-Bradley chassis I/O for the PLC-5 era (1785 processors) and 1771 racks. Rockwell introduced it in the 1980s. It ran the bulk of North American and Middle East process and machine control for three decades. It is not compatible with SLC 500 (that is the 1746 family). It is not directly compatible with ControlLogix (1756). Moving to either platform requires a migration, not a swap. As of 2026, most of the 1771 line sits in Active Mature or Life Cycle status. Many modules are End of Life. New production is limited to a shrinking list of catalog numbers. The installed base keeps running on surplus, remanufactured, and aftermarket stock. Plants in the Middle East, Americas, and Europe still operate thousands of 1771 racks. This reference lists the catalog numbers, typical lifecycle status, and the practical replacement path for each module family. Rockwell uses four lifecycle statuses: Status | Meaning Active | In production, fully supported Active Mature | In production, support ongoing, no new features Life Cycle | Production limited or by order, support phased End of Life | Discontinued, no repair, no support Statuses shift over time. The tables below show typical status as of 2026. Always verify each catalog number on the Rockwell Product Lifecycle page before you commit a bill of materials.   1. Racks and Chassis   The 1771 rack is a backplane chassis. The processor, power supply, and I/O modules all plug into the same backplane. Rack size determines how many modules the system can hold. Catalog | Slots | Notes 1771-A1B | 4 | Smallest chassis, used for small remote I/O drops 1771-A2B | 8 | Most common size 1771-A3B | 12 | Medium plants and machine lines 1771-A4B | 16 | Largest, for dense I/O panels Slot count includes the processor slot. A PLC-5/15 in an 8-slot rack leaves seven slots for I/O. Racks are passive hardware. They rarely fail. The backplane connectors wear with repeated module insertion, so handle card removal carefully. Rack status: Active Mature. Chassis production continues in low volume. The 1771-A2B remains the most requested rack for spare and expansion use.   2. Power Supplies   The 1771 power supply mounts on the left side of the rack. It converts line power to the 5V DC and 24V DC buses the backplane uses. Catalog | Output | Notes 1771-P7 | 12A at 5V DC, plus 24V DC | Standard supply for most racks 1771-P4S | 4A at 5V DC | Small systems 1771-P6S | 6A at 5V DC | Medium systems Power supply sizing: sum the current draw of every module in the rack, then add 20% headroom. Under-sized supplies cause brownouts and intermittent faults that look like processor problems. Input voltage versions exist for 120V/60Hz (Americas) and 230V/50Hz (Middle East, Europe) mains. Check the nameplate before ordering. A 120V unit on a 230V line fails immediately. Capacitors age. A 1771-P7 from 1995 delivers less current than it did new. Remanufactured supplies get recapped and load-tested. That is the recommended buy for critical spares.   3. Discrete Input Modules   Discrete inputs read dry contacts, pushbuttons, limit switches, and proximity sensors. The 1771 family covers DC, AC, and TTL signal levels. Catalog | Points | Signal | Notes 1771-IBD | 16 | 24V DC | Workhorse module, Active Mature 1771-IAD | 8 | 120V AC | Americas plants 1771-IBN | 16 | 24V DC, isolated | Per-point isolation 1771-IGD | 8 | 5V TTL | Logic-level interfaces 1771-IAC | 8 | 120V AC, isolated | Isolated AC inputs 1771-IA | 8 | 120V AC | Original AC input 1771-IB | 8 | 24V DC | Original DC input The 1771-IBD is the most common 24V DC input module in the entire family. It is still produced and still supported. Surplus demand stays high because it is the default choice for new drops on existing PLC-5 systems. The 1771-IAD and 1771-IAC handle 120V AC circuits directly. This suits the Americas, where 120V/60Hz control circuits are standard. In 230V/50Hz markets, engineers either use 24V DC sensors or step down through control transformers. The 1771-IGD is rare. It reads 5V TTL logic levels from old test equipment and specialty devices. The 1771-IB is the 8-point predecessor of the IBD. Both fit the same slot, but new designs should use the IBD if panel space allows. All input modules report field status through indicator LEDs. Sinking and sourcing versions exist across the catalog; match the module to the sensor common. Mixed sinking and sourcing on one module is not possible, so check the wiring diagram before ordering replacements.   4. Discrete Output Modules   Discrete outputs drive contactors, solenoid valves, pilot lights, and motor starters. Catalog | Points | Signal | Notes 1771-OBD | 16 | 24V DC | Workhorse module, Active Mature 1771-OAD | 8 | 120V AC | Americas plants 1771-OBN | 16 | 24V DC, isolated | Per-point isolation 1771-ODD | 8 | 24V DC, isolated | Isolated DC output 1771-OD16 | 16 | 24V DC | High-density DC output 1771-OA | 8 | 120V AC | Original AC output 1771-OB | 8 | 24V DC | Original DC output The 1771-OBD is the family standard for 24V DC outputs. It is Active Mature and remains in production. The 1771-OAD and 1771-OA switch 120V AC loads directly. Verify the load current per point and the total per module; AC solenoids draw inrush current several times the holding current. The 1771-OD16 gives 16 points in one slot for dense panels. The isolated versions, 1771-OBN and 1771-ODD, keep each point electrically separate. Use them when outputs drive loads from different power sources or when a single shorted load must not take down the group. Output modules fail more often than input modules. They switch real current and absorb inductive kickback from coils. Fused output modules protect the card but not the triac or transistor. A blown fuse on a 1771-OBD is a five-minute fix; a blown output driver is a module replacement.   5. Analog Modules   Analog modules handle 4-20 mA, 0-10V, thermocouple, RTD, and mV signals. These are the modules most affected by obsolescence. Catalog | Points | Function | Notes 1771-IFE | 4 | Analog input | Revisions /A, /B, /C 1771-OFE1 | 4 | Analog output | Isolated outputs 1771-OFE2 | 4 | Analog output | 4-20 mA focus 1771-OFE3 | 4 | Analog output | Voltage focus 1771-IXHR | 8 | Thermocouple/mV input | High-resolution 1771-IR | 4 | RTD input | Resistance temperature 1771-NIV | 8 | Isolated mV input | 1771-NIS | 4 | Isolated analog input | 1771-NOC | 4 | Isolated analog output | The 1771-IFE is the most common analog input module in the 1771 family. It reads four channels of 4-20 mA or 0-10V. Revisions /A, /B, and /C exist. The /C revision adds features and is the preferred spare. The 1771-OFE1, OFE2, and OFE3 cover analog output. The OFE2 is configured for current loops, the OFE3 for voltage. The 1771-IXHR reads eight thermocouple or mV channels with cold-junction compensation. Type J, K, T, E thermocouples are supported. The 1771-IR reads RTDs. Both the IXHR and the IR are End of Life. Thermocouple and RTD inputs on existing systems should migrate to the 1756-IT6 or 1756-IR6I when the rack converts. The 1771-N series (NIV, NIS, NOC) is isolated analog I/O for noisy environments. Production stopped years ago. These modules now come from surplus and remanufactured stock. Analog accuracy depends on the module revision. The 1771-IFE /A is 12-bit; later revisions improve linearity. Calibration drifts with age. A remanufactured analog module is recalibrated and certified. Budget for calibration whenever you buy used analog cards.   6. Specialty and Communication Modules   Specialty modules handle remote I/O, networks, and data transfer. They are the backbone of distributed 1771 systems. Catalog | Function | Notes 1771-ASB | Remote I/O adapter | Still widely stocked, Active Mature 1771-SDN | DeviceNet scanner | End of Life 1771-SCN | ControlNet scanner | Life Cycle 1771-DCM | Direct communication module | End of Life 1771-OWN | Word/byte transfer module | End of Life 1771-PM | PLC-2/3 processor adapter | End of Life The 1771-ASB turns a 1771 rack into a remote I/O drop. A PLC-5 or a 1756 bridge with a remote I/O port talks to it over twinaxial cable. It is the single most important module in distributed 1771 plants. It is Active Mature and still produced. It is also the most failure-prone item in the system, because it carries the communication traffic for the whole rack. One failed ASB takes down every module behind it. The 1771-SDN scanned DeviceNet devices from a PLC-5. DeviceNet itself is in decline, and the SDN is End of Life. The 1771-SCN did the same for ControlNet. The 1771-DCM connected a PLC-5 to another processor for peer-to-peer messaging. The 1771-OWN transferred blocks of data between processors. Both are long discontinued. The 1771-PM let PLC-2 and PLC-3 processors use 1771 I/O. It is obsolete; surviving units are collector items for legacy plants. Communication modules carry firmware. Verify the firmware revision matches the processor and network before installation. A mismatched ASB firmware revision is a common cause of remote rack faults that appear as wiring problems.   7. Lifecycle Status Overview   Typical status as of 2026. Verify on the Rockwell Product Lifecycle page before ordering. Catalog | Typical status | Notes 1771-A1B / A2B / A3B / A4B | Active Mature | Chassis remain in production 1771-P7 / P4S / P6S | Active Mature | Supplies still produced 1771-IBD | Active Mature | Still produced, high demand 1771-IAD | Life Cycle | Production limited 1771-IBN | Life Cycle | Production limited 1771-IGD | End of Life | Surplus only 1771-IAC | Life Cycle | 1771-IA / 1771-IB | End of Life | Surplus only 1771-OBD | Active Mature | Still produced, high demand 1771-OAD | Life Cycle | 1771-OBN | Life Cycle | 1771-ODD | End of Life | 1771-OD16 | Life Cycle | 1771-OA / 1771-OB | End of Life | Surplus only 1771-IFE | Life Cycle | Revisions /A /B /C 1771-OFE1 / OFE2 / OFE3 | Life Cycle | 1771-IXHR | End of Life | Surplus only 1771-IR | End of Life | Surplus only 1771-NIV / NIS / NOC | End of Life | Surplus only 1771-ASB | Active Mature | Still produced, widely stocked 1771-SDN | End of Life | 1771-SCN | Life Cycle | 1771-DCM | End of Life | 1771-OWN | End of Life | 1771-PM | End of Life | The pattern is clear. Discrete DC modules (IBD, OBD) and the ASB stay in production. AC modules and analog modules are sliding to Life Cycle and End of Life. Specialty and data-transfer modules are mostly gone. Buyers increasingly rely on surplus and remanufactured stock for anything outside the Active Mature list.   8. Replacement Paths   Three paths exist for 1771 systems. Path one: keep the PLC-5 and buy remanufactured 1771 modules. This is the cheapest path for existing systems. A remanufactured 1771-IBD costs a fraction of a full migration and installs in minutes. No logic changes, no rewiring, no downtime beyond the swap. This path works until the processor itself fails or the plant needs new functionality. Path two: replace the rack with ControlLogix. The standard migration maps 1771 modules to 1756 equivalents: 1771 module | 1756 replacement | Notes 1771-IBD | 1756-IB16 | 16-point 24V DC input 1771-OBD | 1756-OB16D | 16-point 24V DC output 1771-IFE | 1756-IF8 | 8-channel analog input 1771-OFE1/2/3 | 1756-OF8 | 8-channel analog output 1771-ASB (remote rack) | 1756 rack + 1756-EN2T | EtherNet/IP The 1756-EN2T puts the new rack on EtherNet/IP. Field wiring does not transfer. Terminal blocks and marshalling need review. The 1771 modules bolt into a 1771 rack; the 1756 modules snap into a 1756 chassis. Panel layouts change. The migration is a project, not a swap. PLC-5 ladder logic converts to ControlLogix tag-based logic with Rockwell conversion tools, then needs manual review. Schedule the cutover for a shutdown window. Path three: keep the 1771 racks and bridge them to a modern controller. A 1771 rack with a 1771-ASB runs as a remote I/O drop. A ControlLogix chassis with a remote I/O bridge module (the 1756-era bridge on the remote I/O network) or a 1785-series bridge talks to it. This preserves the field wiring and the 1771 modules while moving control to a current processor. It is a middle path for plants that cannot rewire but cannot keep the PLC-5. Voltage is a migration input, not an output. 120V/60Hz plants keep their control transformers; 230V/50Hz plants keep theirs. The 1756 DC modules still need 24V DC field power, so the panel power distribution usually survives the migration.   9. Spare-Stocking Advice   Plants running PLC-5 and 1771 hardware should hold a defined spare kit. These five items cover most failures: Catalog | Why stock it 1771-IBD | Most common input, high failure exposure 1771-OBD | Most common output, fails from load switching 1771-IFE | Analog input, End of Life pressure 1771-ASB | Single point of failure for the whole remote rack 1771-P7 | Aging capacitors, every rack needs one Stock depth: one spare per ten installed for IBD and OBD. One ASB per five remote racks. One P7 per site minimum, two for multi-rack sites. One IFE per site. Add one 1771-IAD or 1771-OAD per site if the plant runs 120V AC I/O. Rotate spares through the maintenance cycle so stored modules stay verified. The 1771-ASB deserves special attention. It is the communication heart of every remote drop. It handles the traffic for all modules behind it, runs hot, and sits on a network that takes lightning hits in many regions. A single ASB failure stops a whole machine or process area. It is Active Mature today, but that status will not last forever. Plants should secure ASB spares now, while production and surplus both exist. Store modules in anti-static bags in a dry cabinet. Electrostatic damage is invisible and kills modules at random intervals after installation. Label each spare with its test date and the system it belongs to.   10. FAQ   Can 1771 modules work in a ControlLogix rack? No. The 1771 family uses the 1771 backplane; ControlLogix uses the 1756 backplane. The cards are physically and electrically different. There is no adapter that mounts a 1771 card in a 1756 chassis. Migration to 1756-IB16, 1756-OB16D, 1756-IF8, and 1756-OF8 is the standard path. Is the 1771-ASB still made? Yes. As of 2026 the 1771-ASB is Active Mature and still in production. It remains the most stocked 1771 communication module. That status can change, so plants that depend on remote 1771 racks should buy spares while supply is available. What is the difference between 1771 and 1746? 1771 is the chassis I/O for PLC-5 processors and 1771 racks. 1746 is the I/O for SLC 500 processors. Different backplanes, different mounting, different wiring. A 1771 module cannot go into an SLC 500 chassis and a 1746 module cannot go into a 1771 rack. They are separate product lines that share the Allen-Bradley brand. How do I check the lifecycle status of a 1771 module? Open the Rockwell Product Lifecycle page and search the catalog number. The page shows the current status: Active, Active Mature, Life Cycle, or End of Life, plus the last order date and last repair date. Statuses change without notice, so check before every significant purchase. What replaces the 1771-IFE? The 1756-IF8 is the standard ControlLogix replacement. It gives eight analog input channels versus four on the IFE. For plants staying on PLC-5, a remanufactured 1771-IFE is the practical replacement. The /C revision is preferred for spares. Is 1771 hardware worth repairing? For modules in production, Rockwell repair is available. For End of Life modules, Rockwell repair stops. Remanufactured modules from specialized suppliers cover the gap. A remanufactured 1771-IFE costs less than a migration and restores the system to spec. For the ASB, repair or replacement is almost always cheaper than the downtime it prevents. Can I mix 120V and 24V modules in one rack? Yes. Racks mix AC and DC modules freely. The backplane supplies logic power; field power comes from the module terminals. Keep AC and DC field wiring in separate ducts and observe the isolation ratings in the installation manual. How long will 1771 spare parts be available? Surplus stock will last years, but specific catalog numbers dry up at different rates. The 1771-IGD and 1771-PM are already scarce. The 1771-IBD and 1771-ASB remain available. Buy the End of Life items your plant uses now, while they are still findable. See the Allen-Bradley spare parts section for current availability.   11. Maintenance Checklist   Run this list on every scheduled shutdown. · Inspect the 1771-P7: check output voltage under load, look for bulged capacitors, listen for hum. · Clean rack backplane contacts with the proper contact cleaner. Do not use abrasive tools. · Verify the 1771-ASB status LEDs: run, fault, and communication indicators in the correct state. · Check remote rack communication counts in the processor. Rising error counts mean cable or ASB trouble. · Tighten field wiring on 1771-OBD and 1771-OAD outputs. Loose terminals cause heat and intermittent trips. · Replace blown module fuses with the exact rating. Never bridge a fuse. · Test spare modules on a bench rack before they go into storage. · Record module serial numbers and firmware revisions in the maintenance log. · Verify the 120V/60Hz or 230V/50Hz supply matches the module nameplate before re-energizing. · Rotate stocked spares through service so nothing sits dead for years.   12. Where to Buy 1771 Modules   The 1771 market in 2026 is a surplus and remanufactured market. Rockwell still makes the core items (IBD, OBD, ASB, P7, racks). Everything else comes from stock that is shrinking. Buy from suppliers that test and certify modules, publish the revision, and back the sale with a warranty. A used module without a test report is a gamble; a remanufactured module with a load test is a spare part. Plants in the Middle East, Americas, and Europe all face the same problem: the PLC-5 installed base is large, and the production line is closing down around it. The practical answer for most sites is a defined spare kit plus a migration plan on the calendar. Stock the PLC spare parts that keep production running today, and sequence the ControlLogix migration for the next major shutdown. Between those two actions, the 1771 family keeps earning its keep. For a full catalog of 1771 modules, including End of Life and remanufactured items, browse the Allen-Bradley spare parts listing. Compare revisions, check test certifications, and confirm compatibility with your rack before ordering. URL Slug: allen-bradley-1771-io-reference -------------------------------------------------------------------------------------------- 🏢 About TZ Tech   TZ Tech is a leading supplier of industrial automation, electrical, instrumentation, and telecommunications components. We specialize in sourcing ready-to-ship distributor stock, allowing us to offer highly competitive pricing and short lead times. Thanks to our extensive inventory, we can even source rare and discontinued parts that are hard to find elsewhere.   🛡️ Our Quality Commitment   We understand that quality is your top priority. Every component undergoes a strict screening and inspection process so you can buy with absolute confidence. For legacy or discontinued parts, we believe in complete transparency and will always provide an honest, accurate report on the product's condition. Plus, all brand-new parts come backed by a full 1-year warranty.   ✉️ Get in Touch     Have a project or a part you need? Send us your inquiry today! Our team is dedicated to providing a fast response within 6 hours (excluding weekends)
  • Siemens S7-300/400 Memory Concept Explained: Load Memory, Work Memory, and Retentive Data
    Siemens S7-300/400 Memory Concept Explained: Load Memory, Work Memory, and Retentive Data Aug 18, 2026
      The memory architecture of the Siemens S7-300 and S7-400 programmable logic controllers is organized into three distinct layers: load memory, work memory, and system memory. Every memory-related fault, whether a CPU that refuses to leave STOP, a program that disappears after a power outage, or a battery alarm on an S7-400, can be traced back to one of these layers and to the rules that govern how data moves between them. This article defines each layer precisely, explains how the two controller families implement them differently, provides the concrete parameters of representative CPUs, and closes with failure diagnostics, maintenance practice, and the questions that engineers most frequently search for. The material assumes a working knowledge of STEP 7 and of the general structure of a PLC program, but no prior specialization in memory management.   1. The Three Memory Layers Defined   Load memory holds the complete user program, including code blocks (OB, FB, FC), data blocks (DB), symbols, comments, and technology data. It is the non-volatile, or battery-backed, repository from which the CPU restores its working copy at every startup. Work memory is the integrated RAM area in which the CPU actually executes the program; it contains only the code and data required for execution. System memory is the set of address areas that the instruction set operates on: process inputs (I), process outputs (Q), bit memory (M), timers (T), counters (C), local data (L), and data blocks (DB). The distinction between the three layers is not academic. A block that exists only in load memory is not executed. A block that exists only in work memory is executed but cannot be uploaded to a programming device. A retentive flag that is not backed up in load memory is reset at every restart. Each layer has its own volatility, its own capacity limits, and its own failure behavior, as summarized in Table 1. Table 1: The three memory layers at a glance Layer | Contents | S7-300 implementation | S7-400 implementation | Behavior on power loss Load memory | Full program: blocks, symbols, comments, technology data | Micro Memory Card (MMC) | RAM backed by battery; optional Flash EPROM card | S7-300: retained on the MMC. S7-400: retained in RAM while the battery is healthy; otherwise restored from EPROM or lost Work memory | Executable code and data only | Integrated RAM | Integrated RAM | Contents lost; rebuilt from load memory at the next startup System memory | I, Q, M, T, C, L, DB addressing | Internal CPU circuitry | Internal CPU circuitry | Non-retentive parts reset; retentive parts restored from load memory A second axis runs through the architecture: the difference between volatile and non-volatile storage. On the S7-300, non-volatility is achieved with flash memory (the MMC) and no battery is required. On the S7-400, non-volatility is achieved with a battery-backed RAM and, optionally, with a Flash EPROM card. This single difference explains most of the practical divergence between the two families, from the battery-low LED on the S7-400 to the fact that an S7-300 CPU without an MMC will not start at all.   2. Load Memory: Where the Program Is Stored   Load memory is the highest-capacity layer. It stores the program in its complete form, including data that the CPU never executes directly: block comments, symbol information, and technology objects. When a project is compiled and downloaded, every block is transferred into load memory first. The CPU then copies the executable portions into work memory. Because load memory holds the full project, it is also the layer that an upload reads when you transfer a program from a CPU back to a programming device.   2.1 Load memory on the S7-300: the Micro Memory Card   All current S7-300 CPUs store load memory on a Micro Memory Card (MMC). The MMC is a plug-in flash card that fits into a slot on the front of the CPU. It requires no battery, which is why an S7-300 plant can sit without power for years and still start with its program intact. Representative order numbers for the MMC family are 6ES7953-8LL31-0AA0 (512 KB) and 6ES7953-8LM31-0AA0 (2 MB); the same family extends from 64 KB up to 8 MB, and the maximum acceptable size depends on the CPU. The MMC is not an optional accessory. A modern S7-300 CPU without an MMC cannot run a program: the CPU goes to STOP and requests a memory card in the diagnostics buffer. This is a deliberate design decision. Because the MMC is the only non-volatile storage in the system, it holds not only the program but also the retentive data and, on some CPUs, the firmware. If the card is missing, the CPU has neither a program to execute nor a place to store retentive state. The MMC carries a small write-protection slider on its housing. When the slider is in the locked position, the CPU rejects downloads with a message stating that the memory card is write-protected. The slider protects the card against accidental overwrite in the field, but it is a common cause of failed downloads after maintenance, so its position should be the first thing checked when a download is refused. If load memory is lost or empty: on the S7-300, an empty or missing MMC means the CPU stops and cannot start. On the S7-400, an empty RAM load memory with no EPROM card means the CPU starts into STOP with no user program; if an EPROM card is present, the CPU copies the program from the EPROM into RAM at startup and runs normally.   2.2 Load memory on the S7-400: battery-backed RAM and Flash EPROM   The S7-400 implements load memory in two stages. The primary stage is RAM integrated on the CPU module, which holds the working copy of the load memory. This RAM is kept alive by a backup battery, for example 6ES7971-0BA00, mounted in the power supply or in the CPU compartment. The secondary stage is a plug-in Flash EPROM card, for example 6ES7952-1KM00-0AA0, which provides non-volatile storage that survives even a complete loss of battery power. At power-up, the S7-400 behaves as follows. If the RAM load memory contains a program, the CPU copies it into work memory and starts. If the RAM is empty but a Flash EPROM card is inserted, the CPU copies the program from the EPROM into the RAM load memory and then into work memory. If both are empty, the CPU goes to STOP. This startup chain is the reason why a well-maintained S7-400 can recover from a battery failure without any intervention, provided the EPROM was kept up to date. If load memory is lost or empty: on the S7-400, loss of the RAM load memory occurs when the battery fails during a power outage and no EPROM card is fitted. The program is then gone and must be re-downloaded or restored from a backup file. This scenario, more than any other, justifies the habit of downloading to EPROM after every commissioning change.   3. Work Memory: The Execution Space   Work memory is the integrated RAM in which the CPU executes the program. It is divided internally into a code area and a data area. At download time, the CPU copies the executable blocks from load memory into work memory; at runtime, the CPU fetches instructions and data exclusively from work memory. Work memory is always volatile. On both families it is rebuilt from load memory at every power-on, so a program that "survives" a power cycle does so because load memory survived, not because work memory did. Work memory is the layer that determines whether a program fits. A large data block, a long OB, or a heavily nested FB can exhaust work memory even when the load memory still has free space. When this happens, the download is rejected with a message such as "No user memory available," and the remedy is either to reduce the program size or to move to a CPU with more work memory. Work memory cannot be expanded by adding cards; it is a fixed property of the CPU module itself. This is why the work memory figure in the CPU technical data is the single most important number to check when a project outgrows its controller. If work memory is lost or empty: the CPU stops or fails to start. Because work memory is rebuilt at every power-on, its loss is normally transient and invisible: the CPU simply reloads from load memory. The loss becomes permanent only when load memory is also lost, which is the S7-400 battery scenario described above.   4. System Memory and the Address Areas   System memory is the collective term for the addressable data areas that the instruction set operates on. These areas are implemented in the CPU's internal circuitry, not on any removable medium, and their sizes are fixed properties of each CPU model. Table 2 lists the areas and their roles. Table 2: System memory address areas Area | Symbol | Contents | Notes Process image of inputs | I | Input states copied from the I/O modules at the start of each OB 1 scan | Byte and bit addressing, for example I0.0 through I0.7 in input byte IB0; default range 128 bytes, configurable up to a CPU-specific maximum (2048 bytes on most S7-300 CPUs) Process image of outputs | Q | Output states written to the I/O modules at the end of each OB 1 scan | Byte and bit addressing, for example Q0.0 through Q0.7 in output byte QB0 Peripheral I/O | PI, PQ | Direct access to I/O modules that bypasses the process image | Used for high-speed or time-critical I/O; addressed as PIW/PQW words Bit memory | M | Flags for intermediate logic states | Byte and bit addressing, for example M0.0 through M0.7 in flag byte MB0; size depends on the CPU; on some CPUs the first 256 bytes are reserved for system data and cannot be used freely Data blocks | DB | Structured data storage for the user program | The Retain attribute controls whether DB contents survive a restart Timers | T | S5 timer functions | Number of timers depends on the CPU Counters | C | Counter functions | Number of counters depends on the CPU Local data | L | Temporary variables of the currently active OB, FB, or FC call | Stack-based; depth is limited per priority class   4.1 The process image   The I and Q areas are refreshed through the process image. At the start of the cyclic program, the CPU copies the states of the input modules into the I area; during the cycle, the program reads these consistent snapshots; at the end of the cycle, the CPU copies the Q area to the output modules. This mechanism guarantees that all program sections see the same input states within one scan. Direct peripheral access (PIW, PQW) bypasses the image and reads or writes the module directly, which is faster but not consistent within the scan. A process image that is too small for the installed I/O can be enlarged in the CPU properties in STEP 7, up to the CPU-specific maximum.   4.2 Bit memory M and the flag byte   Bit memory, historically called flags, is the scratchpad of the program. A single flag bit, for example M0.0, holds one Boolean state; eight consecutive bits form flag byte MB0, addressed as M0.0 through M0.7. Flag words (MW) and flag double words (MD) are formed by grouping bytes. The size of the M area differs per CPU: a CPU 314 provides 256 bytes, a CPU 315-2 DP provides 2048 bytes, and a CPU 319-3 PN/DP provides 8192 bytes. On several S7-300 CPUs, part of the M area, for example the first 256 bytes, is reserved for system data used by the operating system and by system functions; using these addresses in the user program can produce erratic behavior, so the technical data of the specific CPU must be consulted before the M area is allocated freely.   4.3 Timers, counters, and local data   Timers (T) and counters (C) are functional elements with an internal state: a timer stores the remaining time, a counter stores the count value. Their numbers are fixed per CPU, for example 256 timers and 256 counters on a CPU 314 and 2048 of each on a CPU 319-3 PN/DP. Local data (L) is the stack area that holds the temporary variables of the currently active call. Every time an FB or FC is called, the CPU reserves a slice of the local data stack for that block's temporaries; deep nesting or large temporary structures can exhaust the stack, which produces a programming error and, if unhandled, a STOP. On S7-300 CPUs the local data stack is typically 32 KB shared across the priority classes; on S7-400 CPUs the capacity is larger and, on newer models, allocated per priority class. If system memory is lost or reset: non-retentive I, Q, M, T, C, and L areas are initialized at every restart, and non-retain DBs are reset to their load values. Retentive areas are restored from load memory, which is the mechanism examined in the next sections.   5. The S7-300 in Practice: MMC, Retentive Data, and the Battery Question   The defining property of the S7-300 memory concept is the absence of a battery. The program lives on the MMC, work memory is reloaded from the MMC at every power-on, and retentive data is stored on the MMC as well. When the CPU detects a power-down, it saves the current values of the configured retentive areas to the MMC; at the next power-up, it restores them. This design has three practical consequences. First, the MMC is a wear item in a narrow sense. Flash memory has a finite erase/write endurance, and every power-down writes the retentive areas. Under normal cyclic operation this is not a concern, but programs that modify retentive data in fast cycles, or that use the system functions SFC 82 to SFC 84 to write data blocks on the MMC in a loop, shorten the card's life. The rated number of write cycles is given in the Siemens documentation for the card. Second, retentive configuration is explicit. In STEP 7, the CPU properties dialog (Hardware Configuration, Retentive Memory tab) defines how many bytes of M, how many timers, and how many counters are retentive. The default retentive flag range on most S7-300 CPUs is M 0.0 through M 15.7. Data blocks are made retentive individually by marking them with the Retain attribute in the block properties. Only the configured ranges survive a power cycle; everything else is initialized. Third, the download behavior is simple and uniform. A normal download in STEP 7 writes the block to the MMC (load memory) and copies it into work memory. There is no separate "download to RAM only" path on the S7-300: with an MMC fitted, every download is automatically non-volatile. The upload direction works the same way: an upload reads from the MMC. Replacement MMC cards in all capacities are listed in the Siemens PLC spare parts catalog, which matters for plants that must keep a programmed spare card on the shelf. The battery question, which dominates S7-400 discussions, simply does not arise on the S7-300. If an S7-300 CPU has no battery, the program cannot be lost to a battery failure. The realistic failure modes are a missing, full, write-protected, or defective MMC, and each of them is examined in Section 9.   6. The S7-400 in Practice: Batteries, EPROM, and the Startup Chain   The S7-400 memory concept is organized around battery-backed RAM, with the Flash EPROM as the safety net. The backup battery, for example 6ES7971-0BA00, maintains the RAM-based load memory and the retentive data while the controller is powered off. The CPU module also carries an integrated rechargeable buffer battery, which maintains the RAM for a limited time, on the order of tens of minutes when fully charged, during a main battery change. This buffer is the reason a battery can be swapped with the power off at all, but it must never be relied on for longer than the manual specifies. The Flash EPROM card, for example 6ES7952-1KM00-0AA0, is the non-volatile layer of the S7-400. It is not required for operation, but it is the difference between a recoverable and a catastrophic battery failure. The card family spans from 64 KB up to 64 MB, and the maximum size depends on the CPU. The startup chain described in Section 2.2 means that a CPU with a current EPROM card recovers automatically from a flat battery; a CPU without one starts into STOP and needs a re-download. Download behavior on the S7-400 has two levels, and confusing them is a common source of field problems: 1. A normal download writes the block to the RAM load memory and to work memory. The change is active immediately but is volatile: it survives a power cycle only while the battery keeps the RAM alive. 2. "Download to EPROM" (or "Copy RAM to ROM") writes the current load memory contents to the Flash EPROM card. The change then survives even a total battery loss. The classic S7-400 failure sequence is therefore: download a modification in the afternoon, never copy RAM to ROM, and find two weeks later, after a power outage with a flat battery, that the CPU restarts with the old program from the EPROM. The modification existed only in RAM and was lost. Keeping the EPROM current after every commissioning change is the single most effective memory-related maintenance rule for the S7-400. The S7-400 reports its battery state continuously. A battery-low condition lights the BATF LED on the front of the CPU or power supply and writes an entry to the diagnostics buffer. STEP 7 shows the detailed state in Hardware Diagnostics / Module Information on the Battery tab, which lists the battery status and, on many CPUs, the estimated remaining backup capacity. Backup batteries such as the 6ES7971-0BA00 are stocked in the PLC spare parts range precisely because they are a consumable with a service life measured in years, not decades.   7. Memory Sizing Reality per CPU   The practical question in every memory-related project discussion is the same: how much work memory and how much load memory does the CPU actually have? Table 3 gives representative figures for five widely installed CPUs. The work memory figure is fixed; the load memory figure is the maximum size of the MMC or EPROM card the CPU accepts. Table 3: Representative CPUs and their memory CPU | Order number | Work memory | Load memory (max) | Typical use CPU 314 | 6ES7314-1AG14-0AB0 | 128 KB | MMC up to 8 MB | Medium machines, standard S7-300 applications CPU 315-2 DP | 6ES7315-2EH14-0AB0 | 256 KB | MMC up to 8 MB | Distributed I/O via PROFIBUS DP CPU 319-3 PN/DP | 6ES7318-3EL01-0AB0 | 2 MB | MMC up to 8 MB | Large S7-300 applications with PROFINET CPU 414-2 | 6ES7414-2XK05-0AB0 | 512 KB | RAM plus EPROM up to 64 MB | Mid-range S7-400 applications CPU 417-4 | 6ES7417-4XT05-0AB0 | 4 MB | RAM plus EPROM up to 64 MB | High-performance S7-400 applications Two sizing rules follow from the table. First, work memory is the binding constraint for program logic. A project with large data blocks or many blocks in the cyclic path needs work memory headroom, because the CPU executes from work memory and cannot page code in from load memory on demand. Second, load memory is the binding constraint for project data: symbols, comments, and technology objects are stored only in load memory. A project that compiles to 300 KB of code may still need a 2 MB MMC once comments and symbol information are included. The general practice is to size the MMC generously at commissioning, because a card swap later requires a full download and a brief production stop.   8. Configuring Retentive Data   Retentive data is the state that must survive a power cycle: finished-part counters, recipe selections, mode flags, and accumulated totals. The configuration procedure is identical in structure on both families, with the storage mechanism differing underneath. On the S7-300, open the CPU properties in Hardware Configuration and select the Retentive Memory tab. There, define the retentive ranges for bit memory (for example 16 bytes of M by default), the number of retentive timers, and the number of retentive counters. Data blocks are handled individually: in the DB properties, mark the block as Retain. Retentive data is then stored on the MMC at power-down and restored at power-up, which is why it survives without any battery. On the S7-400, the same dialog defines the retentive ranges, but the storage mechanism is the battery-backed RAM. Retentive values survive a power cycle as long as the battery is healthy. If the battery fails while the controller is powered off, retentive data is lost and the affected DBs are reinitialized to their load values at the next startup. This is why the battery state of an S7-400 is a maintenance topic, not an operational detail. Three configuration errors account for most retentive-data complaints. The retentive range is not configured at all, so flags reset at every restart. The range is configured but the DB lacks the Retain attribute, so DB contents reset even though M flags survive. Or the range is configured on the wrong CPU in a multi-CPU project, so the intended CPU resets while an unused one retains. All three are diagnosed in minutes by comparing the Retentive Memory tab with the observed behavior after a test power cycle.   9. Failure Modes and Diagnostics   Memory faults on the S7-300/400 present themselves through the LEDs, the diagnostics buffer, and the behavior of downloads and uploads. Table 4 collects the common failure modes, their causes, and the diagnostic path for each. Table 4: Memory-related failure modes and diagnostics Symptom | Likely cause | Diagnostic path | Remedy CPU in STOP; SF and STOP LEDs lit; diagnostics entry "STOP due to memory error" | MMC missing or defective (S7-300), or load memory corrupt | Read the diagnostics buffer via STEP 7 (accessible nodes, module information); check the MMC seating | Insert a known-good MMC with a backup of the program; re-download; replace the card if defective Download rejected with "No user memory available" | Work memory or load memory capacity exhausted | Compare project block sizes with the CPU work memory; check free load memory | Delete unused blocks; reduce DB sizes; move to a CPU with more work memory or a larger MMC Download rejected with "memory card is write-protected" | MMC slider in locked position | Inspect the slider on the card housing | Open the slider; repeat the download Download rejected on an S7-300 with no card inserted | MMC absent | Check the card slot; read the diagnostics buffer | Insert the MMC; the CPU then accepts the download S7-400 BATF LED lit; diagnostics entry "battery low" | Backup battery exhausted or missing | Module Information, Battery tab; check voltage and status | Replace the battery per the procedure in Section 11; verify RAM contents afterward S7-400 restarts with an older program after a power outage | Battery flat and EPROM card holds an older version than the last RAM download | Compare the EPROM date with the last commissioning change | Copy RAM to ROM / download to EPROM after every change; replace the battery Upload returns no blocks or an incomplete project | Blocks exist only in work memory, or the MMC holds an older version (S7-300) | Attempt upload from the CPU; check which blocks are listed | Download the current program to the MMC first; then upload Retentive data lost after a restart | Retentive ranges not configured, DB without Retain attribute, or MMC removed at power-down (S7-300) | Review the Retentive Memory tab; perform a controlled test power cycle | Configure the retentive ranges and Retain attributes; re-download SFC 82/83/84 call reports "No user memory available" | MMC full or write cycle limit reached during runtime data logging | Check free MMC space; review the call parameters | Free space on the card; archive and delete old logged data blocks Two general rules make these diagnostics faster. First, the diagnostics buffer is the primary evidence: it records the stop cause, the time stamp, and the module that triggered the event, and it is readable even from a CPU in STOP. Second, the distinction between load memory and work memory explains most upload/download surprises: if a block is not in load memory, it cannot be uploaded; if it is not in work memory, it cannot be executed.   10. Maintenance and Backup Practice   Memory maintenance on legacy S7-300/400 equipment follows a small set of rules that prevent nearly every failure mode in Table 4. Back up before you touch. A full upload of the program and the Hardware Configuration to the engineering station should precede any download, any memory card operation, and any battery work. The backup file is the insurance that makes every subsequent step reversible. Many plants schedule a fresh backup after every commissioning change and keep the file on a server with the date in the file name. Check the S7-400 battery on a schedule. The battery state is visible in STEP 7 Hardware Diagnostics / Module Information on the Battery tab, and the BATF LED gives a local indication. A monthly check of the BATF LED during routine rounds, plus a quarterly review of the Battery tab, catches a weak battery long before it becomes a production event. Battery service life is measured in years, but it varies with ambient temperature and the duration of power outages, so calendar-based replacement is less reliable than status-based replacement. Handle MMCs by the book. The MMC may be inserted or removed only with the CPU powered off. Removing a card during operation, or during a download, can corrupt the card and forces a format and a full re-download. Cards should be stored in anti-static packaging, labeled with the project name and firmware version, and write-protected with the slider once the content is final. A programmed spare card on the shelf is the fastest disaster recovery an S7-300 plant can have; the Siemens PLC spare parts range covers the card family from 512 KB to 8 MB. Think about the power supply. The S7-300 is fed by the PS 307 and the S7-400 by the PS 407, both available for 120 V/60 Hz and 230 V/50 Hz mains; the input range is printed on the type plate of each module. The modules carry CE marking for the European market and UL/CSA listings for North American installations. A failing power supply produces memory symptoms before it produces a total failure, because brown-outs corrupt RAM contents and trigger restart sequences. Voltage measurements at the load terminals belong in the same maintenance round as the battery check. Stock spares for legacy plants. Plants running S7-300/400 hardware beyond its original service life should hold, at minimum, one programmed MMC per CPU type, one spare backup battery per S7-400, and one spare CPU of each type in use. Older CPUs are increasingly difficult to source, so the spare CPU should be procured while the type is still available. If the plant uses Flash EPROM cards, a spare card with the current program completes the set. The cost of a programmed card and a battery is small compared with the cost of an unplanned production stop, and prices in USD vary with region and availability.   11. Frequently Asked Questions   Does the S7-300 lose its program when the battery dies? No, because the S7-300 has no battery for program storage. The program resides on the MMC, and work memory is reloaded from the MMC at every power-on. A discharged battery is therefore not a cause of program loss on the S7-300; most S7-300 CPUs do not even have a battery compartment. The battery question applies to the S7-400, where the RAM-based load memory depends on the backup battery while the controller is powered off. What happens if the MMC is removed while the CPU is running? The CPU can go to STOP, and the card itself can be damaged, because the CPU writes to the MMC at power-down and during downloads. Siemens specifies that the MMC may be inserted or removed only with the power off. If a card was removed while running, power the CPU down, reinsert the card, and check the diagnostics buffer. If the card was corrupted, format it and re-download the program from the backup. How do I make data retentive on an S7-300? Open the CPU properties in Hardware Configuration and select the Retentive Memory tab. Define the retentive ranges for bit memory (default M 0.0 to M 15.7), the number of timers, and the number of counters. For data blocks, mark the block with the Retain attribute in its properties. The retentive data is then saved to the MMC at power-down and restored at power-up, without any battery. Note that only the configured ranges retain their values; everything else is initialized at restart. What is the S7-400 battery change procedure? First, confirm that the current program is stored on a Flash EPROM card or in a backup file on the engineering station; this step is mandatory. Then, with the CPU powered on, open the battery compartment and replace the cell with a new one of the same type (6ES7971-0BA00), working within the buffer time provided by the integrated rechargeable battery, typically on the order of tens of minutes when fully charged. After insertion, confirm that the BATF LED extinguishes and verify the status in Module Information on the Battery tab. If the CPU was powered off and the RAM was lost, restore the program from the EPROM or from the backup before restarting production. Can I download to work memory only? On the S7-300, no: with an MMC fitted, every download writes to the MMC and copies into work memory, so every download is automatically non-volatile. On the S7-400, a normal download writes to the RAM load memory and to work memory; the change is volatile unless you then download to the EPROM or copy RAM to ROM. A change that exists only in RAM survives a power cycle only while the battery keeps the RAM alive. If the battery fails during an outage, the change is lost and the CPU restarts with the EPROM version. Why does my upload show no blocks? An upload reads from load memory. On the S7-300, blocks that exist only in work memory cannot be uploaded, which typically happens when the MMC was replaced or formatted after the last download. Download the current program to the MMC first, then perform the upload. On the S7-400, verify that the RAM load memory, not only work memory, contains the program; if the CPU was restarted from the EPROM after a battery loss, the upload returns the EPROM version. How long does the S7-400 battery last, and when should it be replaced? The service life depends on the battery chemistry, the ambient temperature, and the frequency and duration of power outages. The reliable method is status-based replacement: replace the cell when the BATF LED lights or when Module Information reports a low state. In a powered-up rack, several years of service are typical. The rechargeable buffer battery on the CPU gives a limited window for a main battery change, so a replacement cell should be on hand before the procedure starts.   12. Summary   The S7-300/400 memory concept is a three-layer model. Load memory holds the complete program and is non-volatile (MMC on the S7-300, battery-backed RAM with optional Flash EPROM on the S7-400). Work memory is the volatile integrated RAM from which the CPU executes, and it is rebuilt from load memory at every startup. System memory provides the address areas I, Q, M, T, C, L, and DB, with retentive subsets configured in STEP 7 and restored from load memory at restart. Most field problems reduce to a small number of causes: a missing or write-protected MMC on the S7-300, a flat battery or an outdated EPROM on the S7-400, a retentive range that was never configured, or a program that exceeds work memory. Each has a defined diagnostic path through the LEDs, the diagnostics buffer, and Module Information, and each has a defined remedy. The maintenance rules that prevent them are equally few: back up before any download, keep the EPROM current on the S7-400, check the battery on a schedule, handle MMCs only with the power off, and keep a programmed spare card and a spare battery on the shelf. For plants that run legacy S7-300/400 hardware, these rules are not optional diligence; they are the difference between a brief intervention and a full re-commissioning.   13. Maintenance Checklist   · [ ] Full program and Hardware Configuration backed up to the engineering station after every commissioning change · [ ] MMC inserted in every S7-300 CPU; spare programmed MMC stored per CPU type (write-protect slider closed) · [ ] MMC slider position verified before downloads; cards inserted and removed only with power off · [ ] S7-400 BATF LEDs checked during routine rounds (monthly) · [ ] S7-400 battery status reviewed in Module Information, Battery tab (quarterly); replacement battery in stock · [ ] Flash EPROM cards up to date after every download (Copy RAM to ROM / download to EPROM) · [ ] Retentive ranges and Retain attributes verified against the process requirements after any configuration change · [ ] Retentive behavior confirmed with a controlled test power cycle after commissioning · [ ] Diagnostics buffer reviewed periodically; unexplained entries investigated before they become stops · [ ] Spare CPUs, MMC cards, batteries, and EPROM cards stocked for each CPU type in service · [ ] PS 307 / PS 407 input voltage (120 V/60 Hz or 230 V/50 Hz) and output voltage verified at the load terminals URL Slug: siemens-s7-300-400-memory-concept --------------------------------------------------------------------------------------------- 🏢 About TZ Tech   TZ Tech is a leading supplier of industrial automation, electrical, instrumentation, and telecommunications components. We specialize in sourcing ready-to-ship distributor stock, allowing us to offer highly competitive pricing and short lead times. Thanks to our extensive inventory, we can even source rare and discontinued parts that are hard to find elsewhere.   🛡️ Our Quality Commitment  We understand that quality is your top priority. Every component undergoes a strict screening and inspection process so you can buy with absolute confidence. For legacy or discontinued parts, we believe in complete transparency and will always provide an honest, accurate report on the product's condition. Plus, all brand-new parts come backed by a full 1-year warranty.  ✉️ Get in Touch Have a project or a part you need? Send us your inquiry today! Our team is dedicated to providing a fast response within 6 hours (excluding weekends).
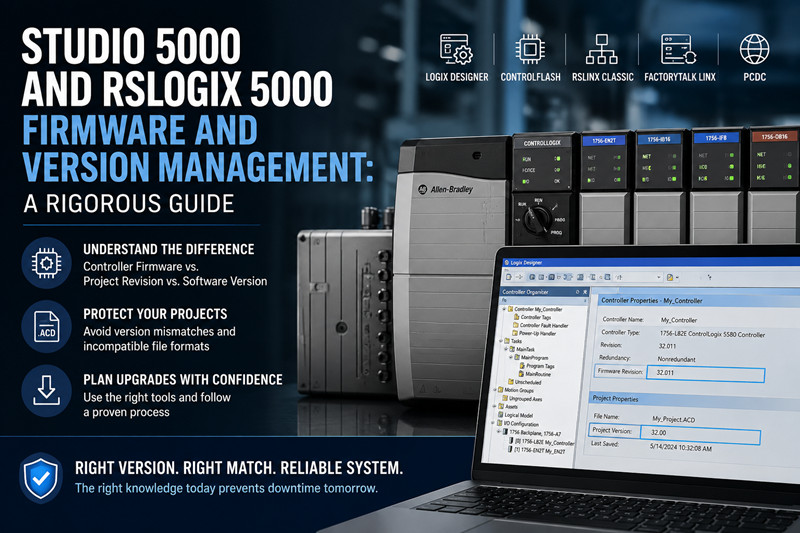
  • MicroLogix 1400 Troubleshooting: Common Field Faults and the 2026 Buying Reality
    MicroLogix 1400 Troubleshooting: Common Field Faults and the 2026 Buying Reality Aug 17, 2026
      Thirty years on shop floors. Twenty of them staring at Allen-Bradley small PLCs. The MicroLogix 1400, the 1766 series, is the last of the old MicroLogix line still in production, and I still see it in panels every week. Packing machines. Water treatment. Conveyors. HVAC plants. It is a workhorse, and it fails in the same handful of ways over and over. This is the stuff I actually fix on the job. The real faults, ranked by how often I see them, the causes, and the fix. Plus when to stop fixing and swap in a spare, and the 2026 buying situation, because that part affects every plant that runs these units.   What You're Actually Working With   The MicroLogix 1400 comes in six common catalog numbers: 1766-L32BWA, 1766-L32BWB, 1766-L32BXWE, 1766-L32AWAA, 1766-L24BWA, and 1766-L24BWB. The L32 units have 32 I/O, the L24 units have 24. The letter codes at the end tell you the power supply and the I/O mix. Same brain inside, different power and I/O. When you order a spare, the number on the side of the dead unit is the number you want on the replacement. The 1400 has an LCD screen and a keypad on the front, a built-in Ethernet port, and a serial port. You program it with RSLogix 500, and Rockwell still gives away a lite version, so you do not need a paid license to babysit a 1400. The front panel tells you a lot before you plug in a laptop. The LCD shows alarms. The LEDs along the top show power, run, fault, comm activity, and battery. Learn what those LEDs mean and you have solved half your problems. Half the calls I get start with "the machine just stopped" and end with a five-second look at the front panel.   The Five-Minute First Check   Before you pull the unit, do the five-minute check. I do it every time, and it catches more problems than any fancy diagnostic. Power first. Check the power LED and the supply voltage at the terminals with a meter. I have seen a 1400 "dead" because a loose terminal or a tripped breaker took out the feed. The PLC was fine the whole time. Check the fuses. Some 1400 models have a user-replaceable fuse. A blown fuse takes out a whole section of I/O and looks exactly like a dead output or a dead input. Check the keyswitch. The 1400 has a three-position keyswitch on the front: RUN, REM, and PROG. If somebody left it in PROG, the machine will not run. It happens all the time after a download, and the operator calls at 6 a.m. because the line will not start. Check the fault LED and the LCD message. The LCD tells you the fault code. Write it down. That message is worth more than a week of guessing. Then check the wiring, especially the commons. A missing common wire on an input bank makes every input in that bank read dead, and it is not a PLC fault at all. Grounding too. These units live in panels full of contactors and VFDs. If the PLC drops communication every time a motor starts, suspect noise and grounding before you suspect the PLC.   The Battery Problem and the Program Loss Nightmare   This is the big one. The one that shuts down a production line on a Friday afternoon. The MicroLogix 1400 uses a 3-volt lithium battery, part number 1766-BAT, behind the little door on the front of the unit. It keeps the real-time clock alive and keeps retentive data alive when the power is off. Timer current values, counter accumulators, recipe registers, all of that lives on that battery. The battery lasts two to five years. Cold, clean panels get closer to five. Hot, dusty panels get two. And nobody changes it on a schedule, because it is out of sight, and then one day the machine starts acting wrong. What you see. The BAT LED on the front flashes. The LCD shows "BATT" in the alarm area. Sometimes the machine keeps running and nobody notices until the battery is completely flat. That is the dangerous one. The clock resets, retentive data goes to zero, and the machine starts up in a state nobody planned for. What causes it. A dead battery, plain and simple. Nine times out of ten it is age. The other time, it is a unit that sat on a shelf for years before installation, so the battery was already half gone on day one. The fix. Change the battery. Do it with power on if you can, or at least with a backup of the program already saved to a PC. Open the door, unplug the old battery, plug in the new one, close the door. Thirty seconds of work. The 1766-BAT is cheap. Keep one in the panel, right next to the spare fuse. tztechio carries the 1766-BAT along with the rest of the Allen-Bradley spare parts. Everybody asks about program loss. The program lives in flash memory, so it usually survives a dead battery. What you lose is retentive data and the clock. But do not relax too much. I have seen whole programs come up empty after battery failures, usually because the program was never saved to flash cleanly or a bad download corrupted it right before the battery gave out. The lesson is the same either way: back up the program before the battery dies, not after. When it is not the battery. If you replace the battery and the alarm stays, check the battery connector. I have seen corroded contacts on units in humid plants. Clean the contacts, reseat the battery. If it still shows a battery fault with a fresh battery, the backup circuit on the board has a problem, and that is a replace-the-unit situation, not a repair.   Channel 0 Communication Issues   Channel 0 is the RS-232 serial port on the 1400. It is how you talk to the PLC with a laptop, how it talks to a PanelView, and how it talks to a pile of third-party gear. It is also the source of a thousand headaches, and almost all of them are settings, not hardware. What causes it, most common first. First, wrong DF1 driver settings in RSLinx. The driver has to match what the 1400 expects: baud rate, parity, node address. The 1400 defaults to DF1 full-duplex at 19200 baud. If somebody changed the baud in the processor and did not change RSLinx, you get nothing but silence. Second, the wrong cable or a damaged cable. DF1 uses null-modem wiring on the 9-pin connector. A straight-through cable that works fine for something else will not work here. Third, somebody changed the channel configuration to a different protocol. The 1400 can run DF1, Modbus RTU, or ASCII on Channel 0. If the last guy left it in Modbus mode and you are trying to program through it, it will not talk to RSLinx. Fourth, the device on the other end has a different baud or parity. Both ends have to agree on every parameter. One bit off and it is silence. The fix. Check settings before you check hardware. That is the rule. In RSLinx, set the driver to RS-232 DF1, pick the right COM port, set the baud and parity to match the processor. Use auto-configure if you do not know the processor settings. Then check the cable. Then check the other device's settings. Nine times out of ten it is one of those three, and it costs nothing to fix. Passthrough is a separate chapter. If you have a PanelView hanging off Channel 0 and you want to reach the PLC through it, passthrough has to be enabled in both devices, and the DF1 node addresses have to be right. When passthrough stops working, it is almost always because somebody changed a node address or passthrough got disabled during a download. Re-enable it, set the addresses, and it comes back. Channel 1, the Ethernet port, is usually more reliable, and most modern 1400 installs talk to the PLC over Ethernet for programming and HMI. If you have a choice, use Ethernet. When Ethernet gives you trouble, check the basics: static IP address, subnet mask, and whether the address collides with something else on the plant network.   LCD Display Problems   The LCD on the front of the 1400 is a convenience, until it stops working, and then it is a problem, because the alarm messages live on that screen. What causes it. For a washed-out display, it is usually contrast. The 1400 lets you adjust contrast from the front panel menu. On a hot panel, or an old unit, the contrast drifts. Before you condemn the screen, adjust it. I have "fixed" a dead-looking display with three button presses more than once. Dead pixels and missing rows are physical damage to the LCD module. Nothing in the menu fixes that. Backlight failure is the same: the screen goes dark but the PLC runs fine. You can run it blind, but that is a bad idea on a production machine, because the alarm messages are exactly what you cannot see. The fix. Adjust contrast first, always. A display with dead pixels is not repairable in the field. The LCD module is part of the front assembly, and you are not swapping it on the bench without a lot of pain. If the display is gone and the machine needs an operator interface, that is a strong reason to replace the unit. A replacement 1766 series unit and an hour of work puts you back in business.   Blown Outputs   Outputs die. It is physics. The 1400 comes with relay outputs on most models and transistor outputs on some. Both fail for predictable reasons. What causes it, ranked. A shorted or overloaded load is number one. The output was sized right on paper, but the load drew more than the rating, and the relay contacts welded or the transistor let the smoke out. Inductive kick is number two. A relay contact switching a solenoid or a contactor without a flyback diode or surge suppressor across the load. The back-EMF eats the contacts. This is the one I see most on machines that have been "modified" over the years. High cycle count is number three. Relay outputs have a mechanical life. A relay output cycling a valve every few seconds wears out. That is not a defect, that is wear. Wiring mistakes are number four. Somebody landed a 120V load on a 24V transistor output, or shorted a terminal during a repair. Instant death, and usually a smell to go with it. The fix. Verify the output is actually dead before you blame it. Force the output on in the program and check voltage at the terminal with a meter. If the bit is on and there is no voltage at the terminal, the output is dead. Then check the load, because a welded contactor coil will kill the replacement output too. Fix the load first. Here is the part nobody wants to hear. On the 1400, the embedded outputs are soldered to the main board. There is no output card to swap. If a base output blows and you have no spare channel to rewire to, the unit is done. That is why I always tell people to keep a spare 1400 in the store room. Prevention beats replacement. Run heavy loads through an external contactor or an interposing relay, so the PLC output only drives the coil. Add flyback diodes on DC loads and RC snubbers or MOVs on AC loads. That one habit doubles the life of the outputs.   Modbus RTU Setup Problems   The 1400 speaks Modbus RTU on Channel 0, both master and slave. It is a big reason these units are still around, because they talk to VFDs, power meters, and third-party panels that speak Modbus. It is also a steady source of phone calls. What causes it. The usual suspects. Wrong baud or parity on one end. Wrong node address. Wrong register mapping, where the request points at a Modbus address that does not line up with the data file you think it does. And wiring, especially two-wire versus four-wire RS-485, plus missing termination resistors on a long run. The fix. Go end to end. Node address first: both ends have to agree. Then baud and parity: same on both ends, and 8 data bits, no exceptions. Modbus RTU is always 8-bit. Then wiring: check A and B, check the shield, check the termination. Then the register map: the Modbus address you are reading has to line up with the data file in the 1400. That is where most of the real debugging happens, and it is a paper exercise, not a hardware one. Once the wiring and settings are right, the error codes on the MSG instruction will usually tell you exactly what is wrong.   Firmware Corruption After a Bad Download   This one scares people, and it usually should not. A download that gets interrupted, a power blip during a firmware update, a laptop that dies mid-transfer. The 1400 ends up with a corrupted program or corrupted firmware, and it will not run. What causes it. An interrupted download, a power loss during a firmware flash, or a bad firmware file. Also a dying battery at exactly the wrong moment. I have seen that one: the download starts, the battery gives out, the flash write gets interrupted, and the unit comes up half-dead. The fix. Try the cheap stuff first. Cycle power. Put the keyswitch in PROG, power up, and try to connect. If RSLinx sees it, download the program again, completely, and cycle power. Most of the time that is it. If the unit will not talk at all, you are looking at firmware recovery, and that is a bench job. I have seen units come back from what looked like certain death with nothing more than a power cycle and a re-download. If the flash is truly corrupted, the unit is done from a field standpoint. Do not throw it in the bin. Send it to a repair house that does board-level work. But do not hold the production line up waiting for it. Swap in a spare, ship the dead one out, and move on.   Fault Quick-Reference Table   Here is the table I wish somebody had handed me twenty years ago. Fault, likely cause, fix, and the spare part you will need. Fault | Likely Cause | Fix | Spare Part BAT LED flashing, "BATT" alarm on LCD | Battery low or dead. 1766-BAT, 2 to 5 year life | Replace battery with power on, verify alarm clears | 1766-BAT Retentive data zeroed or program empty after power loss | Dead battery, no backup | Reload program from backup, set clock, re-enter retentive data | 1766-BAT plus saved program file RSLinx cannot find processor on Channel 0 | Wrong DF1 settings, bad cable, wrong protocol | Check DF1 driver, baud, parity, cable, channel config | 1761-CBL-PM02 programming cable PanelView passthrough dead | Passthrough disabled, wrong node addresses | Re-enable passthrough in both devices, set DF1 node addresses | None LCD washed out | Contrast drifted | Adjust contrast from front panel menu | None LCD dead pixels or blank, PLC runs | LCD module failure, not field repairable | Replace the unit | 1766-L32BWA or your model number Output bit on, no voltage at terminal | Blown relay or transistor output | Rewire to a spare output or replace unit. Fix the load first | 1766 unit, flyback diode or MOV Modbus MSG errors | Wrong node address, baud, parity, wiring, register map | Check both ends, wiring, termination, register mapping | None Fault LED on, will not run after download | Interrupted download, corrupted firmware | Power cycle, re-download. Firmware recovery if needed | None   When to Replace the Unit Instead of Fixing   Some things on the 1400 are fixable in the field. Battery, settings, wiring, program. Some things are not. Learn the difference and you will stop wasting shift time. Replace the unit when the LCD is dead and you need the operator interface, or when a base output is blown and you have no spare channel to rewire to. Replace it when the battery alarm will not clear with a fresh battery; that points at a board fault. Same for firmware corrupted past recovery. And replace it when the unit has been through years of heat, dust, and abuse, because old units fail in cascade. You fix the battery and the next week an output dies. That is the unit telling you it is done. Fix it when it is a settings problem, and that is 70 percent of the calls I get. The battery is a fix, thirty seconds and twenty dollars. Wiring, a cable, a connection, all fixes. A program issue you can download over, that is a fix too. Here is the rule I run by. If the fix costs more in labor than a spare unit costs, or if the machine cannot wait for a repair, swap the unit and debug the old one on the bench. Production time is worth more than any PLC ever made.   The 2026 Buying Reality   The part everyone asks about. Can you still buy a MicroLogix 1400 in 2026? The official answer is yes. Rockwell still lists the 1766 series as Active or Active Mature on its lifecycle status as of 2026. That is the official word. Check it yourself on Rockwell's product lifecycle page, because official status changes and you should look at it with your own eyes. Here is the unofficial word. The rest of the MicroLogix family is already gone. The 1000 (1761), the 1200 (1762), the 1500 (1764), and the 1100 (1763) are all discontinued. As of 2022, the 1400 was the only MicroLogix you could still buy new. Distribution channels have been reporting component sourcing problems for years. The 1100 got hit first. The talk in the channel is that the 1400 could follow within two to three years. That is rumor, not official, but I have been in this game long enough to know that channel rumors about component shortages have a way of becoming official announcements. Prices are already creeping up as stock depletes. The units out there are being bought up by people who know the platform is ending. If you run a plant full of 1400s, the smart play is to buy spares now, while they are still available and still priced like a normal part. Not next year. Now. The people who waited on the 1100 learned that lesson the expensive way. Where do you buy? There are still distributors with stock, plus specialists in automation spare parts. tztechio carries MicroLogix 1400 units and 1766-BAT batteries as spares, along with a range of PLC spare parts. I would rather buy from a place that understands what these parts are for than gamble on auction sites, because a "new" PLC that has been sitting in a warehouse for ten years has its own problems, starting with a battery that is already dead. A word on old stock. If you buy a new old stock unit, plan on replacing the battery before you install it. A battery that has been sitting for years is already half dead. And a 1400 stored in a damp warehouse can have corrosion issues. Test every unit you receive. Power it up, load a program, run it for a day before you trust it in a machine. That test costs you an afternoon and saves you a shutdown.   Replacement Paths: What Comes After the 1400   Know what is on the other side, because the day is coming when you will have to move off the 1400. There are two main paths, and neither is a drop-in swap. I will be straight with you about that. The Micro800 family is one path. The Micro820 (2080-LC20-20QBB) and the Micro850 (2080-LC50-24QWB) are Rockwell's current small controllers. You program them with Connected Components Workbench, which is free. That is the good news. The bad news is that CCW is a completely different environment than RSLogix 500. Your ladder logic does not just port over. The instruction set is different, the way you handle data is different, and tag migration is manual. The Micro800s are good little controllers and the price is right, but do not believe anyone who tells you the migration is quick. CompactLogix is the other path. If your machine needs more power, the CompactLogix 1769-L16ER-BB1B is the modern step up. It runs Studio 5000, which is a proper modern environment, and it is a much more capable controller. It is also a bigger jump. Different software, different license cost, different way of thinking about tags and tasks. The ladder logic needs a full review, line by line, because the instructions do not map one to one. Either way, the move off the 1400 is a project, not an afternoon. That is exactly why the 1400 is still out there in the numbers it is. Plants do not migrate a platform because they are bored. They migrate when they have to. And until they have to, the 1400 keeps running, and the spares keep being worth buying. My advice: keep the 1400s running as long as you can, buy your spares now, and start the migration conversation early, on one machine, before the platform forces it on you. And keep your RSLogix 500 backups safe. That software and those program files are worth more than the hardware at this point.   FAQ   Q: Does the MicroLogix 1400 lose its program when the battery dies? A: The program is stored in flash memory, so it usually survives. What you lose is retentive data: timer and counter values, recipe registers, and the real-time clock. But I have seen programs come up empty after battery failures and interrupted downloads too. Back up the program to a PC before the battery dies, not after. Q: How long does the 1766-BAT battery last? A: Two to five years, depending on the environment. Hot panels kill it faster. Change it on a schedule, with power on, and keep a spare in the panel. It is a thirty-second job. Q: Can I still buy a new MicroLogix 1400 in 2026? A: Officially yes. Rockwell still lists the 1766 series as Active or Active Mature as of 2026. Check their lifecycle page yourself, because that status changes. But the channel is already reporting sourcing problems and prices are climbing. If you need spares, buy them now. Q: What replaces a MicroLogix 1400? A: The Micro800 family (Micro820, Micro850) with free Connected Components Workbench software, or a CompactLogix 1769-L16ER-BB1B with Studio 5000 for more power. Neither is a drop-in swap. Your ladder logic gets re-written and reviewed by hand. Q: Can I program a MicroLogix 1400 for free? A: Yes. The lite version of RSLogix 500 handles the MicroLogix line and it is free. You can also do online edits with it, which is a lifesaver on a running machine. Q: Why can't my laptop talk to the 1400 on the serial port? A: Start with the DF1 driver settings in RSLinx, then the cable, then the channel configuration. Wrong baud, wrong parity, or a straight-through cable instead of a null-modem will all give you silence. Settings before hardware, every time. Q: Can the 1400 talk Modbus? A: Yes. It does Modbus RTU master and slave on Channel 0. Check node address, baud, parity, and register mapping on both ends. Modbus RTU is always 8 data bits, no exceptions.   Final Word   The MicroLogix 1400 is old, and it is not getting younger. But it is still alive, still supported, still available, and running production lines all over the world. Most of its faults are predictable, and most of them are cheap to fix. Battery, settings, wiring, backups. That covers most of what I see in a year of service calls. The one thing you cannot fix is time. The platform is on borrowed time, and the clock is ticking on buying spares at sane prices. So do the boring stuff: keep backups, keep a 1766-BAT in the panel, keep a spare unit in the store room, and keep your eye on the lifecycle page. When the day comes, you will be ready, and the machine will not miss a beat. That is the whole job, and it is the same job it has always been. Keep the line running. URL Slug: allen-bradley-micrologix-1400-troubleshooting -------------------------------------------------------------------------------------------- 🏢 About TZ Tech   TZ Tech is a leading supplier of industrial automation, electrical, instrumentation, and telecommunications components. We specialize in sourcing ready-to-ship distributor stock, allowing us to offer highly competitive pricing and short lead times. Thanks to our extensive inventory, we can even source rare and discontinued parts that are hard to find elsewhere.   🛡️ Our Quality Commitment   We understand that quality is your top priority. Every component undergoes a strict screening and inspection process so you can buy with absolute confidence. For legacy or discontinued parts, we believe in complete transparency and will always provide an honest, accurate report on the product's condition. Plus, all brand-new parts come backed by a full 1-year warranty.   ✉️ Get in Touch     Have a project or a part you need? Send us your inquiry today! Our team is dedicated to providing a fast response within 6 hours (excluding weekends).
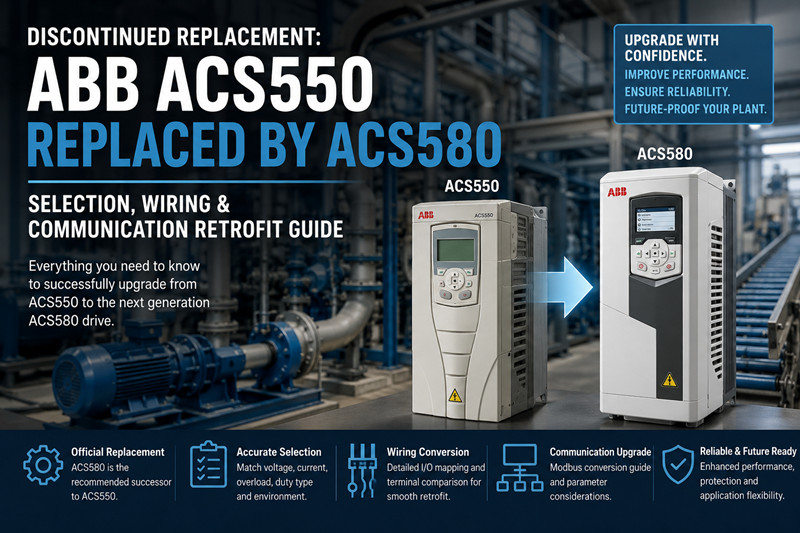
  • ControlLogix vs CompactLogix: Which One Does Your Plant Actually Need?
    ControlLogix vs CompactLogix: Which One Does Your Plant Actually Need? Aug 07, 2026
    Let's be honest: most of the ControlLogix racks I see in the field don't need to be ControlLogix. A 1756-L73 running a machine with thirty I/O points is a $6,000 processor doing a $1,200 job. I've opened cabinets like that three times this year. The panel is twice the size it needs to be, the spares cost three times as much, and the electrician needs a step stool to reach the processor. Nobody wants to admit they overspecified. The integrator wrote "for future expansion" into the spec and the future never showed up. Meanwhile the CompactLogix brick in the next cabinet runs an identical machine, costs a fraction to keep spares for, and hasn't faulted in four years. But don't read this as a "small PLC good, big PLC bad" rant. I've also seen a 1769-L36ERM coordinating three motion axes and a VFD network off one backplane, a brick stretched way past its limits. That failure mode costs just as much, in a different currency. Here's what most people miss. The two families share the same programming environment, the same instruction set, the same Studio 5000 software, and none of the same hardware. They aren't "big version, small version" of each other; they're two architectures that speak the same language, and treating them as interchangeable is how you end up with a gold-plated cabinet or a brick in way over its head. Let's be straight about this: what follows is what each platform is built to do, what it costs to own over ten years, and how to pick the one that won't embarrass you in front of your maintenance crew. I've spent more than twenty years in this trade, and here's everything I know without the sales brochure.   Two Families, One Studio, Zero Shared Parts   ControlLogix is a modular, chassis-based system. You buy a rack, called a chassis, and slot cards into it. The processor is one card, the power supply bolts to the side, and every I/O, comms, and motion card plugs into the backplane. The chassis comes in five standard sizes: the 1756-A4 with four slots, the 1756-A7 with seven, the 1756-A10 with ten, the 1756-A13 with thirteen, and the 1756-A17 with seventeen. CompactLogix is a brick. Processor, power supply, and a chunk of I/O live in one molded housing. You bolt it to the back panel and hang expansion modules off the side on a short serial bus. No backplane, no card cage, no swappable comms cards. What you see is what you get, decided at purchase time. That one architectural difference drives how you size, repair, expand, and stock spares. Allen-Bradley parts don't cross over at all: a 1756-IB16 input card will not fit a CompactLogix system, and a 1769-IQ16 will not fit a ControlLogix rack. If you run both, you're stocking two separate spare-parts bins, and that's a real, recurring cost.   ControlLogix: Built Like a Truck, Priced Like a Luxury SUV   ControlLogix exists for one reason: it's what you pick when the system is too big, too fast, or too critical for anything smaller.   The Architecture Does the Heavy Lifting   Because every module rides the backplane, ControlLogix scales in a way CompactLogix can't touch. Need more I/O? Add another chassis and connect it with a 1756-EN2T or 1756-EN2TR EtherNet/IP module, and the processors treat remote racks as if they were local. The 1756-EN2TR adds a second RJ45 port and CIP Sync. Legacy plants still run ControlNet with the 1756-CNB and DeviceNet with the 1756-DNB, so one rack can hold a plant's older networks together. A brick can't do that. Need more memory? The 1756-L82E carries 5 MB of user memory and the 1756-L85E carries 20 MB, enough for a batch recipe table, an alarm database, and a historian buffer in one controller. Need redundancy? That's hardware, not software trickery, and it's the headline below. The I/O modules are built for industrial abuse. A 1756-IB16 gives you sixteen 24 VDC inputs with isolation and per-point diagnostics, and the 1756-OB16 does the same on outputs. When a field device starts dying, the diagnostics tell you which channel is going before the machine faults. On a CompactLogix you find out when the machine stops. Power comes from the 1756-PA72, a 120/240 VAC supply rated for 6 amps of backplane current, or the 1756-PB72, its 24 VDC twin, sized against the total current draw of every card. Get that wrong and you get brownouts at the worst moment, usually 3 a.m. during a batch run.   Redundancy Is the Real Differentiator   Nobody wants to admit this, but redundancy is the single biggest reason plants buy ControlLogix. The 1756-RM2 redundancy module, one per chassis, pairs two processors so that when the primary faults, the standby takes over with bumpless transfer of program and data. That's high-availability, DCS-style thinking bolted onto a PLC, and CompactLogix has nothing like it. There is no redundant CompactLogix, and there won't be one. If your application can't tolerate a processor swap, you're buying ControlLogix, full stop. Redundancy isn't free. You buy two of everything, plus sync cables, configuration time, and annual failover testing. A system that's never failover-tested is just an expensive way to have two broken processors.   Motion and Process Applications   ControlLogix is where Allen-Bradley motion lives. The 1756-M02AE, 1756-M03SE, and 1756-M08SEE SERCOS modules, and the newer motion over EtherNet/IP, run multi-axis coordinated applications a CompactLogix L36ERM has no headroom for. Then there's the process world. ControlLogix with PlantPAx is Allen-Bradley's answer to a DCS, and it's a legit one. The 1756-IF8 and 1756-IF16 analog inputs, the 1756-OF8 and 1756-OF4 outputs, PID with auto-tune, alarm management, batch sequencing, all run in the same chassis as your discrete logic.   The Honest Cons   Now the part the sales reps skip. ControlLogix is expensive. A current 1756-L82E lists in the $6,000 to $9,000 range, and the 1756-L85E sits north of that. Add a chassis, a 1756-PA72, a pair of 1756-EN2TR modules, and I/O, and a modest ten-slot rack is a $25,000 to $40,000 cabinet before a single field wire is pulled. A hot-spare processor is another $7,000 to $10,000 of inventory that does nothing until something dies. The footprint is real too. A 1756-A13 chassis with a processor, two comms cards, and nine I/O cards needs ventilation, a deeper enclosure, a power budget a brick doesn't. I've seen plants put one into a panel sized for a CompactLogix and then wonder why the temperature alarm goes off every summer. And one more thing: the L6x generation is done. The 1756-L61, 1756-L63, and their siblings hit their last-time-buy windows in 2024 and 2025, and those windows are closed. New L6x processors don't exist; today's stock is secondary market for a platform Allen-Bradley has stopped supporting. The 1756-L7x and 1756-L8x families remain current, but every year you keep an L63 in production you're betting the plant on a part that gets harder to find. PLC spares for L6x systems are drying up, and I've watched the price of a used 1756-L63 nearly double in eighteen months. Plan the migration before the market plans it for you.   CompactLogix: The Brick That Runs the World   Now the platform that actually runs most of the machines on this planet.   The 1769 Family   The 1769 line has been around for over two decades and it's still the workhorse. Processors run from the 1769-L16ER, a tiny brick with 512 KB of memory perfect for a single machine, up through the 1769-L18ER, the 1769-L24ER-QBFC1B with embedded 24 VDC I/O, two analog inputs, two analog outputs and a counter, the 1769-L30ER, the 1769-L33ER, and the 1769-L36ERM, which adds two integrated motion axes. The L33ER is probably the most common PLC on factory floors in the Americas and the Middle East right now: a 2 MB controller with built-in EtherNet/IP, enough for a decent-sized machine, at a fraction of ControlLogix cost. Want more headroom? The 1769-L37ERM and 1769-L38ERM exist, but you're still on the same serial bus and two-axis motion limit. I/O hangs off the side of the brick on the 1769 bus. The 1769-IQ16 gives you sixteen 24 VDC inputs, the 1769-OW16 sixteen relay outputs, the 1769-IF4 four analog inputs, and the rest of the family covers AC inputs and thermocouple modules. Power comes from the 1769-PA4, rated 4 amps at 120/240 VAC, or the 1769-PA2 at 2 amps, bolted to the brick's left end. Everything is DIN-rail or panel mounted. No rack, no card cage, no backplane current math. On comms, the "ER" processors carry EtherNet/IP natively, and a 1769-SDN scanner adds a DeviceNet master for legacy field devices. Not the network zoo a ControlLogix rack can host, but plenty for a machine cell.   The 5069 Family   The newer 5069 CompactLogix is the same idea with modern internals. The 5069-L306ER, 5069-L330ER, and 5069-L340ER bricks run faster processors with more memory, and modules like the 5069-IBS16 and 5069-OB16 talk over a faster local bus. The 5069-L340ER is genuinely capable: 3.2 MB of memory, dual EtherNet/IP ports, and enough speed to blur the line with entry-level ControlLogix. Here's the catch nobody mentions at the sales meeting: 1769 and 5069 are not compatible. A 5069 brick will not take 1769 expansion modules, and a 1769 brick will not take 5069 modules. Form factor, bus, and mounting all changed. If your supplier nudges you to "upgrade" to 5069, you're not upgrading, you're replacing everything in the cabinet.   What CompactLogix Does Well   The brick does exactly what its name says: everything a machine needs in one box that mounts in minutes. The 1769-L24ER-QBFC1B has embedded I/O, so a small machine needs exactly one part, a 24 VDC supply, and a network cable. Spares are cheap enough that plants stock a complete spare brick: when the processor dies, you swap the whole unit in fifteen minutes instead of rebuilding a rack. Cost per point is the big one. A 1769-L33ER with a couple of 1769-IQ16 and 1769-OW16 modules runs maybe a third of what an equivalent ControlLogix slot count costs, and the panel space is a third too. For standalone machines, skids, packaging lines, material handling, pump stations, and anything under roughly 100 I/O points, CompactLogix is the right engineering answer, not just the cheap one. The programming story is identical. Techs who know Studio 5000 move between a 1769-L30ER and a 1756-L85E without retraining; tags, routines, AOIs, the whole toolkit is the same. That's the single biggest reason CompactLogix adoption is so high: the people who maintain it already know it.   The Honest Cons   CompactLogix has hard ceilings, and you need to know where they are before you pick it, not after. The expansion bus is serial, so the more modules you hang off a brick, the slower the I/O update. Load a 1769-L33ER with eight or nine modules and a fast program and you get scan times a ControlLogix rack eats for breakfast. There's no redundancy, no hot-swap, no ControlNet, no DeviceNet without an add-on scanner, and motion tops out at two axes on the L36ERM. If your machine has six servo axes with coordinated moves, the brick is the wrong tool, and no amount of clever programming fixes that. There's also the repair model. A brick is one sealed unit. When the embedded I/O on a 1769-L24ER-QBFC1B dies, the whole brick dies; when a 1756-IB16 in a rack dies, you pull one card, swap in the spare, and you're back in ten minutes. The brick trades repairability for price, and most of the time that's a fair trade. And the 5069 migration trap deserves repeating. If you're on 1769 today and someone tells you the 5069 is "the same thing but newer," check your wallet. The industrial automation market is full of plants that bought 5069 bricks expecting to reuse 1769 I/O and ended up buying both. PLC spares strategy: pick a generation and stock for it.   Head to Head: The Honest Comparison   Feature | CompactLogix 1769 / 5069 | ControlLogix 1756 Architecture | Brick with side-mounted expansion bus | Modular chassis with parallel backplane Processor examples | 1769-L16ER through L38ERM; 5069-L306ER, L330ER, L340ER | 1756-L61/L63 (end-of-life), L73, L82E, L85E User memory | 512 KB to 3.2 MB | Up to 20 MB on the 1756-L85E I/O expansion | Embedded I/O plus local expansion only | Local racks plus distributed remote racks I/O module examples | 1769-IQ16, OW16, IF4; 5069-IBS16, OB16 | 1756-IB16, OB16, IF8, OF8 Comms | EtherNet/IP standard; DeviceNet via 1769-SDN; no ControlNet | EtherNet/IP, ControlNet, DeviceNet via modules (EN2T/EN2TR, CNB, DNB) Redundancy | None | Yes, 1756-RM2 processor pairs Motion | Up to 2 integrated axes (L36ERM) | Multi-axis SERCOS and EtherNet/IP motion Process / DCS apps | Limited | Full PlantPAx support Footprint | Small, panel or DIN rail | Large, needs rack and ventilation Cost per point | Low | High Spares strategy | Cheap, stock a whole spare brick | Expensive, stock cards and processors Current status | 1769 and 5069 both current | L7x/L8x current; L6x end-of-life since 2024-2025   Realistic Use Cases: Where Each One Belongs   CompactLogix Is the Right Call When...   ...the machine is standalone. A packaging line, a CNC loader, a palletizer, a pump skid, a small water treatment unit. Under 100 I/O points, no redundancy, no coordinated multi-axis motion, one or two EtherNet/IP connections to a VFD or an HMI. The 1769-L33ER handles this class of work all day, and the spare brick in stores costs less than one ControlLogix processor. I've seen too many projects where a CompactLogix would have done the job and the plant bought ControlLogix because the machine builder's standard spec said so. If you're the plant, push back. Ask for the cost-per-point justification. Most of the time there isn't one.   ControlLogix Justifies Itself When...   ...the application is redundant, process-heavy, motion-heavy, or spread out. A fired heater with burner management, a batch reactor skid, a pipeline station with remote I/O in three buildings, a printing line with eight servo axes. When a processor fault costs more per hour than the whole control system costs per year, you buy ControlLogix and you don't apologize for it. That's the oil and gas, power, and water world in the Middle East and the process plants of Europe and the Americas, which run ControlLogix for a reason. Process applications especially: PlantPAx, the 1756-IF8 and 1756-IF16 analog modules, and the redundant 1756-RM2 pairs are the stack Allen-Bradley sells into DCS replacements. If you're migrating an old pneumatic or hybrid control system, ControlLogix with PlantPAx is the platform the whole ecosystem, including historians and alarm management software, is built around.   Either Works When...   ...you're in the middle. A machine with 100 to 300 I/O points, no redundancy, light motion. A 5069-L340ER can run that machine, and so can a 1756-L72 or 1756-L73. The honest answer is that both work; the decision comes down to what your crew already stocks, what your other plants standardize on, and the ten-year cost. If every other line in the plant runs CompactLogix, the techs have spares and know-how, so match the fleet. If the plant already runs a redundant ControlLogix infrastructure, adding one more rack is cheaper than starting a second spare-parts bin. Standardization beats optimization almost every time.   The Price Picture: What This Actually Costs   List prices, and let's be clear these are approximate and negotiable, though the shape of the numbers is stable. A CompactLogix processor runs roughly $1,500 to $4,000 depending on model, the 1769-L16ER at the bottom and the 5069-L340ER at the top. Add a power supply and a handful of I/O modules and a working small system lands around $3,000 to $8,000. A ControlLogix processor runs roughly $4,000 to $12,000, the 1756-L85E at the top and the 1756-L71 or 1756-L73 in the middle. Add a chassis, a 1756-PA72 or 1756-PB72, comms modules, and I/O, and a real system starts around $15,000. Redundancy doubles the processor cost and stacks the 1756-RM2 modules on top. Now do the ten-year math. CompactLogix spares are cheap enough to stock a complete spare brick. ControlLogix spares are expensive enough that most plants stock one processor and a couple of I/O cards and pray. The L6x situation makes it worse: Allen-Bradley parts for the 1756-L61 and 1756-L63 are secondary-market only, and the price reflects it. I've seen used L63 processors listed for more than a new L73. That's the end-of-life tax, and it only goes up. Cost per point is the other lens. A CompactLogix system with 50 points of discrete I/O works out to roughly $80 to $150 per point all-in; the same 50 points on ControlLogix runs $250 to $400 per point before the rack and power supply. You're paying a premium for capability you may never use. That's fine when you need it. It's theft when you don't.   How to Choose: A Decision Checklist   Print this out and go through it in order; don't skip to model numbers until you've answered the architecture questions. · Does the application require redundant processors? If yes, ControlLogix with 1756-RM2. There is no CompactLogix answer. Stop here. · Is this a process application with PID, alarm management, batch, or PlantPAx integration? If yes, ControlLogix. PlantPAx on CompactLogix is fighting the platform. · Does the machine need more than two coordinated servo axes? If yes, ControlLogix. The 1769-L36ERM stops at two. · Is the I/O spread across multiple locations, remote racks, or more than about 100 to 150 points? If yes, ControlLogix with distributed chassis, or a hard look at whether the 5069's faster bus can carry it. · Is the machine standalone, under 100 I/O, no redundancy, one or two network connections? If yes, CompactLogix, and don't let anyone upsell you. · What does your maintenance crew already stock and know? Match the fleet if there's a fleet standard. Standardization beats optimization. · What is the ten-year cost, including spares and the L6x end-of-life tax if you're on legacy hardware? Run the numbers, don't guess. If you answer mostly "yes" to the first four, you're buying ControlLogix and it's the right call. If you answer mostly "yes" to the fifth and sixth, you're buying CompactLogix and you'll sleep fine.   FAQ   Can I mix 1769 and 5069 modules in one system? No. Different form factors, different buses, different mounting. A 5069-L340ER will not accept a 1769-IQ16, and a 1769-L33ER will not accept a 5069-IBS16. Migrating from 1769 to 5069 means replacing the I/O, not just the processor. The only thing that transfers is your program logic and tags, and even then expect to rebuild the I/O tree. Is ControlLogix worth it for a 50-I/O machine? Almost never. Fifty points of discrete I/O on a 1756-L73 means a chassis, a power supply, two comms cards, four or five I/O cards, and a $6,000 processor doing maybe 10% of its capacity. A 1769-L24ER-QBFC1B with embedded I/O runs the same machine for a fraction of the money and panel space. Exceptions: redundancy requirements, process applications, or a plant standard that says everything is ControlLogix. Can CompactLogix do redundancy? No. There is no redundant CompactLogix configuration, no equivalent of the 1756-RM2, and no software trick that changes that. If you need bumpless processor failover, you need ControlLogix. Some plants run two bricks with a handshake and let the second take over a shared network, but that's a shadow system with a switchover gap, not redundancy, and it's not appropriate for anything safety-critical. Which platform has better spare-parts availability in 2026? For current hardware, both are fine, but CompactLogix is the easier position to defend. Bricks are cheap enough that you stock a complete spare, and 1769 and 5069 modules are still in production. On the ControlLogix side, current L7x and L8x parts are available, but the L6x generation is the problem: the last-time-buy windows closed in 2024 and 2025, new parts don't exist, and everything you find is secondary market. If you're running 1756-L61 or 1756-L63 processors, parts availability is your top risk and the migration should already be planned. Check lead times before you commit; the market shifts. Can I reuse my 1756 modules if I downsize to CompactLogix? No. 1756 modules are chassis cards and physically cannot mount in a CompactLogix system, 1769 or 5069. The reverse is equally true. Downsizing means selling or scrapping the 1756 cards and buying new I/O. I've seen plants try to keep a 1756-EN2T "for the network" and then discover it's a chassis card. The only things that carry over are your program, your tag database, and your scars. URL Slug: controllogix-vs-compactlogix-guide ------------------------------------------------------------------------------------------------------------------ 🏢 About TZ Tech   TZ Tech is a leading supplier of industrial automation, electrical, instrumentation, and telecommunications components. We specialize in sourcing ready-to-ship distributor stock, allowing us to offer highly competitive pricing and short lead times. Thanks to our extensive inventory, we can even source rare and discontinued parts that are hard to find elsewhere.   🛡️ Our Quality Commitment   We understand that quality is your top priority. Every component undergoes a strict screening and inspection process so you can buy with absolute confidence. For legacy or discontinued parts, we believe in complete transparency and will always provide an honest, accurate report on the product's condition. Plus, all brand-new parts come backed by a full 1-year warranty.   ✉️ Get in Touch     Have a project or a part you need? Send us your inquiry today! Our team is dedicated to providing a fast response within 6 hours (excluding weekends).
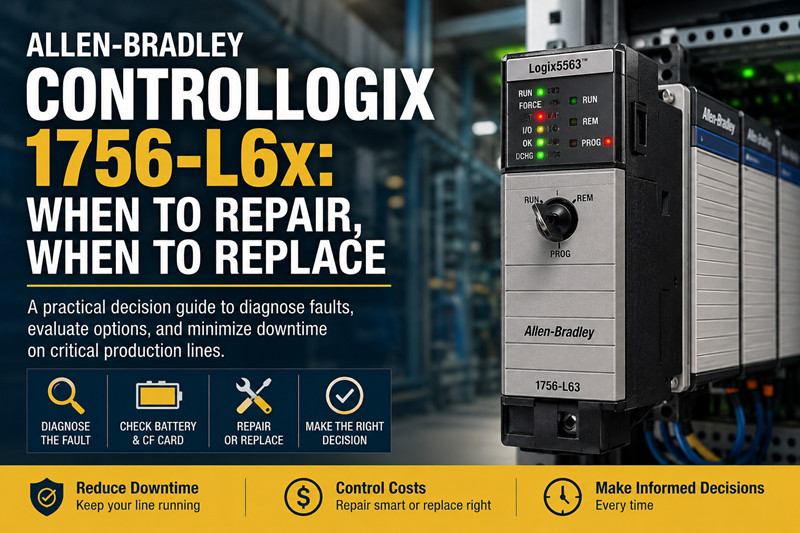
  • Siemens S7-400H redundant system troubleshooting
    Siemens S7-400H redundant system troubleshooting Aug 05, 2026
      I've been keeping S7-400H systems running for almost twenty years now. These redundant racks were built to never stop, but they stop all the time. The CPUs are almost always fine. Sync modules, power supplies, fiber links are what fail. The H system itself is solid. The problem is everything else gets old and tired, and when redundancy goes south, you're running on one CPU with no backup. I work at a shop that's been in the Siemens PLC game since the S5 days. The S7-400H came out in 1996 and plants are still running them. This article covers the faults I've fixed on live systems. Real numbers, real fixes, no theory.   Lost redundancy and the yellow LED   You walk up to the panel and one CPU shows a yellow IFM1F or REDF LED. The other CPU is running solo. This is the most common call I get. First thing: check the sync modules. S7-400H uses two sync modules per CPU, connected through fiber optic cables. Part numbers are 6ES7 960-1AA04 for the standard fiber or 6ES7 960-1AB04 for the extended range. I've seen more sync module failures than CPU failures by a long shot. Look at the SYNC LED on each sync module. If it's off or blinking when it should be solid, that module is dead or dying. Swap it. Don't bother testing it. Then check the fiber cables. These things get bent, pinched in cabinet doors, chewed by rodents. Hold one end up to a bright light. If you see any light leak through the jacket, replace it. Use a fiber power meter if you have one. You need at least -20 dBm at the receiver. Below -25 dBm and you'll get intermittent sync loss, usually right when production is at max. Re-terminate the fiber connectors if the ends are dirty. Use a one-click cleaner, not your shirt. I've fixed more broken sync modules with a $12 cleaning pen than with a $600 replacement part. If sync modules and cables check out, force a redundancy re-establish. Put the CPU in STOP, then back to RUN. In STEP 7, go to PLC > Diagnostic/Setting > Operating Mode. The system should re-sync. If it doesn't, you're looking at a hardware fault on the backplane or the CPU itself.   Redundant power supply problems   The PS 407 power supplies (6ES7 407-0KA02-0AA0 or similar) are workhorses, but they have a weak spot: the backup battery monitoring circuit. Common scenario: one supply shows a BATT LED on. The system keeps running, nobody cares, and three months later the other supply fails too. Now you're down. I've seen it a hundred times. What I do is pull the suspected bad supply and check output voltage at the terminals on the back. You should see 24V DC within 2%. Anything below 23V or above 25V means the regulation circuit is drifting. Replace it. Don't adjust it. There's no trim pot on these. The hidden one: the power supply might be fine, but the 24V DC input to the rack is sagging. Check the input terminals on the PS 407. If input drops below 20.4V (the S7-400's undervoltage threshold), the supply will flag a fault. This happens more than you'd think. Bad circuit breakers, loose terminals, undersized wire. Redundancy module failure is another issue. If you have the redundancy module (6ES7 407-0RA00-0AA0) between two power supplies, that thing fails too. When it goes, one supply looks dead to the rack even though it's outputting voltage. Bypass the redundancy module temporarily. Jumper the outputs to confirm. If the rack comes back, replace the module.   IM 460/461 interface module faults   The IM 460-1 (6ES7 460-1BA00-0AA0) in the central rack and IM 461-1 (6ES7 461-1BA00-0AA0) in the expansion rack are another weak point in H systems. These are the interface modules that connect the two racks of a redundant pair. The symptom: one CPU reports Ext. DP Fault or BUS2Fault but the other CPU is fine. The redundant pair can't sync because the expansion rack communication is broken. Quick test: swap the IM 460-1 between the two racks. If the fault moves with the module, it's bad. If it stays in the same slot, the problem is the backplane or the cable between racks. Cable problems: the connecting cables (6ES7 468-xx) have those big rectangular connectors. I've had the latch break off, the cable partially pull out, and the system sees intermittent faults for weeks before someone catches it. Push the connector in firmly. If it clicks, good. If it doesn't click, replace the cable end.   CPU memory card corruption   S7-400H CPUs use memory cards. MMC or earlier RAM cards. The battery kills these cards when it dies and the CPU powers down. The redundant system will start up but one CPU won't go into RUN because it can't load its operating system. Pull the memory card and put it in a reader connected to a PG/PC. Try to read it. If Windows asks you to format it, the card is dead. If you can read it, back up the project, reformat the card, and rewrite it. The practical fix: always keep two programmed spare memory cards for each CPU type in your cabinet. When this happens (and it will), you swap the card in thirty seconds instead of spending an hour rebuilding it. If both CPUs lost their cards at the same time (usually from a total power loss with dead backup batteries), you'll need to download the project fresh. The RAM-based clocks can drift during this too, so set the time on both CPUs after loading.   Ext. DP slave faults in redundant mode   This one drives me nuts. The redundant system is running fine, but a DP slave (maybe an ET 200M or a remote I/O rack) shows up as faulted on one channel but not the other. Root cause: the DP master on one CPU lost the slave, re-established it, and now the slave is assigned to the wrong master. The two CPUs don't agree on who's driving that slave. Fix in STEP 7: go to the hardware config and check the Redundancy properties for that DP slave. Make sure it's set to Redundant DP Master. If it's set to a specific master slot, change it. Then power-cycle the slave device. After any DP slave replacement in a redundant system, you have to re-assign the slave to both masters. The Slave Replacement procedure in the manual is: disconnect slave from power, replace, power back on, then use HW Config > PLC > Download to Module for the DP slave. If you don't do both masters, the slave will work for one CPU and fault for the other.   When to replace the CPU itself   CPU replacement (414H, 417H, etc.) is rare but it happens. Here's when I pull the trigger: · The CPU goes into STOP with an internal error code that doesn't clear after a memory reset · Multiple I/O modules on the same CPU show no connection but the backplane is fine · The INTF LED stays on permanently even after a fresh OB1 download · You see Distributed I/Os: station failure on one CPU but the other CPU communicates with the same slaves fine Swapping a CPU in an H system: put the good CPU solo, pull the bad CPU, install the new one, set the mode selector to MRES and hold for nine seconds (until the STOP LED stops blinking and stays solid), then set to RUN. The good CPU will download the system data to the new CPU automatically. Let it finish. Don't interrupt this. It takes two to five minutes depending on the program size. The mistake I see: guys swap the CPU and don't match the firmware version. If the new CPU has a different firmware than the existing one, redundancy won't establish. Always check the 6ES7 400 firmware version in the diagnostics buffer before ordering a replacement.   Sync module part number matching   One thing that'll cost you hours: sync module part numbers must match on both CPUs. If rack 0 has 6ES7 960-1AA04 and rack 1 has 6ES7 960-1AB04, the system won't sync. I don't care if the documentation says they're compatible. In the field, they aren't. Keep matched sets. Same thing with the fiber lengths. If one cable is a 1-meter and the other is a 10-meter, the signal timing difference can cause sync loss on long scan cycles. Use the same length on both links.   Practical diagnostic steps summary   When I walk into a plant with a faulted H system, this is my order: 1. Look at the LEDs on both CPUs. Note every LED state. 2. Read the diagnostics buffer on the solo CPU (the one still in RUN). 3. Read the diagnostics buffer on the faulted CPU. 4. Check sync module LEDs on both racks. 5. Check power supply LEDs and battery LEDs. 6. Listen to the power supplies for the fan. If one fan is dead, swap that supply now. The diagnostics buffer tells you 90% of what you need. Don't guess. Read it. Most S7-400H problems are not the CPUs. Sync modules, power supplies, IM modules, and fiber cables fail long before the main PLC does. Keep spares of the expensive stuff (the sync modules and the IM modules), because waiting three days for a replacement 6ES7 960-1AA04 is going to cost more than stocking it. And check those batteries on every PM schedule. A dead backup battery turns a two-minute power cycle into a four-hour rebuild. ------------------------------------------------------------------------------------------------------------------ 🏢 About TZ Tech   TZ Tech is a leading supplier of industrial automation, electrical, instrumentation, and telecommunications components. We specialize in sourcing ready-to-ship distributor stock, allowing us to offer highly competitive pricing and short lead times. Thanks to our extensive inventory, we can even source rare and discontinued parts that are hard to find elsewhere.   🛡️ Our Quality Commitment   We understand that quality is your top priority. Every component undergoes a strict screening and inspection process so you can buy with absolute confidence. For legacy or discontinued parts, we believe in complete transparency and will always provide an honest, accurate report on the product's condition. Plus, all brand-new parts come backed by a full 1-year warranty.   ✉️ Get in Touch     Have a project or a part you need? Send us your inquiry today! Our team is dedicated to providing a fast response within 6 hours (excluding weekends).
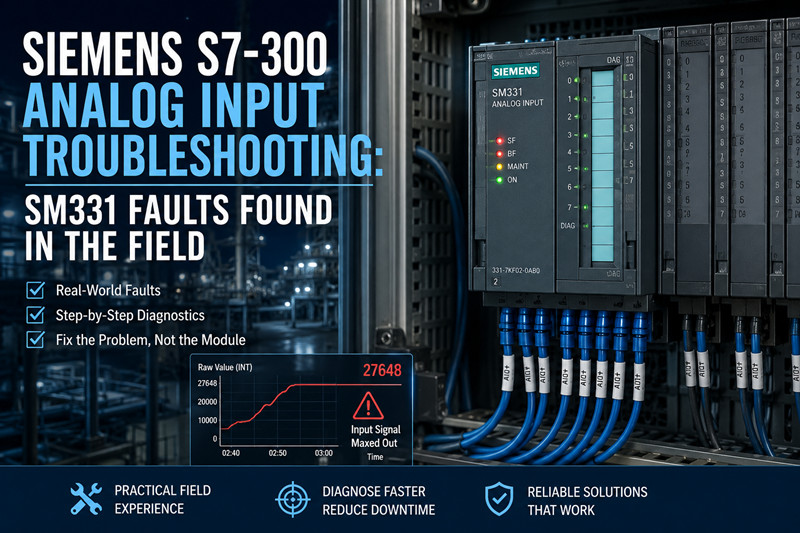
  • Siemens S7-300 PROFIBUS DP Communication Faults: A Technical Guide
    Siemens S7-300 PROFIBUS DP Communication Faults: A Technical Guide Aug 03, 2026
      PROFIBUS DP is a master-slave fieldbus whose physical layer is RS-485. Communication faults on an S7-300 network are best classified by the layer at which they occur: physical, data link, or application. A steady red LED on the CPU's DP interface usually means a cable or termination problem; a configuration error in STEP 7 usually means a GSD or module-order problem. This guide defines the architecture, analyzes each layer, and closes with diagnostics and a spare-part strategy for a discontinued platform.   The Architecture of PROFIBUS DP   PROFIBUS DP (Decentralized Periphery) is a deterministic fieldbus standardized in IEC 61158 and IEC 61784. A class 1 master controls the bus cycle: it sends output data to each configured slave and receives input data in return within a fixed cycle time. Slaves are passive; they respond only when addressed. In the single-master systems that cover most S7-300 plants, the master polls its slaves in a fixed sequence. Three protocol versions exist. DP-V0 provides the cyclic data exchange that nearly every S7-300 installation uses. DP-V1 adds acyclic read and write services and alarm handling, which intelligent slaves such as the IM 153-1 use for parameterization and channel diagnostics. The electrical layer is RS-485 with differential signaling: the B line (RxD/TxD-P) and the A line (RxD/TxD-N) carry the same signal with opposite polarity, and the receiver evaluates the difference. Above it sits the FDL (Fieldbus Data Link) of layer 2, which frames telegrams and administers addresses. A fault must be assigned to its layer before it can be fixed.   Hardware Components of a DP Network   DP Masters Three devices fill the DP master role. The CPU 315-2 DP (6ES7 315-2AG10-0AB0) has an integrated DP interface with its own SF and BF LEDs, supports DP-V0 and DP-V1, and is the most common master in existing plants. The CPU 319-3 PN/DP (6ES7 318-3EL01-0AB0) adds PROFINET interfaces and the largest memory of the family; its DP interface behaves identically from the network's point of view. The CP 342-5 (6GK7 342-5DA02-0XE0) is a communications processor with its own microprocessor, RUN/STOP/BUSF LEDs, and master, slave, or combined operation; it offloads the bus from the CPU and exchanges data through the I/O area or via FC 1 (DP_SEND) and FC 2 (DP_RECV). Siemens PLC spares for all three masters remain in circulation.   DP Slaves   The ET 200M uses the same S7-300 signal modules as the central rack. Its interface module, the IM 153-1 (6ES7 153-1AA03-0XB0), carries two decimal rotary switches for the station address and accepts up to eight modules. The ET 200S (interface module IM 151-1) sets its address with a single rotary switch. The ET 200pro (IM 154-1) is the IP65/67 variant mounted directly on the machine, and it is the most frequent source of intermittent connector faults in practice: vibration, moisture, and temperature cycling.   Connectors and Cabling   PROFIBUS connectors are active components of the bus. The 6ES7 972-0BA52 includes a PG socket that lets a programming device tap the bus without interrupting traffic; the 6ES7 972-0BB52 omits it. Both contain a built-in terminating resistor with a switch: when ON, the connector applies the terminating network and disconnects the outgoing cable, so a terminated connector must sit on the last station of a segment. PLC spares catalogs list both connectors. The cable is a shielded twisted pair. Type A cable, the only type recommended for new installations, has a 0.34 mm² conductor, a characteristic impedance of 135 to 165 ohms at 3 MHz, and a braided shield with at least 80 percent coverage. The standard Siemens FC cable, 6XV1 830-0EH10, meets this specification. The shield must make low-impedance contact with the connector housing over the full circumference.   The 9-Pin D-Sub Pinout   Every DP interface uses the 9-pin D-sub connector. The pins that matter for fault analysis are: Pin | Signal | Function 1 | Shield | Protective ground, bonded to the connector housing 3 | RxD/TxD-P | B line, non-inverting data 5 | DGND | Data ground 6 | VP | +5 V supply for the terminating network 8 | RxD/TxD-N | A line, inverting data Pins 2, 4, 7, and 9 carry auxiliary signals not required for DP operation. Verify the A and B conductors against pins 8 and 3 respectively; a reversed pair produces a dead segment.   Layer 1: The Physical Layer   Termination   An RS-485 bus must be terminated at both physical ends only. The PROFIBUS terminating network is a 390 ohm resistor from VP to B, a 220 ohm resistor between B and A, and a 390 ohm resistor from A to DGND. The 220 ohm resistor in parallel with the two 390 ohm resistors in series yields about 171 ohms, close to the 150 ohm cable impedance, so the line end absorbs the signal instead of reflecting it. The bias holds the idle state at a defined level: B at least 200 mV positive with respect to A. Without it, the receiver inputs float and the bus produces spurious telegrams. Termination must be powered: when the end station of a segment is switched off, its termination disappears, and the segment behaves erratically.   Baud Rate and Segment Length   The baud rate sets the maximum segment length because the signal rise time and round-trip delay must fit within the bit time. The master sets the rate; slaves detect it automatically. Permitted combinations are: Baud rate | Maximum segment length 9.6 kbps | 1200 m 19.2 kbps | 1200 m 45.45 kbps | 1200 m 93.75 kbps | 1200 m 187.5 kbps | 1000 m 500 kbps | 400 m 1.5 Mbps | 200 m 3 Mbps | 100 m 6 Mbps | 100 m 12 Mbps | 100 m These figures assume type A cable, correct termination, and no more than 32 stations per segment. The practical failure at high baud rates is not length but the accumulated capacitance of connectors and stubs; at 12 Mbps even a 0.3 m stub distorts the signal, while at 9.6 kbps a short stub is harmless.   Repeaters   The RS-485 repeater 6ES7 972-0AA01 regenerates the signal and provides galvanic isolation between its two segments. It is required when a segment exceeds 32 stations or the length limit, and recommended when two cabinets have different ground potentials. Each repeater counts toward the 32-station limit, and up to nine may be connected in series, yielding ten segments. A repeater terminates both of its ports.   Shielding and Grounding   The shield is the primary defense against electromagnetic interference, and variable-speed drives are its primary source in most plants. Ground the shield at both ends through the connector housing; a one-ended shield still attenuates capacitive coupling but leaves the network exposed to magnetic fields. Use repeaters or equipotential bonding conductors where ground potentials differ. A DP cable must not run parallel to power cables; keep a separation of at least 20 cm and cross power cables at right angles.   Layer 2: The Data Link Layer   Every station occupies an address between 0 and 126; address 0 is reserved for the programming device and 127 is the broadcast address, so DP stations use 1 to 125. On the IM 153-1 the address is set with the two rotary switches (tens and units), limiting the range to 1 through 99, and it is read at power-up. A duplicate address takes both stations out of service; an address of 0 has the same effect. The master's bus parameters (target rotation time, slot time, responder delays) are generated by STEP 7 from the station list and baud rate. They are not a tuning point, but they explain why a slave that works on a test bench fails on the plant network: the network's timing, not the slave, is at fault. Baud rate detection is precise: slaves detect the rate from the first valid telegrams they receive. There is no baud rate switch on a DP slave, and two baud rates cannot run on one network. The GSD file records which rates a slave supports; a slave that does not support the configured rate never enters data exchange. industrial automation parts suppliers see this fault class regularly, because replacement slaves with different firmware sometimes carry a narrower baud rate range.   Configuration and the Application Layer   GSD Files   The GSD (Geräte-Stammdaten, device master data) file is the slave's identity card: a text file describing the manufacturer and ident number, supported baud rates, DP-V0/DP-V1 features, and the catalog of slotable modules. STEP 7 reads it to display the slave in the hardware catalog and to generate the configuration telegram sent at startup. The startup sequence explains the fault classes: the master sends Set_Prm (set parameters) and Chk_Cfg (check configuration) telegrams, and a slave that rejects either reports a configuration fault and never enters data exchange. It then appears online as present but faulty, which distinguishes this class from a physical failure. An old GSD version for a newer interface module produces the same symptoms; when a replacement IM 153-1 arrives with different firmware, compare its GSD with the project before commissioning.   Module Configuration   For the ET 200M, the physical module order must match the configuration. The IM 153-1 addresses modules by slot; a 32-channel module where the project expects a 16-channel module makes the slave detect a mismatch and withhold its I/O, so the master reports it faulty although the station is electrically present. The ET 200S behaves the same way.   DP-V0 and DP-V1   DP-V0 covers cyclic I/O exchange and the basic diagnostics that SFC 13 reads. DP-V1 adds acyclic services (SFB 52 RDREC, SFB 53 WRREC) and alarms (SFB 54 RALRM). A project configured for DP-V1 that meets a slave whose GSD supports only DP-V0 falls back to the lower service level; the failure appears when the application calls a DP-V1 function the slave cannot answer. That is a configuration fault, not a hardware fault.   Classifying the Fault   Faults fall into three classes, and the class determines the diagnostic route.   Class 1: Slave Not Reachable   The master reports a station failure and the slave never enters data exchange. Causes, in order of frequency: the slave is powered off; the address is wrong or duplicated; termination is missing at one end; a cable or connector is broken; the baud rate is not supported; the GSD or module configuration does not match. The fault is persistent and repeatable, which makes it the easiest class to isolate.   Class 2: Intermittent Faults   The slave drops offline for seconds or minutes and returns on its own, or the network fails only when a drive starts. Causes are physical: a loose connector, a shield not clamped, a moved termination switch, a cable routed with power cables, a corroded contact in a humid environment, or a segment operating marginally at its baud rate. Intermittent faults are the most expensive to chase because the network is healthy when the technician arrives; they require the recording tools described below.   Class 3: Configuration Mismatch   The network is electrically healthy and every station is present, but the master and slave disagree about the configuration: GSD version, module order, firmware revision, or DP-V1 features. The slave reports a configuration fault in its diagnostics, which separates this class from the physical classes.   Diagnostics   LED Patterns The front LEDs are the first diagnostic instrument, read in pairs: the master's and the slave's LEDs together localize a fault to one side of the bus. LED | State | Meaning CPU DP interface BF | off | Bus operation normal CPU DP interface BF | flashing, 1 Hz | Interface cannot participate: address 0 or duplicate, no bus parameters CPU DP interface BF | steady | A configured slave is not reachable: cable break, slave off, wrong slave address CPU DP interface SF | on | A slave has signaled a diagnostic interrupt; clears when the diagnostics are fetched and the cause is removed CP 342-5 RUN | green, steady | CP in RUN CP 342-5 RUN | green, flashing | Startup phase CP 342-5 STOP | yellow, steady | CP in STOP CP 342-5 BUSF | flashing, 1 Hz | CP cannot participate: address 0 or duplicate, no termination, cable break at the CP CP 342-5 BUSF | steady | Configured DP slaves cannot be addressed A master with a steady BF LED and a slave with a healthy power LED points to the cable between them. A master whose BF LED flashes with an empty bus points to its own address or bus parameters. The MPI interface uses the same 9-pin connector and RS-485 level but a different protocol; its status is not shown by the BF and SF LEDs described here.   STEP 7 Online Diagnostics   STEP 7 reads the DP master's diagnostics without programming. Open the online hardware configuration, select the DP master, and call PLC > Module Status. The DP slave diagnostics tab lists every configured station as data exchange, waiting, or faulty; the bus diagnostics view shows which stations are present and at which baud rate the network actually runs. If the station lists differ, the fault is physical; if they match and the slave still reports faulty, the fault is in configuration or diagnostics.   SFC 13 DPNRM_DG   SFC 13 (DPNRM_DG) reads a slave's diagnostic telegram from the application program. Parameters: LADDR, the slave's diagnostic address from the hardware configuration; RET_VAL; RECORD, the data area receiving the diagnostics; and BUSY, indicating the call must be repeated. The record begins with a six-byte standard header: station status 1 to 3, the master address, and the manufacturer's ident number. Station status 1 separates the fault classes: bit 0, station does not exist; bit 1, not ready; bit 2, configuration fault; bit 6, device type mismatch. The device-specific part follows: which slot reported the fault and, for channel faults, the channel number and error code, such as error code 9 for a wire break on an analog input.   FB 125 PO_DIAG   FB 125 (PO_DIAG) decodes the diagnostics of all slaves of a DP master system into a structured data block and is called from OB 82, OB 86, and OB 122. The result identifies the slave by address and classifies the fault: station failure, module fault, or channel fault with slot and channel number. An HMI or logging function can read the block, which turns an intermittent fault into a recorded event correlated with the machinery that was running.   The Organization Blocks   OB 82 (diagnostic interrupt) fires when a slave reports module or channel diagnostics. OB 86 (rack failure) fires when a slave leaves the network; event ID 0xC4 identifies a station failure, 0xC1 a failure of the DP master itself. OB 122 (I/O access error) fires when the program accesses the I/O of a slave not in data exchange. A plant that runs these blocks empty loses the only record of what happened while nobody was watching; a minimal OB 86 that stores the event ID, timestamp, and faulty station address pays for itself at the first unexplained outage.   Troubleshooting Table   Symptom | Likely cause | Check | Fix Slave never appears online; master BF steady | Cable break or connector unplugged | Measure continuity of A and B through the connectors | Replace the cable segment or reseat the connector Slave appears, then drops when a drive starts | EMC coupling through the shield or cable route | Inspect shield clamping and the distance to power cables | Reground the shield; reroute the cable; add a repeater Two stations drop simultaneously | Duplicate address | Compare the address switch settings with the address list | Set unique addresses and power-cycle both stations Slave never enters data exchange; switches read 0 | Address set to 0 | Inspect the rotary switches | Set an address between 1 and 99 and power-cycle Frame errors and drops at 12 Mbps | Segment too long or too many stubs | Measure the cable length; count the connectors | Lower the baud rate or add a repeater Configuration fault on an ET 200M | Module order mismatch | Compare the physical modules with the HW Config slots | Align the module order or correct the project Slave reports the wrong device type | GSD version mismatch | Compare the GSD in the project with the module firmware | Install the matching GSD; update the IM firmware Network dead after a connector replacement | Termination switch moved | Inspect the termination switches at both ends | Set termination ON at both ends only Intermittent drops in a humid area | Corroded contacts | Inspect the pins; measure the contact resistance | Replace the connectors Master BF flashing with an empty bus | Master address 0 or duplicate | Check the master address in HW Config | Correct the address and download the hardware configuration   A Systematic Diagnostic Procedure   The following sequence resolves the majority of DP faults in under an hour. 1. Record the LEDs: the master's BF and SF, and the power and bus LEDs of every slave on the suspect segment. 2. Establish the baseline: open STEP 7 online, read the bus diagnostics, and confirm the actual baud rate and station list. 3. Check the physical layer: both termination switches, the connector latches on both ends of the suspect segment, and the address switches. 4. Isolate by halves: with the bus powered down, disconnect the middle connector and terminate both halves. The healthy half starts, the faulty half does not. Repeat until the fault is contained in one cable section. 5. For intermittent faults, install FB 125 with OB 82, OB 86, and OB 122, and let the network run until the next event. The recorded event identifies the station; the timestamp identifies the machinery in operation. 6. Measure a suspect cable: continuity of A and B, no short between them, shield continuity, and insulation to ground. The loop resistance of type A cable is about 110 ohms per kilometer; a value well above this indicates a damaged conductor. 7. Document every change. A DP network fault is often the result of a previous undocumented change.   Preventive Maintenance Checklist   · Verify the termination switch positions at both ends of every segment quarterly, and record them. · Check the connector screws and cable clamps during scheduled outages; a loose clamp breaks the shield contact. · Inspect the cable route whenever new drives or power cables are installed, and enforce the 20 cm separation. · Read the bus diagnostics in STEP 7 during a scheduled stop and compare the station list with the address documentation. · Check the cabinet ground connections and the equipotential bonding between cabinets. · Keep a log of GSD versions and interface module firmware revisions, and record every hardware change. · Test spare connectors and spare interface modules on a bench network before they are needed. · Re-verify the bus parameters after any hardware configuration change; a re-download with a different baud rate changes the behavior of the entire network.   Spare-Part Strategy for a Discontinued Platform   Siemens ceased production of the S7-300 in October 2025 and has committed to supplying spare parts until approximately 2033. A decade of operation remains for most plants, and the components that fail first on a PROFIBUS network are mechanical: connectors, cables, and interface modules. The bus connector 6ES7 972-0BA52, the IM 153-1, and the CP 342-5 are the parts a maintenance store should hold, together with a spare segment of FC cable. Siemens PLC spares that cover the DP layer cost little compared with a production stop caused by a connector that cannot be replaced, and Siemens S7-300 parts remain available through the same channel. The rule is simple: the network that carries the last S7-300 in the plant must outlive the CPU it serves.   Frequently Asked Questions   Why does a DP slave drop offline randomly and return by itself? The fault class is intermittent, and the cause is almost always physical: a marginal termination, a shield contact that opens with vibration, a corroded pin, or EMC coupling from a drive that starts at the same time each day. Install FB 125 with OB 86 so every drop is recorded with a timestamp, then correlate the timestamps with the machinery in operation. A drop that always coincides with a specific drive starting is an EMC problem; one that correlates with nothing is usually a connector or termination problem. What does bus termination actually do? The terminating network at each end of a segment performs two functions. The 220 ohm resistor between A and B, in parallel with the two 390 ohm resistors, matches the cable's characteristic impedance so the signal is absorbed at the end instead of reflected back into the bus. The 390 ohm bias resistors hold the idle state at a defined level: B at least 200 mV positive with respect to A. Both ends must be terminated, and the termination must be powered. Can I mix baud rates on one network? No. The master defines one baud rate for the entire network, and every slave must support it. Slaves detect the rate automatically, but a slave whose GSD does not list the configured rate never enters data exchange. Two different baud rates require two separate DP networks or two masters. How long can a segment be? Up to 1200 m at 9.6 to 93.75 kbps, 1000 m at 187.5 kbps, 400 m at 500 kbps, 200 m at 1.5 Mbps, and 100 m at 3 to 12 Mbps, assuming type A cable and correct termination. With up to nine repeaters in series, ten segments can be connected, and the total cable length is the sum of the segment lengths. Do I need a repeater? You need one when a segment exceeds 32 stations, when the cable length exceeds the limit for the baud rate, or when two cabinets have different ground potentials. The repeater 6ES7 972-0AA01 regenerates the signal, provides galvanic isolation, and terminates both of its ports. Up to nine repeaters may be connected in series. The master reports a station failure, but the slave's power LED is on. Where do I start? The slave is powered but not participating. Check the address switches (a duplicate address or an address of 0 takes a station off the bus), the termination at both ends of the segment, and the cable between the master and the slave. Then read the slave's diagnostics with SFC 13 or from the STEP 7 online view; station status 1 distinguishes a station that is not present from one that reports a configuration fault. Can I replace an IM 153-1 with a newer revision without changing the project? Usually, yes, provided the GSD in the project supports the features of the new firmware. Compare the GSD version with the module's firmware revision, install the matching GSD if necessary, and verify in the online diagnostics that the slave accepts the configuration. The module order in the rack must still match the project. URL Slug: siemens-s7-300-profibus-dp-troubleshooting
  • Emerson PACSystems RX3i: Troubleshooting Common Field Issues
    Emerson PACSystems RX3i: Troubleshooting Common Field Issues Jul 21, 2026
      Emerson acquired GE's automation business in 2019. The PACSystems RX3i — originally GE Fanuc — is still widely deployed in power generation, water treatment, and manufacturing. You maintain racks with IC695CPE302, IC695CPE305, or IC695CPU315 CPUs, and when one faults you need a fast, repeatable diagnosis.   What You Need   · PAC Machine Edition (PME) version 9.5 or newer — diagnostics, logic monitoring, firmware management · Serial cable for CPU port 2 (RS-232) connection · Ethernet cable for IC695ETM001 or embedded Ethernet port · Multimeter for voltage checks · Spare power supplies — IC695PSA040 (AC) or IC695PSD040 (DC) · Firmware files from Emerson Support · Backup of current logic — export a .PGD file from PME Serial connection: 57600 baud, 8 data bits, no parity, 1 stop bit. CPU Error LED Patterns The RX3i CPU has OK, RUN, and FAIL LEDs. The OK LED gives the fastest diagnostic read. OK LED Solid Green — Normal. CPU passed POST, firmware loaded, logic running. A fault elsewhere in the system (I/O, network) won't change this LED. OK LED Flashing Green (1/sec) — Boot mode. Normal right after power-up. If it persists past 60 seconds, firmware may be corrupted or the bootloader cannot find a valid image. See firmware recovery below. OK LED Flashing Red (1/sec) — Recoverable hardware fault. Memory parity, watchdog timeout, or backplane communication failure that the system can try to recover from. Connect PME and read the fault log. OK LED Solid Red — Non-recoverable hardware fault. Corrupted flash, failed CPU core, or catastrophic power fault. Power cycle once. If solid red returns within 30 seconds, replace the CPU. FAIL LED Lit — CPU stopped executing logic. Corrupted program, hardware fault, or configuration error. Cross-check with the OK LED pattern, then read the fault table in PME.   Using PAC Machine Edition to Diagnose Faults   PME is the only supported diagnostic tool for RX3i. Logic Developer PLC will not work with current firmware. Step 1: Connect. Open PME and open the matching project. Right-click the controller in the Navigator pane and select Connect. Choose Ethernet (enter the IP address) or Serial (Port 2, 57600 baud). Step 2: Read the fault table. Expand the controller node and double-click Fault Table. The table shows fault code (four-digit hex), description, timestamp, and occurrence count. Step 3: Decode common fault codes. Fault Code | Description | Likely Cause 0x0001 | CPU watchdog timeout | Logic scan exceeds watchdog limit; check for infinite loops 0x0002 | Memory parity error | Faulty CPU RAM; power cycle, then replace module 0x0004 | Stack overflow | Too many nested subroutines or FOR/NEXT loops 0x0010 | Configuration mismatch | Hardware config does not match physical rack layout 0x0020 | Firmware checksum failure | Corrupted firmware; reload via boot mode 0x0040 | Backplane communication error | Loose module or faulty backplane; reseat all modules 0x0100 | Power supply fault | Voltage out of tolerance; measure backplane +5V and +3.3V Step 4: Clear faults. Right-click in the Fault Table and select Clear All Faults. If the same code reappears within minutes, the root cause is still active.   Power Supply Issues: IC695PSA040 and IC695PSD040   The IC695PSA040 (120/240 VAC input, 40W output) and IC695PSD040 (24 VDC input, 40W output) supply +5VDC and +3.3VDC to the backplane.   No Output, No LEDs   No lights on the supply. AC version: check for 85-264 VAC at the terminal block. DC version: check for 18-36 VDC. If input is present and the supply shows no life, the internal fuse opened or the primary switching circuit failed. Replace the supply — neither has a user-replaceable fuse.   Random System Resets   The machine runs for hours or days, then spontaneously resets. Measure backplane voltage at the supply test points: TB1 (+5VDC), TB2 (+3.3VDC), TB3 (common). Acceptable: +5VDC between 4.85V and 5.15V. +3.3VDC between 3.20V and 3.40V. Ripple over 50mV peak-to-peak means failing output capacitors. Swap the supply.   Over-Temperature Shutdown   Both supplies derate above 60°C ambient. The OK LED flashes amber before shutdown. Improve enclosure airflow. If ambient regularly exceeds 55°C, add forced-air cooling or relocate the rack.   Ethernet Module Troubleshooting: IC695ETM001   The IC695ETM001 is the most common communication module in RX3i racks and the second most frequent failure point after power supplies.   No Link Light   RJ-45 port has Link/Activity (green) and Speed (amber) LEDs. No green LED means the physical layer is down. Try a known-good cable. Verify the switch port is not disabled, VLAN-mismatched, or port-security locked. Confirm the module is fully seated in the backplane.   Intermittent Communication   Controller drops off the network for 30-60 seconds at random. Disconnect the Ethernet cable. If the fault table logs 0x0040 while disconnected, the problem is on the network side. Assign a static IP — DHCP lease renewal during production causes disconnects. Check the switch for excessive broadcast traffic.   Module Not Found After Replacement   PME reports "Module Not Found." Open hardware configuration and verify the slot number. Check the module firmware revision — IC695ETM001 must be version 5.0 or newer to work with PME 9.5 projects. Remove the module and inspect backplane connector pins for damage.   Backplane and Rack Issues   The RX3i backplane is passive, but mechanical failures happen. Module not recognized — A module works in one rack but not another. Bent pin on the backplane connector or cracked solder joint. Inspect pin rows with a bright light. A single bent pin can be straightened with fine tweezers. A cracked backplane needs replacement. Intermittent faults across multiple slots — Fault code 0x0040 appearing on several unrelated modules. Measure backplane voltage at the far end of the rack. If voltage drop exceeds 100mV compared to the supply end, the backplane has a resistive fault from corroded contacts. Clean connectors with isopropyl alcohol and reseat every module. If voltage drop persists, replace the backplane.   Firmware Corruption Recovery   Firmware is stored in flash memory. Corruption happens during a power loss during a firmware update or after thousands of flash write cycles. Step 1: Force boot mode. Remove power. Set the CPU mode switch to STOP. Hold the RESET button on the CPU faceplate. Apply power and hold RESET for 10 seconds. The OK LED flashes green once per second — the CPU is in boot mode. Step 2: Connect via serial. Connect serial cable to Port 2. Open a terminal at 57600 baud. The bootloader prompt appears: RX3i Boot > Step 3: Load new firmware. In PME, select Tools > Firmware > Update Firmware via Serial. Browse to the .BIN file for your CPU: CPE302_Vxx.BIN, CPE305_Vxx.BIN, or CPU315_Vxx.BIN. Start the transfer. Do not interrupt power — the process takes 15-30 minutes. Step 4: Verify. Power cycle the rack. The OK LED should transition from flashing green to solid green within 60 seconds. Open PME and check the firmware version. If the bootloader does not respond, the CPU's bootloader is corrupted. Return the module to Emerson for service or replace it.   Where to Source Spare Modules   Emerson has shifted focus to PACSystems RXi and newer edge platforms. RX3i modules are not discontinued across the board, but production volumes have dropped. Lead times on some items run 12-16 weeks. The IC695CPE302 and IC695CPE305 are particularly affected. New old-stock — Distributors still holding RX3i inventory. Look for IC695PSA040, IC695ETM001, and IC693MDL340 (24VDC 16-point discrete output) from surplus dealers. NOS modules carry UL and CE certifications. Reconditioned units — Professionally tested and warranted at 40-60% of list price. IC695CPU315 and IC695ETM001 units are commonly available through reconditioners. Third-party repair — IC695PSA040 supplies and IC695ETM001 Ethernet modules can be repaired at the component level. Typical turnaround is 5-10 business days. RSTi-EP migration — Some RX3i applications can move to the RSTi-EP distributed I/O platform. Requires a newer CPU and different I/O modules, but RSTi-EP stock is more available in 2026. Keep one IC695PSA040, one IC695PSD040, and one IC695ETM001 on the shelf per every five racks. IC695CPE302 and IC695CPU315 are harder to find — order when you see a good used or NOS unit. Browse our full selection of industrial automation spare parts and PLC modules for Emerson, GE, and other brands. We stock IC693MDL340 and IC695-series modules for same-day shipping on many items. ------------------------------------------------------------------------------------------------------------------- 🏢 About TZ Tech   TZ Tech is a leading supplier of industrial automation, electrical, instrumentation, and telecommunications components. We specialize in sourcing ready-to-ship distributor stock, allowing us to offer highly competitive pricing and short lead times. Thanks to our extensive inventory, we can even source rare and discontinued parts that are hard to find elsewhere.   🛡️ Our Quality Commitment   We understand that quality is your top priority. Every component undergoes a strict screening and inspection process so you can buy with absolute confidence. For legacy or discontinued parts, we believe in complete transparency and will always provide an honest, accurate report on the product's condition. Plus, all brand-new parts come backed by a full 1-year warranty.   ✉️ Get in Touch     Have a project or a part you need? Send us your inquiry today! Our team is dedicated to providing a fast response within 6 hours (excluding weekends).
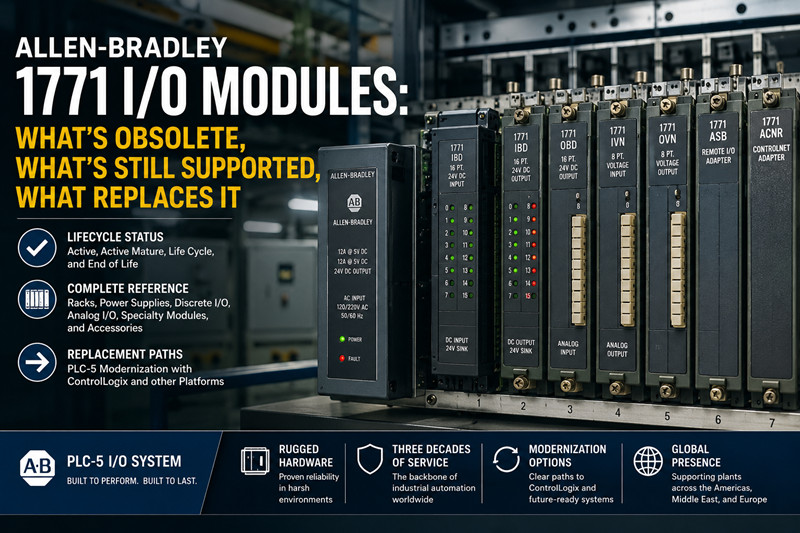
1 2 3 4 5
A total of5pages
Subscribe

Please read on, stay posted, subscribe, and we welcome you to tell us what you think.

submit
Copyright 2026 @ TZ TECH Co., LTD. .All Rights Reserved Disclaimer: We are not an authorized distributor or distributor of the product manufacturer of this website, The product may have older date codes or be an older series than that available direct from the factory or authorized dealers. Because our company is not an authorized distributor of this product, the Original Manufacturer’s warranty does not apply.While many DCS PLC products will have firmware already installed, Our company makes no representation as to whether a DSC PLC product will or will not have firmware and, if it does have firmware, whether the firmware is the revision level that you need for your application. Our company also makes no representations as to your ability or right to download or otherwise obtain firmware for the product from our company, its distributors, or any other source. Our company also makes no representations as to your right to install any such firmware on the product. Our company will not obtain or supply firmware on your behalf. It is your obligation to comply with the terms of any End-User License Agreement or similar document related to obtaining or installing firmware.

Sitemap | Blog | XML | Privacy Policy

leave a message

leave a message
If you are interested in our products and want to know more details,please leave a message here,we will reply you as soon as we can.
submit

Home

Products

whatsApp

contact

YOUR COOKIE SETTINGS

In addition, with your permission, we want to place cookies to make your visit anointeraction with slOC more personal. For this we use analytical and advertisingcookies. With these cookies we and third parties can track and collect yourinternet behawior inside and outside super-instrument.com. With this we and third parties adapt super-instrument.com and advertisementsto your interest. By clicking Accept you agree to this. If you decline, we only usethe necessary cookies and you unfortunately will not receive any personalizedcontent. Please visit our Cookie policy for more information or to change yourconsent in the future.

Accept and continue Decline cookies